Squaring the Laser Head MIRA
Overview
What you will learn
In this guide, you will learn how to square the laser head on your MIRA.
When to do this
You should check and see if your laser head is square if you recently experienced a crash, or if you notice the edges of your cuts coming out at a steep angle.
What you need
- 2.5 mm Allen Key
- Cloth or Rag
- Small 90° Carpenter's Square (4” is recommended)
Squaring Procedure
- With the machine ON; remove any materials from the bed, as well as the honeycomb tray, and set aside.
- Use the arrow keys to jog the laser head to approximately the center of the bed. It doesn’t need to be exact, just close. Place a cloth or rag under the laser head to catch any bolts that may fall.
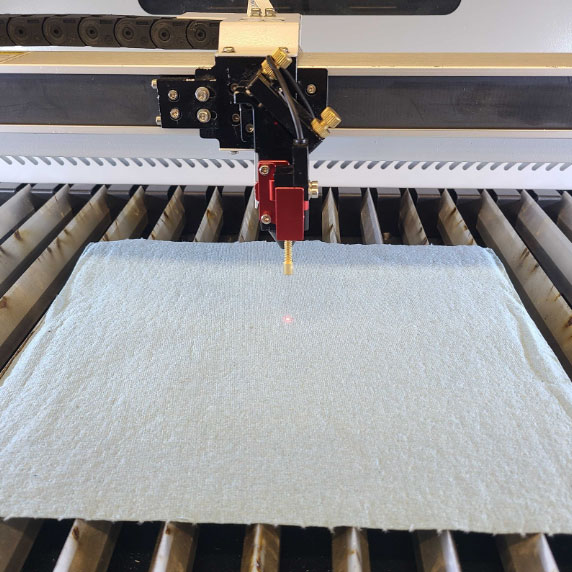
- Use a 2.5 mm Allen key to remove the 2 bolts mounting the auto focus assembly to the laser head. Set the mounting bolts aside.
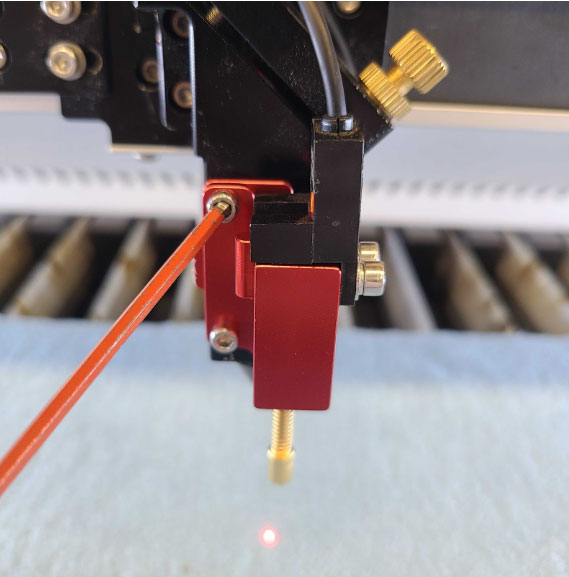
- Rest the auto focus assembly out of the way, on top of the gantry.
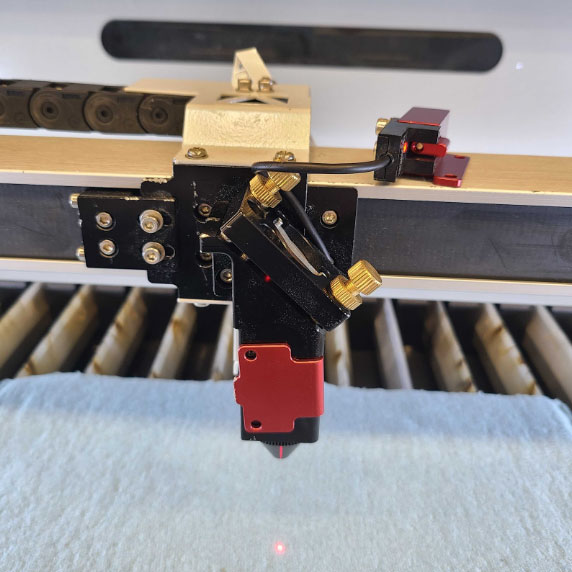
CAUTION: Be EXTREMELY CAREFUL if you need to move the laser head or gantry after this point. The auto focus assembly can get damaged.
- Slide out the lens holder cartridge and set aside.
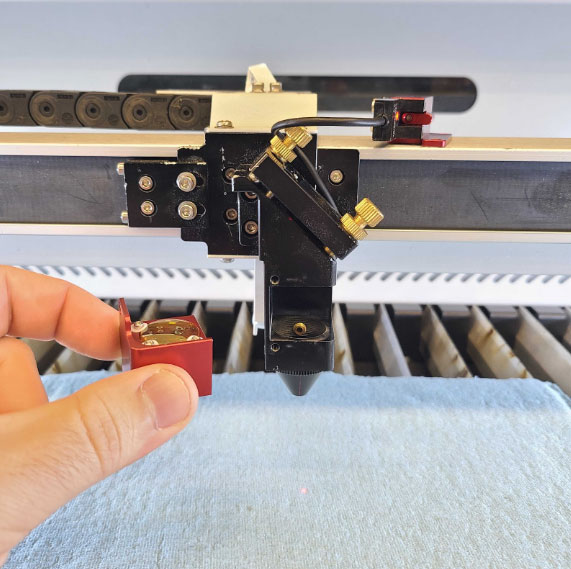
- Press the “Z/U” button on the keypad and verify the “Z Move” option is highlighted. Press and hold the LEFT or RIGHT arrow keys to adjust the bed until the 90° square sits flat on AT LEAST 2 of the blades, and can be comfortably positioned on the left side of the laser head.
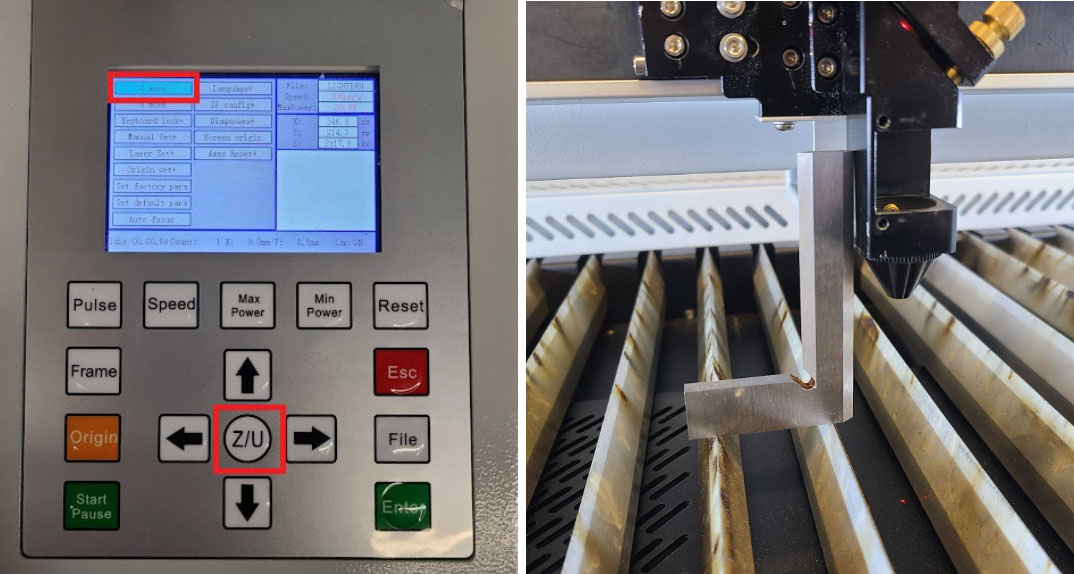
NOTE: If you do not have a square that is small enough to fit in the space, the acrylic pie wheel that came with the machine can work in a pinch. It is recommended this process be done with a true square however.
- There is a small notch on the side of the laser head that the top of the square MUST be under to accurately find what position is square, pictured below. Move the bed until the top of the square is about .5 mm from the underside of the notch.
CAUTION: Never try to raise the table with the square beneath the laser head. The square should always be removed when adjusting the bed.
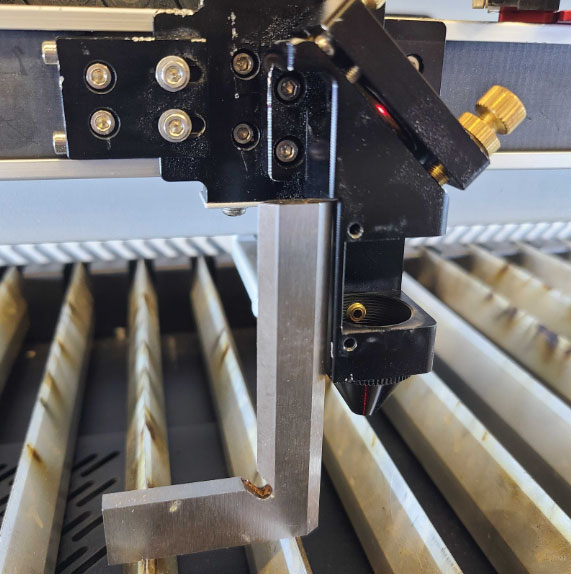
- Push the square into the left side of the laser head and down onto the blades to ensure they are sitting as flush as possible. Bend down and look at the front of the laser head at eye level. Look for a (usually small) gap between the square and the laser head.
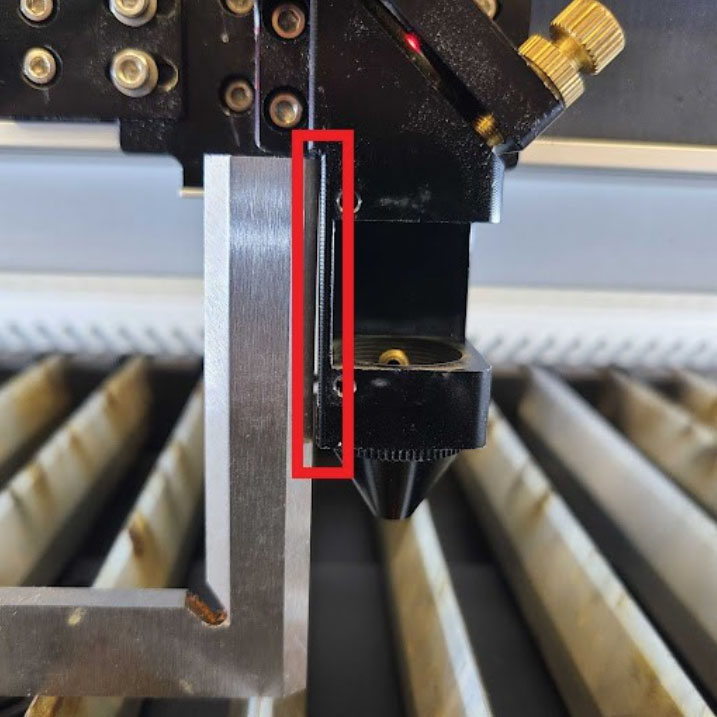
- If there is a gap, you will need to carefully adjust the laser head. Use a 2.5 mm Allen key to loosen both of the laser head mounting bolts ½ of a turn.
- If the gap is larger toward the bottom of the laser head, tilt the laser head right with your hand. If you are unable to tilt the head, loosen the bolts another ½ turn with the Allen key, and repeat.
- If the gap is larger toward the top of the laser head, tilt the laser head left with your hand. If you are unable to tilt the head, loosen the bolts another ½ turn with the Allen key, and repeat.
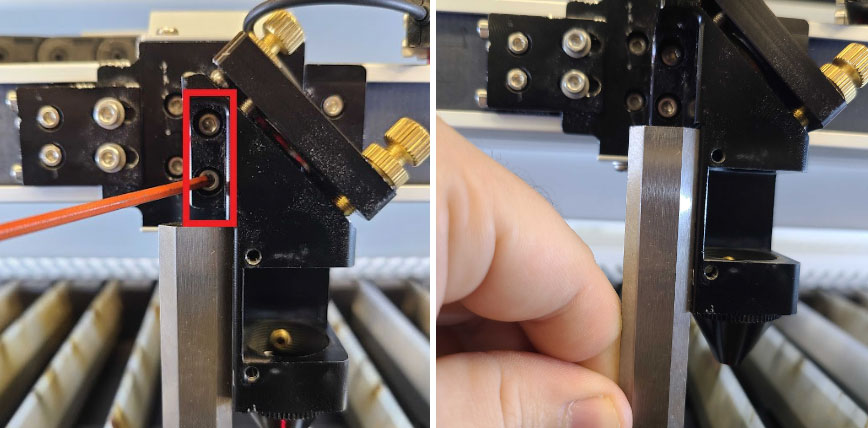
- Once you can confirm the laser head is as square as possible, tighten the bottom bolt slowly with the Allen key. Check it is squareness one last time, as there is often some slight movement on the laser head when tightening the mounting bolts. Readjust the square as needed until the square sits flush to the side of the laser head.
- Once square, reinstall the lens housing and auto focus assembly to the laser head.
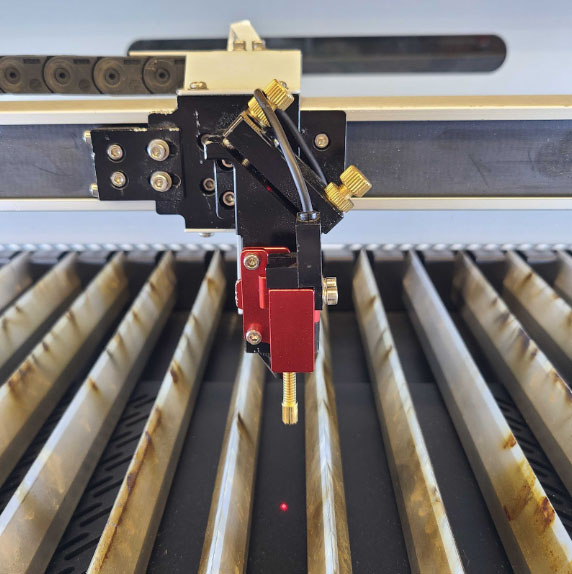
- Perform a quick 5 point test to verify the beam path is still exiting the nozzle cleanly after squaring, and realign the machine as needed. See our AEON Laser Knowledge Base article on the 5 point test for detailed instruction.
If you have any questions or concerns, please send us an email at support@aeonlaser.us for the fastest service. If your laser is malfunctioning, please submit a support ticket.
Did you find this document helpful? Let us know what you liked or what we can improve on by sending an email to helpusgrow@aeonlaser.us.
Happy Lasering!


