-

Getting Started 16
-

Maintenance 14
-

Troubleshooting 14
-

Repair 8
-

Laser 101 3
-

Materials 10
-

Accessories 20
-

Multi-Roller 7
-

LightBurn 9
Install a 1.5" Lens MIRA


Overview
What you will learn
In this article, you will learn how to install a 1.5” lens into your MIRA.
When to do this
A 1.5” lens is designed to provide higher detail when engraving, at the cost of a loss of cutting output. This is achieved from the smaller focal distance, which provides for a finer point of focus and dot size from the laser. A 1.5” lens is good for engraving jobs that require fine detail, such as a fine script font or photorealistic engraving.
What you need
- 1 x Size 2.5mm Allen key
- 1 x Size 1.5mm Allen key
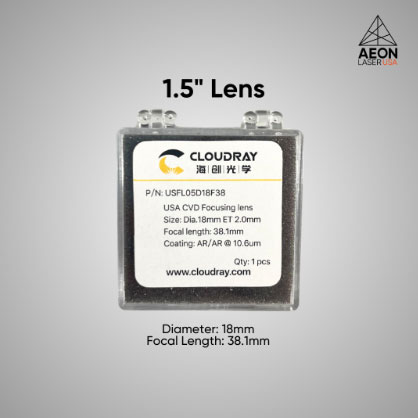
- 1 x 1.5” (38.1mm) Lens
- Cloth (to catch any screws)
Need assistance?
Book time with a qualified technician and get help with Swapping Lenses.
Video
Steps
- Use a size 2.5mm Allen key to remove the lens housing from the laser head.

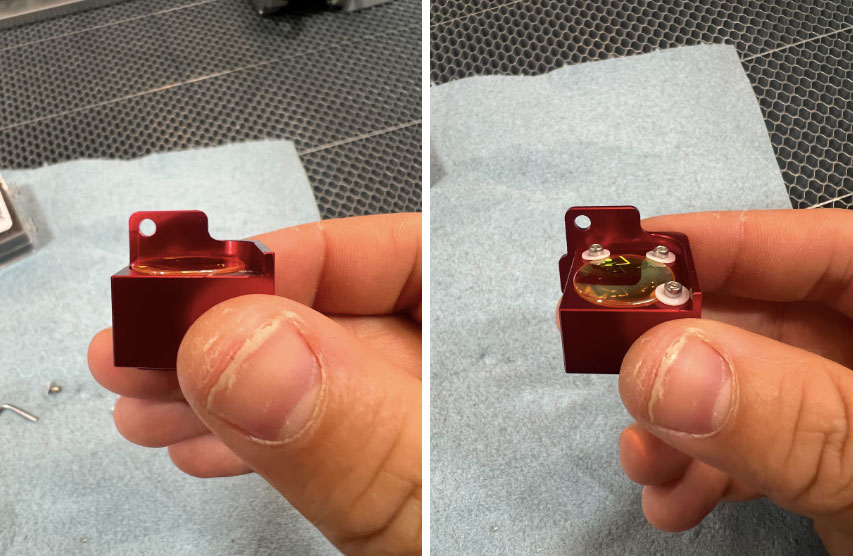
2.5mm Allen key removing the lens housing - Carefully use a 1.5mm Allen key to remove the screws/washers holding the 2” lens in the housing and set them aside. Remove the old lens and put it aside in a safe place where it will not get dirty or scratched.
NOTE: Put something down on your work area to catch the screws or lens in case they get dropped. A microfiber cloth works great and is safe for the lens to be rested on.

Lens on microfiber cloth - Fit the 1.5” lens convex side facing upwards (dome side facing up) into the BOTTOM of the housing and secure it with the same screws/washers that were removed in the previous step. A common method is to flip the housing upside down when screwing in the lens, as to avoid potentially dropping the lens and mounting hardware.
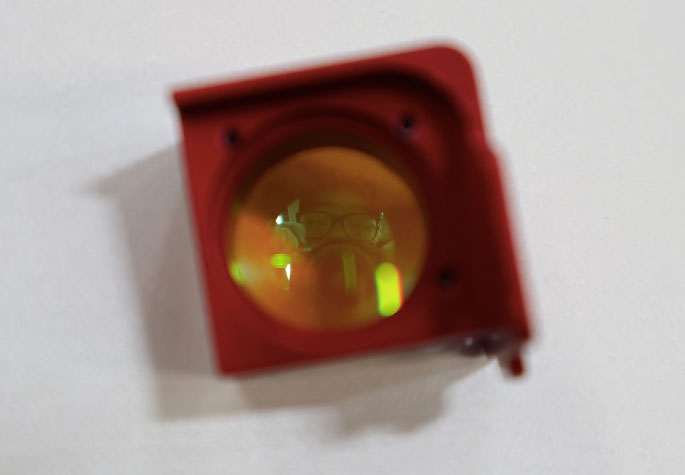
Lens in lens housing NOTE: An easy way to check if the lens was installed in the proper direction is by looking at your reflection. When viewing the lens from the top down, which would be through the housing for a MIRA 1.5” lens, your reflection should be right side up. It will be like looking in a tiny mirror.
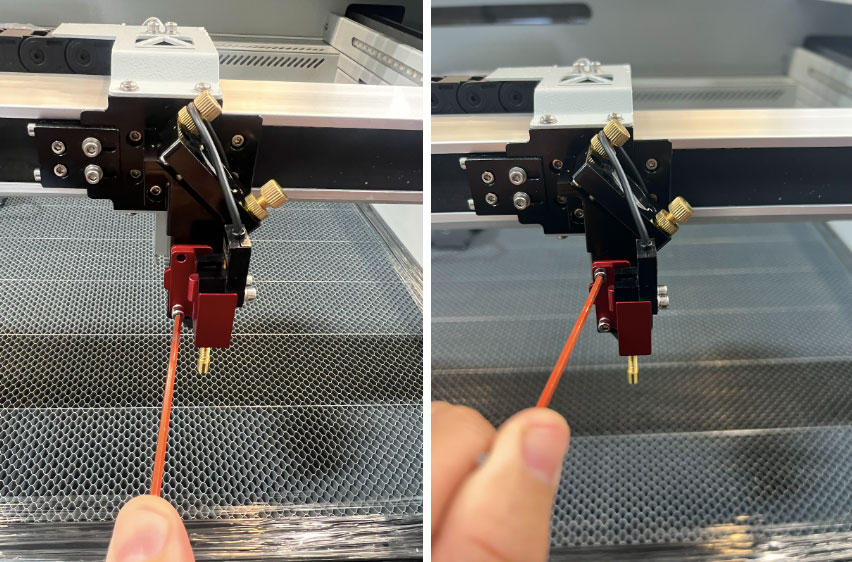
View of lens from the top - Reinstall the lens housing back into the laser head. Ensure the housing is sitting flush before fully torquing the mounting bolts.
2.5mm Allen key tightening the lens housing - You're done, try running a test file!
If you have any questions or concerns, please send us an email at support@aeonlaser.us for the fastest service. If your laser is malfunctioning, please submit a support ticket


