-

Getting Started 16
-

Maintenance 14
-

Troubleshooting 14
-

Repair 8
-

Laser 101 3
-

Materials 10
-

Accessories 20
-

Multi-Roller 7
-

LightBurn 9
Cleaning Laser Head and Optics MIRA


Overview
What you will learn
You will learn to clean your Autofocus Sensor, Lens, Nose Cone, Mirrors and Camera.
Why do this?
Having a clean lens and set of mirrors is the key to maintaining maximum beam transmission.
When to do this?
The maintenance and cleaning schedule will vary depending on frequency of use and materials you are working with. Some materials produce more smoke and dust than others, and may increase the frequency of cleaning.
What you need:
- Camera Dust Blower
- Lens Brush
- Q-Tips
- 90% Isopropyl Alcohol
- Microfiber Lens Cloth
- 1” Blue Painters Tape
- Allen Key Set
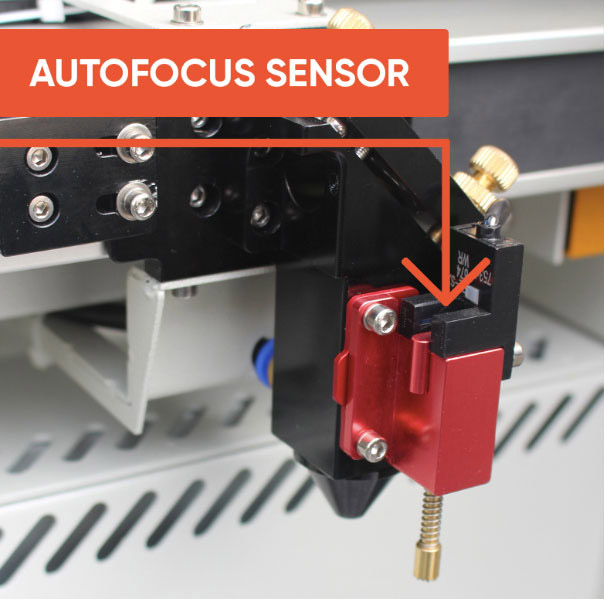
Autofocus Sensor
Frequency
Monthly / As Needed
To Clean
- Using the Camera Air Dust Blower, blow air into the autofocus sensor to clear away any debris.
- Use a Q-Tip soaked in 90% Isopropyl Alcohol to carefully clean the autofocus sensor.
NOTE: Each time you clean the autofocus sensor, take the time to ensure the autofocus pin and the nose cone are both screwed in tight.
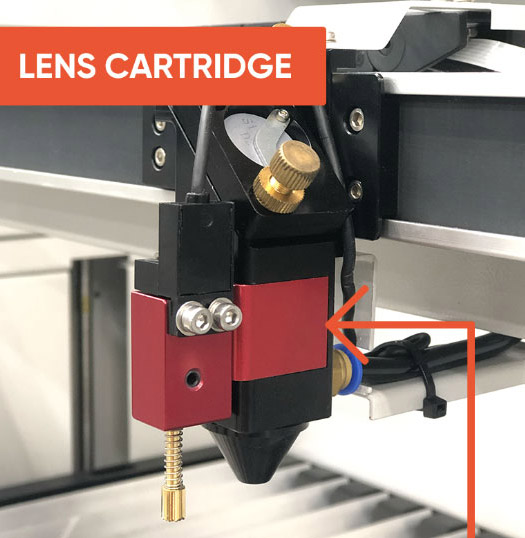
Lens
Frequency
Clean as needed. With frequent use, this should be done at a minimum of once a week.
To Access
- Place a piece something flat under the laser head on the honeycomb or blades. This will protect the screws from falling into the machine.

piece of wood under laser head - Using your 2.5mm Allen key, remove the two M3 Allen bolts and lock washers holding the autofocus pin and lens cartridge holder to the laser head.
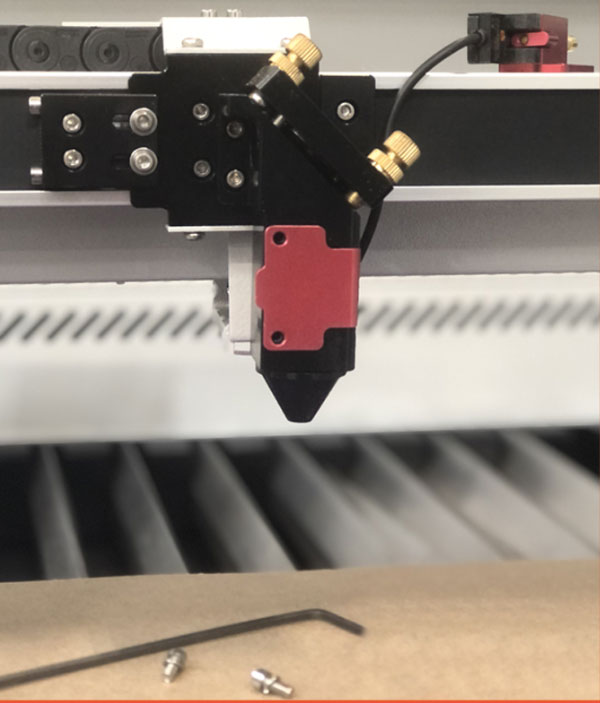
2.5mm Allen key and two M3 Allen bolts on top of wood - Carefully place the autofocus sensor on the gantry to keep it safely out of the way, and slide out the lens holder cartridge.
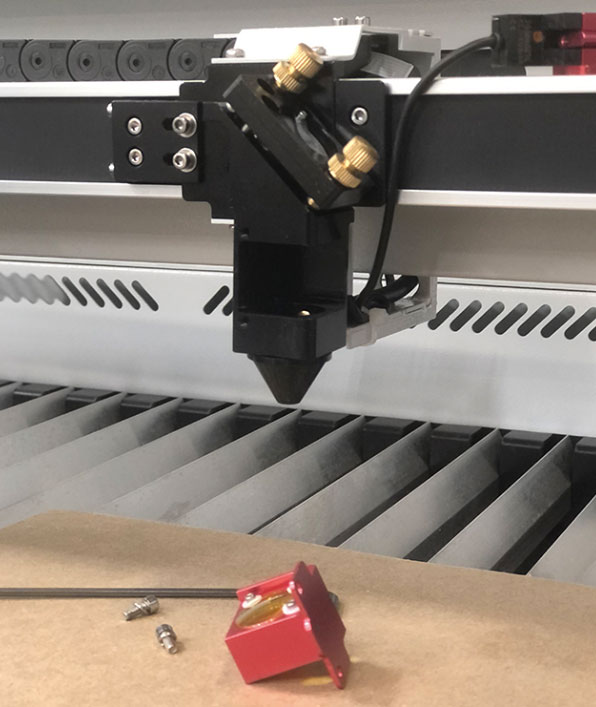
autofocus sensor gantry, lens holder cartridge on wood -
Lens Holder Cartridge
To Clean
- Using the Camera Air Dust Blower, blow on the lens first before cleaning to remove any debris.
- Dust the lens with a lens brush to remove any debris.
- To clean, wipe with a lens cleaner in a sweeping motion from left to right.
Replace the lens if you see that there are scratches, chips, or discoloration.
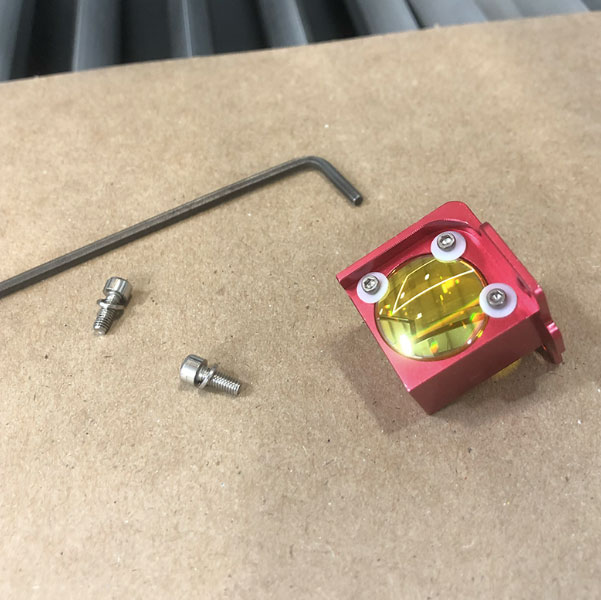
To Replace
Replace the lens if they are foggy or cracked
- Using your 1.5mm Allen key, remove the two Allen bolts and plastic washers holding the lens in the lens cartridge.
- Remove the lens and set aside.
- Replace with a new lens, careful to not leave fingerprints.
- Replace the 2 Allen bolts and plastic washers, be careful not to over-tighten.
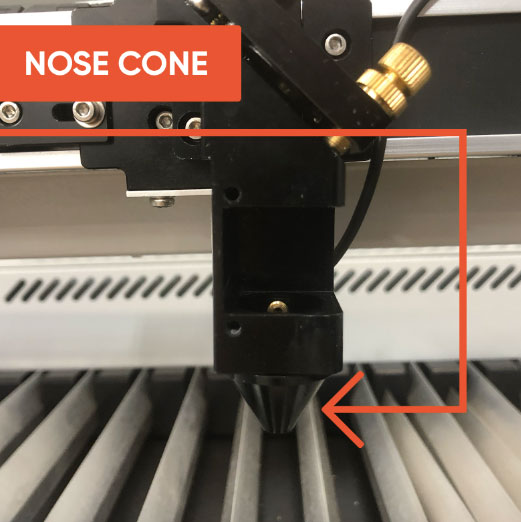
Nose Cone
Frequency
Weekly / As Needed
To Clean
- Use a cloth and Isopropyl alcohol to clean the nose cone exterior.
- Ensure it is tightly screwed on
- If you are not getting a clean, circular red dot, you may need to remove the nose cone by unscrewing it and cleaning out the inside with alcohol and a lint-free cloth.
Mirror 3

Frequency
As Needed. Clean Mirror 3 whenever you clean the lens.
To Access
- Using your 1.5mm Allen key, remove the two M1.65 Allen bolts holding the mirror in place.
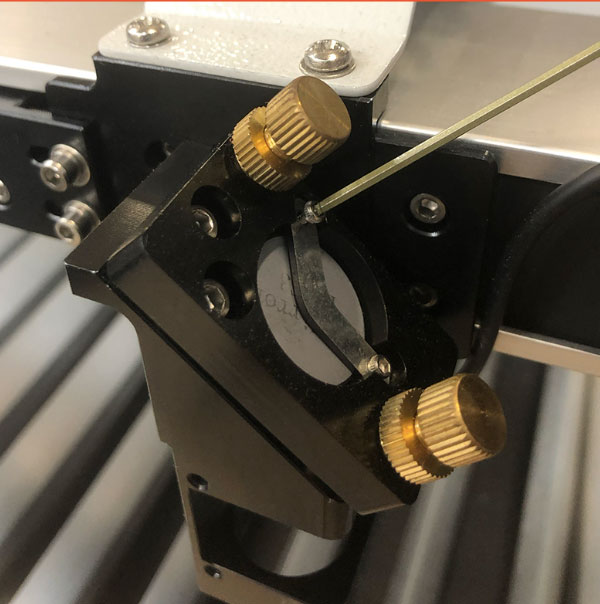
Removing the two M1.65 Allen bolts - Using a piece of painter's tape, remove the Mirror 3 boomerang that holds Mirror 3 in place.
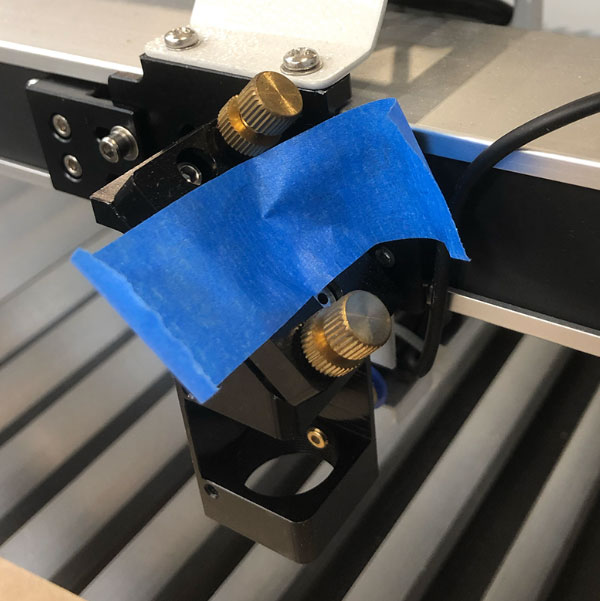
Painter's tape on Mirror 3 boomerang - Using a new piece of painter's tape, remove Mirror 3.
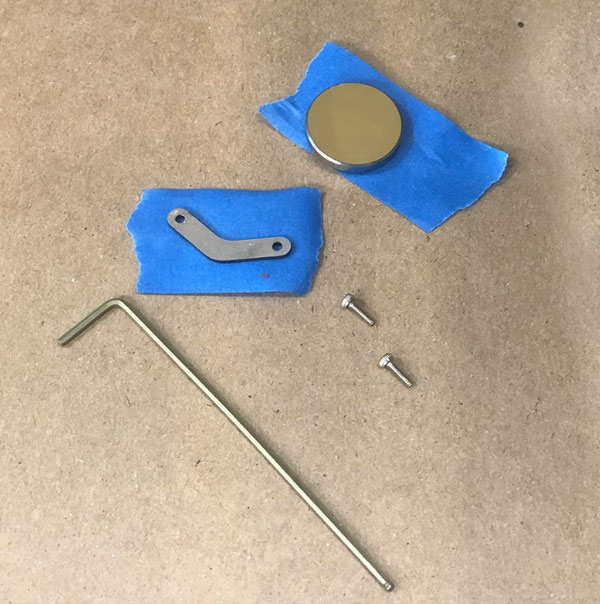
Mirror 3 boomerang and Mirror 3 on top of Painter's tape
To Clean
- Using the Camera Air Dust Blower, blow on the lens first before cleaning to remove any debris.
- Dust the lens with a lens brush to remove any debris.
- To clean, wipe with a lens cleaner in a sweeping motion from left to right.
To Replace
Replace the mirror if there are any scratches, chips, or discoloration.
- Using the painter's tape holding Mirror 3, gently replace it on the laser head and carefully remove the tape.
- Replace the boomerang over Mirror 3.
- Gently screw in the M1.65 Allen bolts.
⚠️CAUTION⚠️ DO NOT over-tighten, that can cause the mirror to crack.
- Replace the Nose Cone by carefully screwing it back into place.
- Replace the Lens Cartridge.
- Replace the Focus Pin, ensure the wire is out of the way by loosely wrapping it around the Mirror 3 focus knobs.
- Screw the M3 bolts back into place.
Mirror 2
Frequency
As Needed. Do a visual inspection when you clean Mirror 3, clean if dirty.
To Clean
- Leave mirror 2 in place. With your air blower, puff air on to the mirror and lightly dust with a lens brush before cleaning to remove debris.
- To clean, wipe with a lens cleaner in a sweeping motion from left to right.
- Be careful not to push too hard as you clean, so you do not need to realign the mirrors.
To Replace
Replace the mirror if there are any scratches, chips, or discoloration.
You should not need to replace Mirror 2. Should you require this, put in a support ticket first.
Mirror 1
You should not need to replace Mirror 1. Should you require this, put in a support ticket first.
Camera
Frequency
As Needed.
To Clean
- Blow air on the camera lens using the Camera Air Dust Blower to clear away any debris.
- Use a Q-Tip soaked in 90% Isopropyl Alcohol to carefully clean the camera lens.


