LightBurn Setup Using LightBurn License - After Your Machine Arrives (Mac)
Overview
Setting Up Lightburn Using Your Personal Activation Key After Your Machine Arrives (Installation Process and Loading Device Profiles)
What you will learn
In this article you will learn how to install Lightburn and how to connect to your machine.
Why do this
Lightburn is a layout, editing, and control software for your laser. Lightburn talks directly to your laser without the use of additional software. The device profiles created here at the factory controls how Lightburn connects and communicates with the machine, as well as other misc. settings necessary for proper use and operation.
What you need
- Computer with macOS and WiFi connection capability
- Internet Connection
- Lightburn License Key
- USB Thumb Drive (attached to the machine ignition keys)
- USB Cable
Need assistance?
Book time with a qualified technician and get help setting up and navigating LightBurn.
Software and Driver Installation
- Go to: https://lightburnsoftware.com/pages/trial-version-try-before-you-buy
- Download LightBurn to your computer. LightBurn will run on MacOS 10.11 or later.
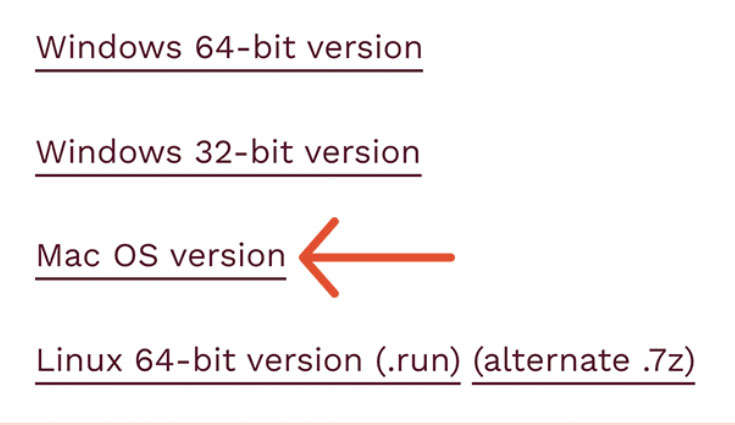
Choose Mac OSX Version - Double-click the LightBurn.dmg file to mount the disk image.
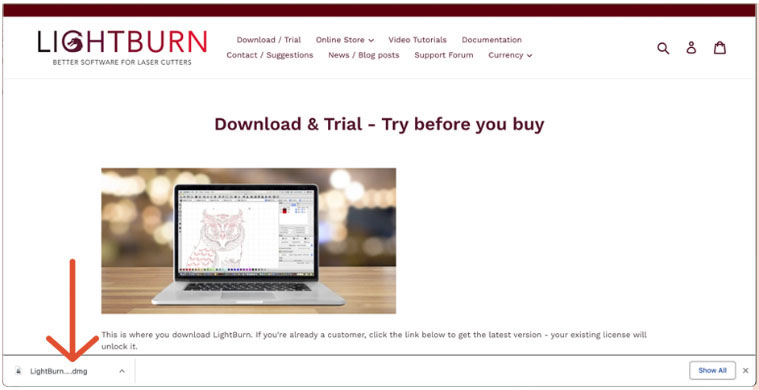
LightBurn.dmg file - Drag the LightBurn application into your applications folder, and then double-click on the LightBurn icon to begin.
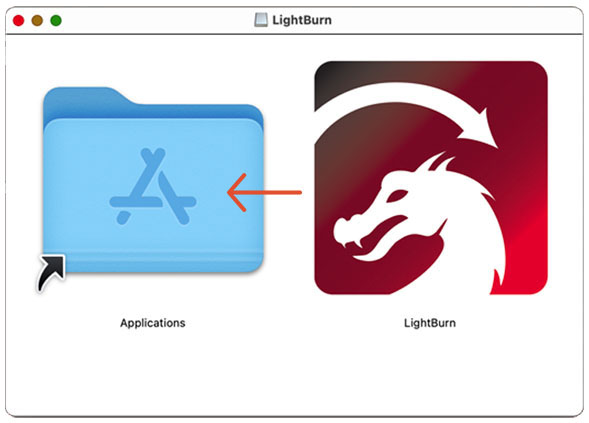
LightBurn app icon 📌 Note: If LightBurn will not open because it cannot be verified, perform the following:
Click Cancel.
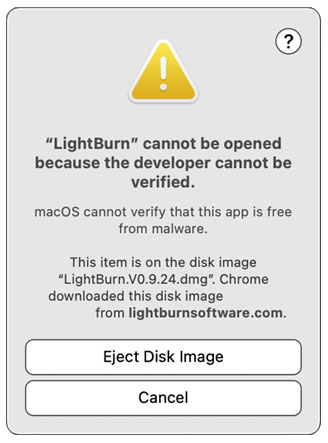
LightBurn cannot be opened warning Click on the Apple Logo. Then click on System Preferences.
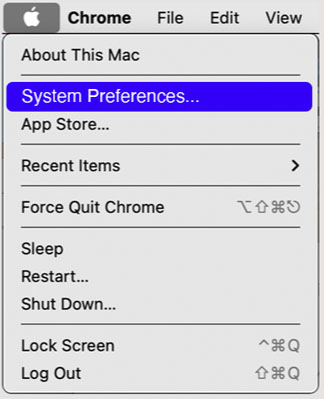
Apple logo > System Preferences Click Security & Privacy.
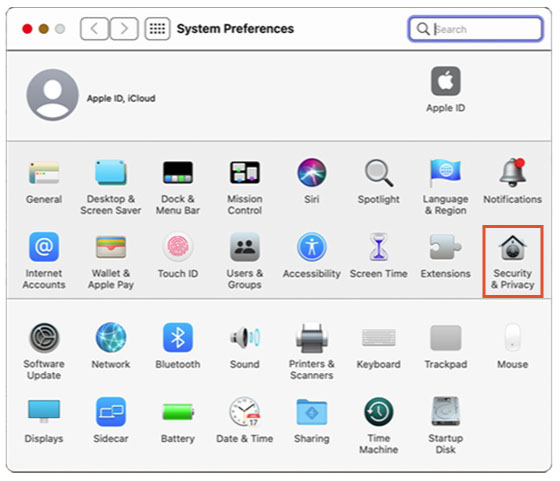
Security & Privacy icon Click Open Anyway.
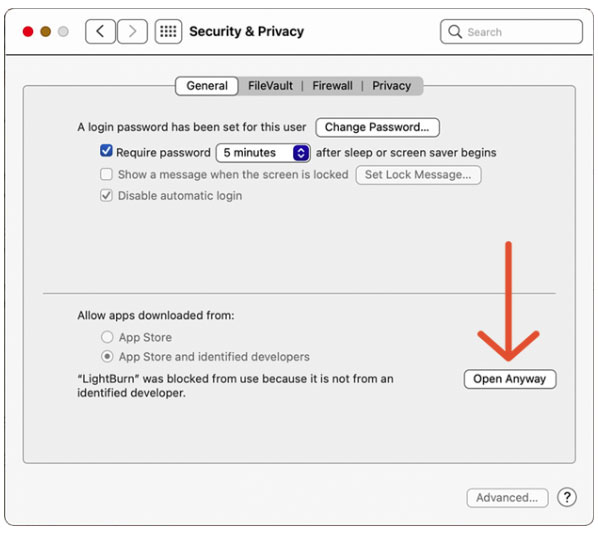
Click Open Anyway Click Open
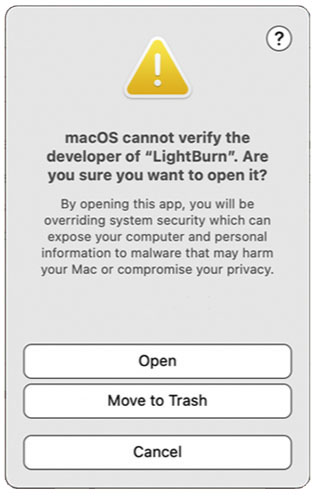
Click Open - Copy and paste your Lightburn License Key, which can be found in your “Getting Started” email. Then click the Activate License button, and click OK.
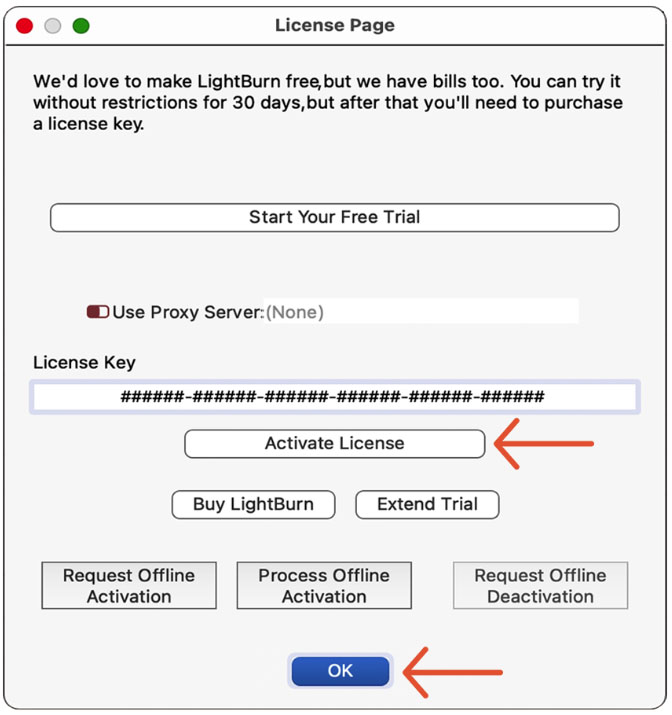
License Page window
Connecting via USB
- Plug the USB thumb drive that came with your laser into an open USB port on your computer.
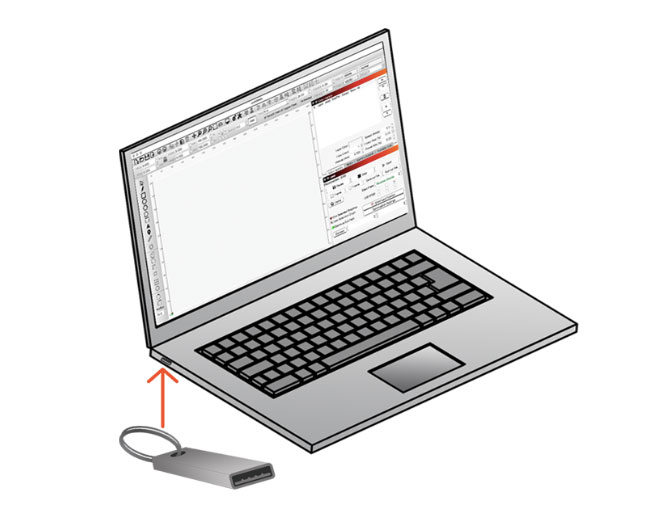
USB Drive - Power the machine on and allow it to fully reset.
- If the Devices Window does not popup, click on Devices in the Laser Window.
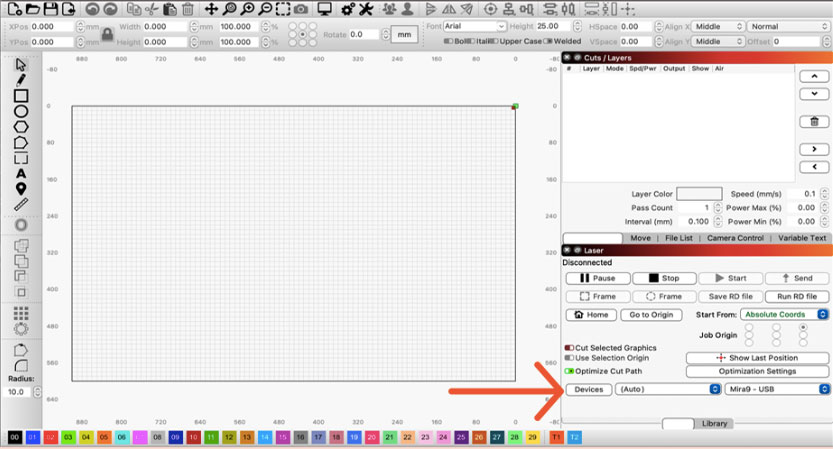
Laser Window - In the Devices Window, click the Import button.
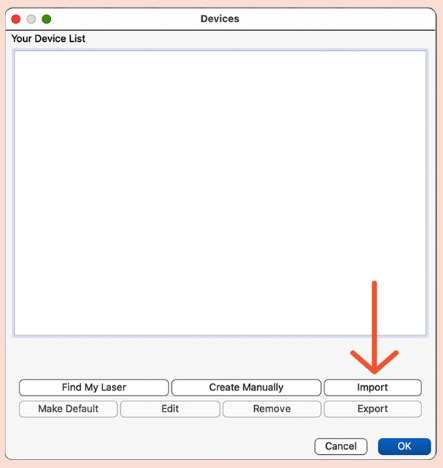
Devices Window - Navigate to the machine USB (DISK_IMG drive).
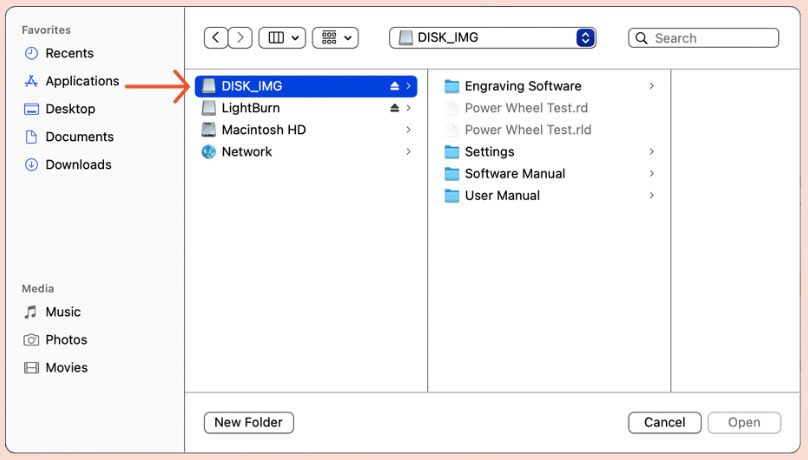
DISK_IMG drive - Click on the Settings folder.
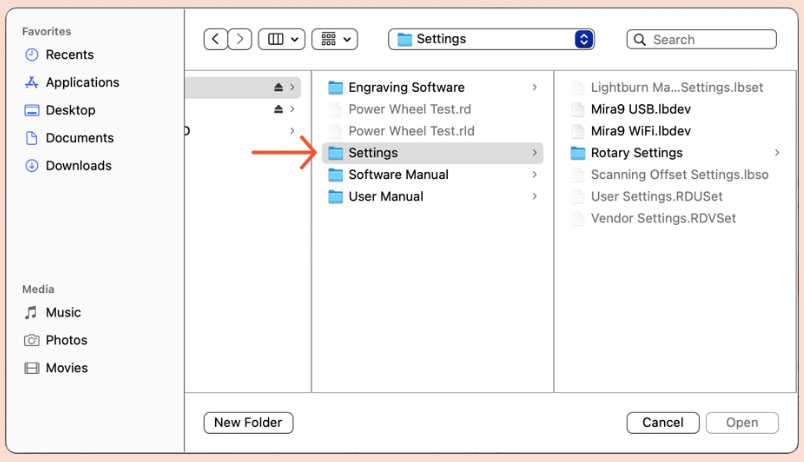
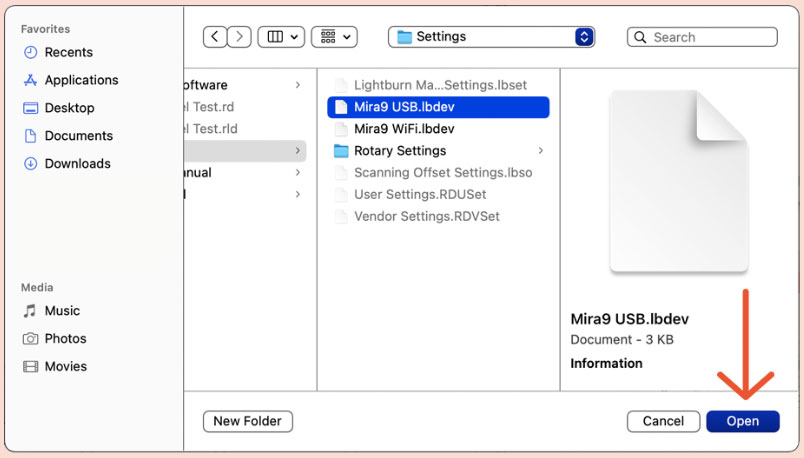
Setting folder - Select the file ending in USB.lbdev, and click Open.
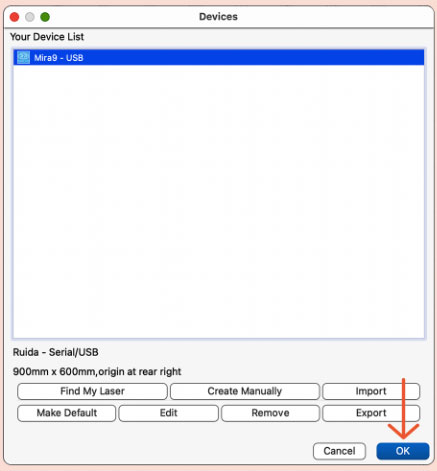
file ending in USB.lbdev - Select the new USB device from the Devices list and click OK.
Devices list - In the Laser Window, select the new USB device from the dropdown menu.
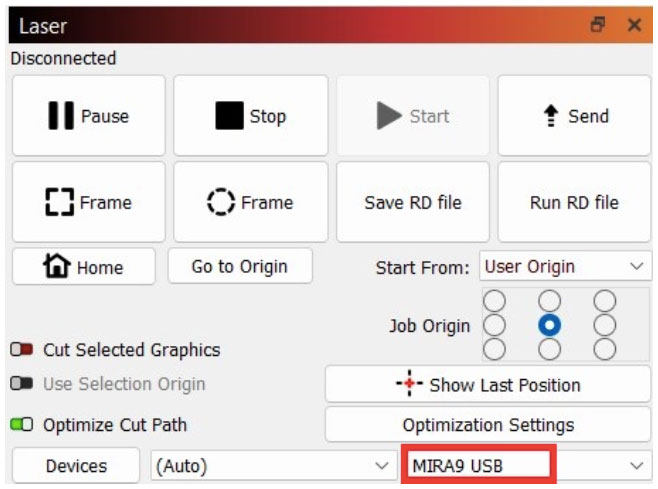
Laser Window - Plug one end of the USB cable that came with your laser, directly into an open USB port on your computer.
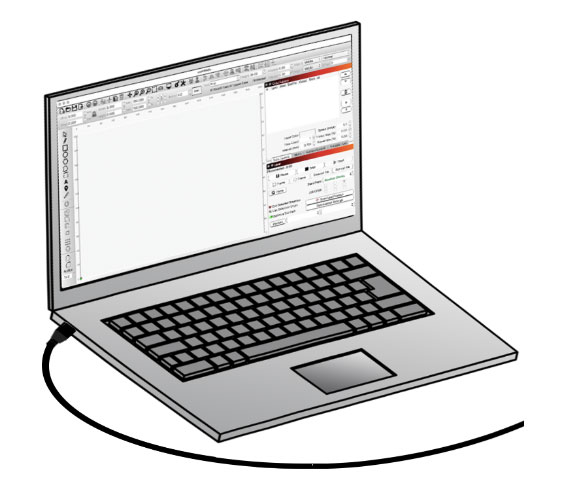
USB cable into USB port NOTE: USB cables longer than 10 feet and USB hubs are NOT recommended. Signal will begin to deteriorate if you travel farther than approximately 10 feet. The speed and power provided will also decrease as the cable is extended further.
- Plug the other end of the supplied USB cable into the bottom USB port, on the right side of the machine.
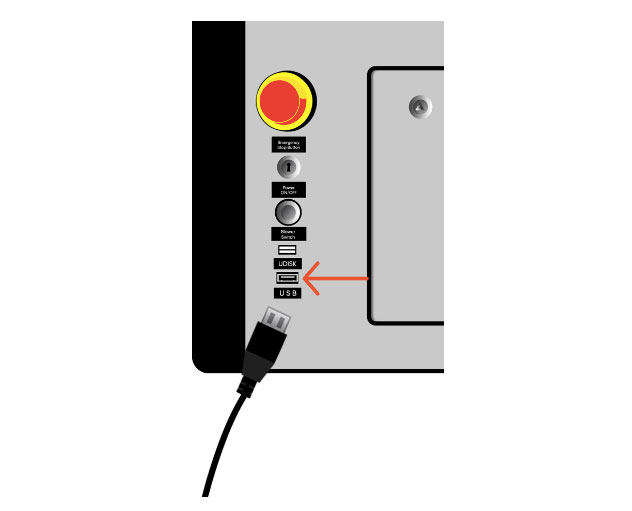
USB cable into machine - In the Laser Window, right-click the Devices button to reset the connection. It should now say Ready.
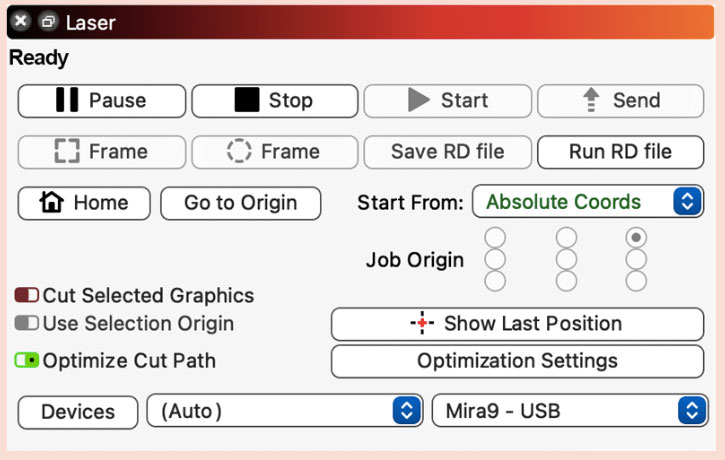
Laser Window
Congratulations! Lightburn is now connected to your laser via USB.
Connect via WiFi
- Plug the USB thumb drive that came with your laser into an open USB port on your computer.

USB Drive - Power the machine on and allow it to fully reset.
- If the Devices Window does not popup, click on Devices in the Laser Window.

Laser Window - In the Devices window, click the Import button.

Devices Window - Navigate to the DISK_IMG drive on your computer.

DISK_IMG drive - Select the Settings folder.

Setting folder - Select the file ending in WiFi.lbdev, and click Open.
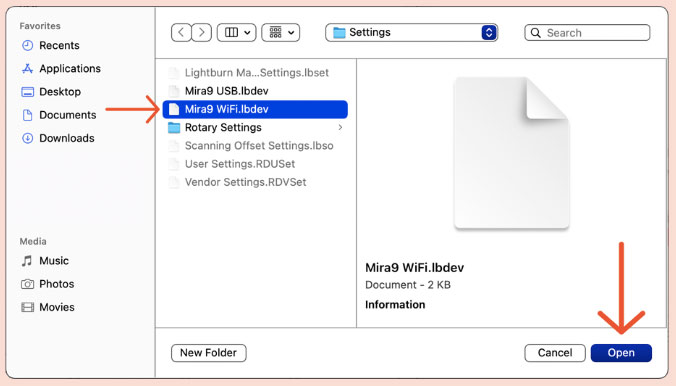
file ending in WiFi.lbdev - Select WiFi from the Device List, and click OK.
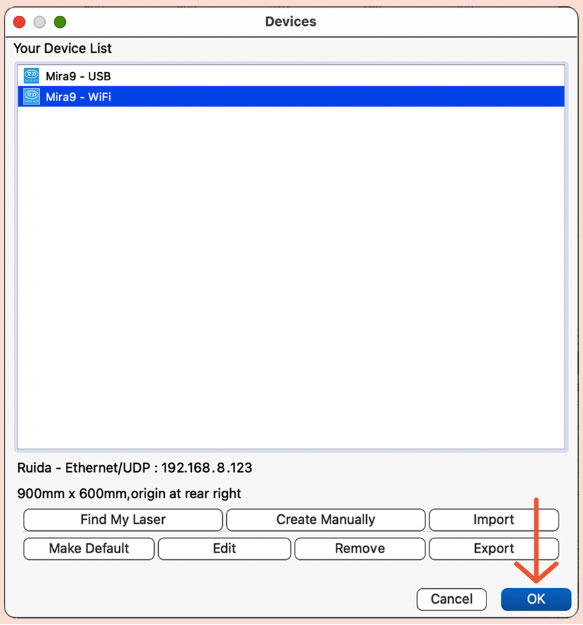
Device List - In the Laser Window, select the new WiFi device from the dropdown menu.
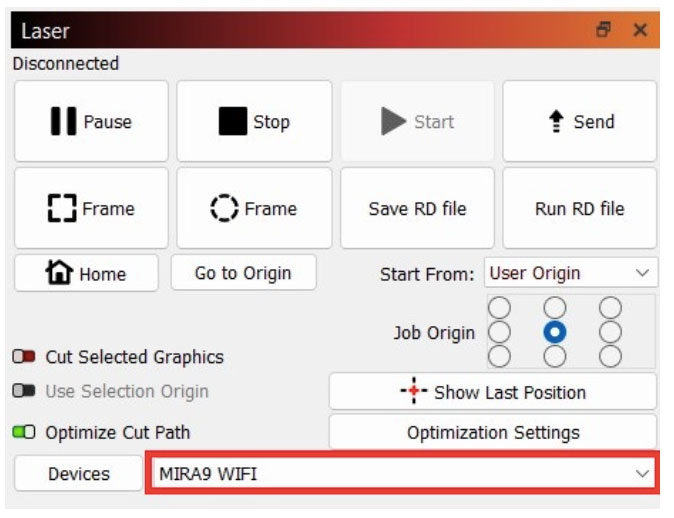
Laser Window - Click on the WiFi symbol on your computer taskbar, as if you were going to connect to your home WiFi network.
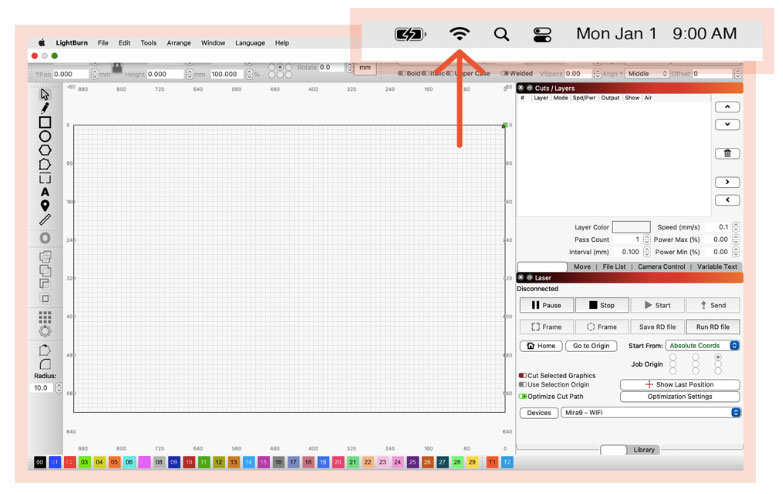
WiFi symbol on computer taskbar - Select your laser from the list of available WiFi connections, and click Connect.
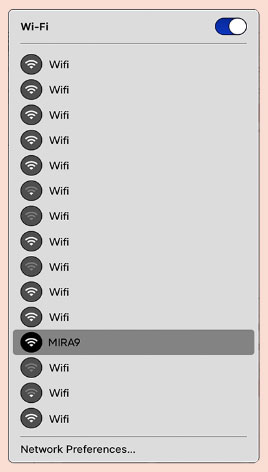
WiFi connections list NOTE: You will not be able to access the internet via WiFi when connected to the laser via a WiFi connection.
- In the Laser Window, right-click the Devices button to reset the connection. It should now say Ready.
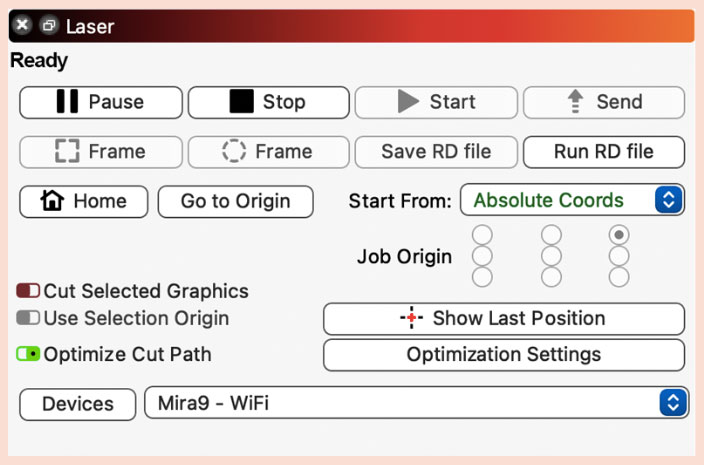
Laser Window
Congratulations! Lightburn is now connected to your laser via WiFi.


