-

Getting Started 16
-

Maintenance 14
-

Troubleshooting 14
-

Repair 8
-

Laser 101 3
-

Materials 10
-

Accessories 20
-

Multi-Roller 7
-

LightBurn 9
LightBurn Bridge Setup MIRA


What You Need
- LightBurn Bridge
- Micro SD Card
- Power Plug
- Ethernet Cable
- Computer
- Internet Connection
- USB Thumb Drive
Need assistance?
Book time with a qualified technician and get help setting up a Lightburn Bridge.
Steps
- Plug in and turn on the laser.
- Insert the Micro SD Card into the bridge, ensure it’s positioned correctly.
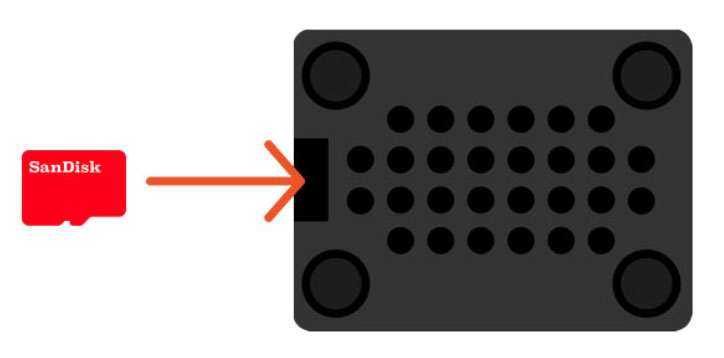
Micro SD Card - Plug the power plug into the bridge, and the other end into a power source.
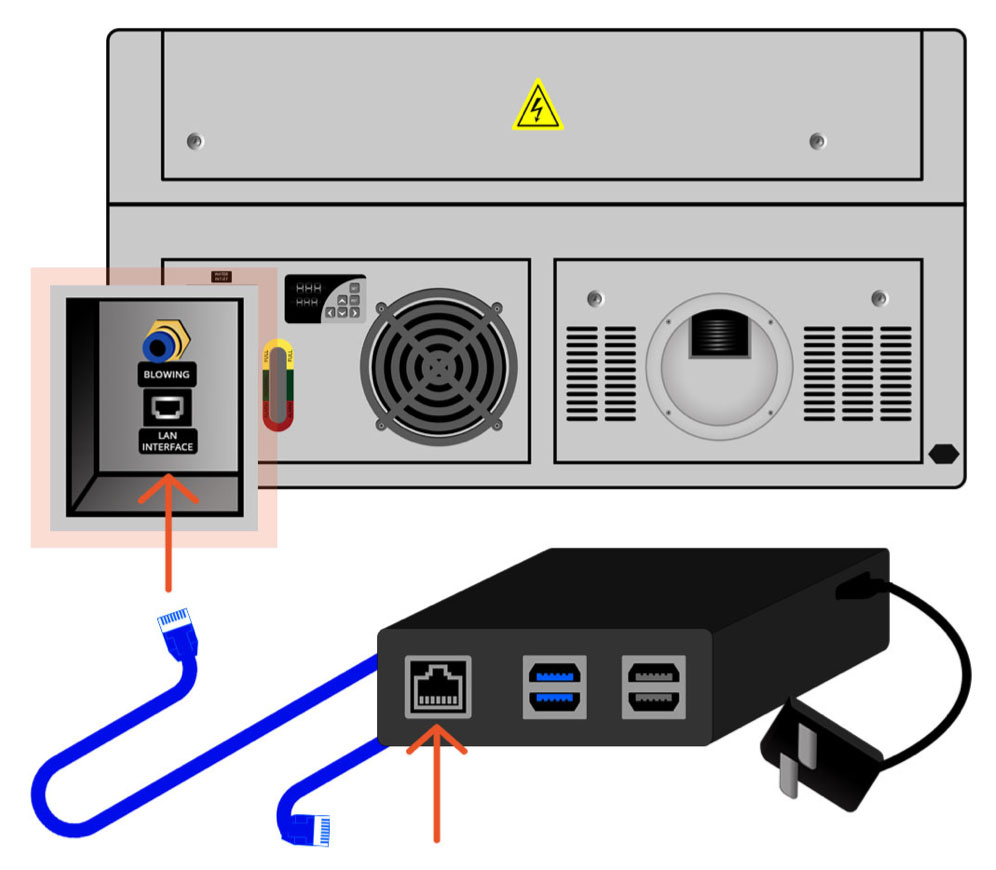
- Plug one end of the ethernet cable into the bridge. Plug the other end into the LAN INTERFACE located at the back of the laser.
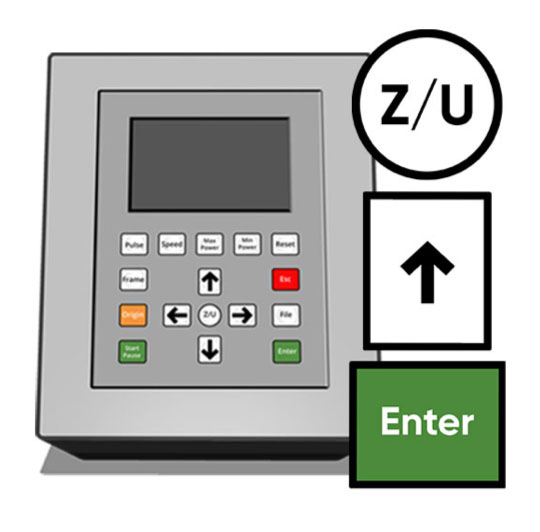
LAN Interface, back of laser - On the Keypad, press the Z/U button. Using the UP Arrow, highlight IP CONFIG+ on the screen. Press the ENTER button.
The keypad - Using the Arrow buttons, change the IP address to : 10.0.3.3
Press the Z/U button after you have entered each number.
Press ENTER.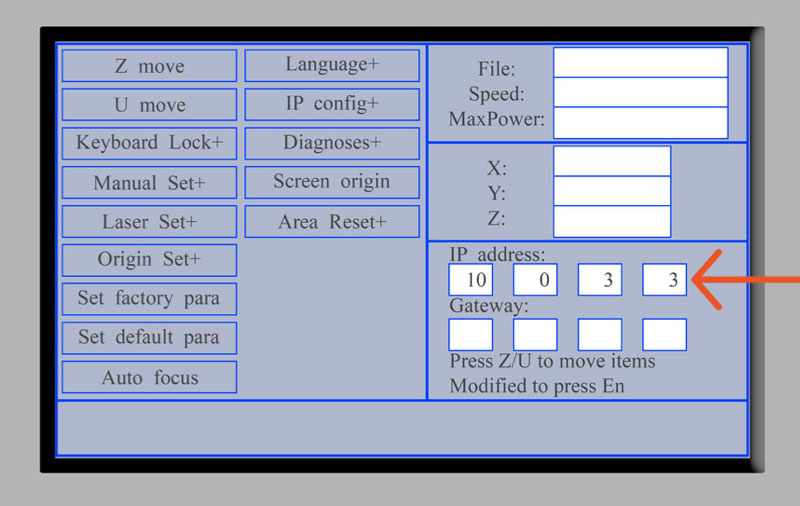
Enter IP Address - Use the UP & DOWN Arrow buttons to highlight the Z Move on the keypad screen. Press ENTER.
Press the LEFT Arrow button to raise the table up. Be careful to not hit the laser head on anything.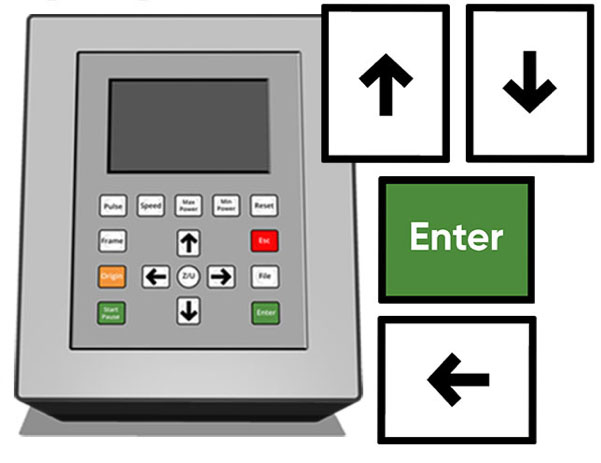
The Keypad - Open the lid, and the front access door.
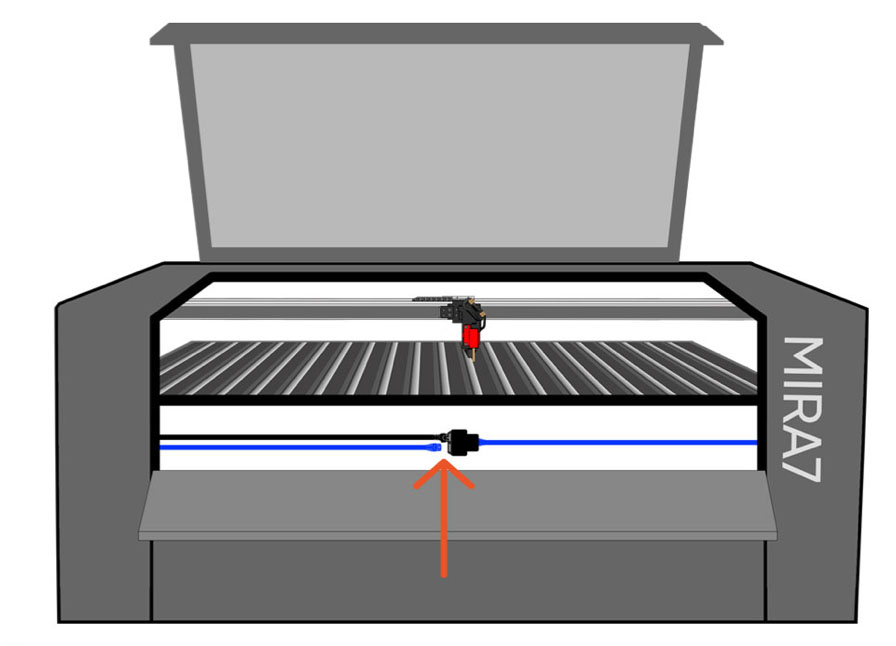
Front of laser, lid open - Locate the blue and black cables on the floor at the front of the machine.
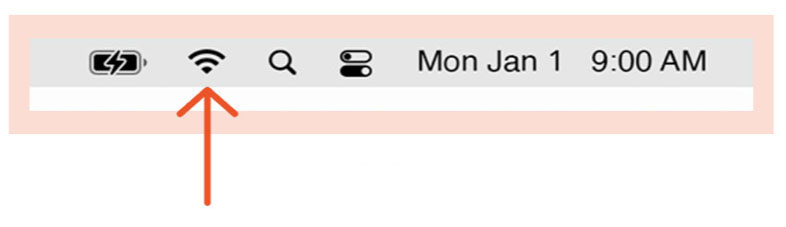
Disconnect the blue cable plugged into the left side of the Ethernet hub. Lay the wires on the floor. - On your computer, click on the Wifi icon in your taskbar.
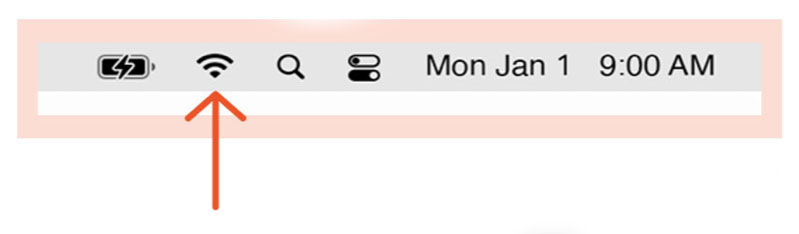
Wi-Fi icon Choose LightBurn Bridge from the dropdown.
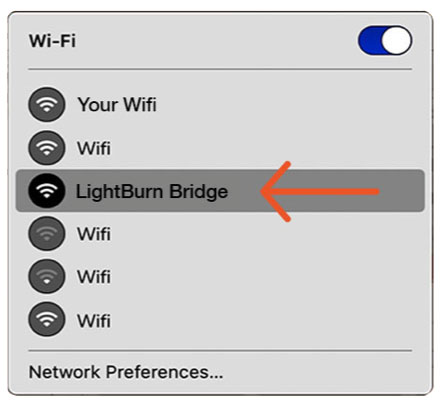
LightBurn Bridge - The Join LightBurn Bridge window will pop-up. Select your network from the SSID dropdown.
Enter your password.
Click the Connect button.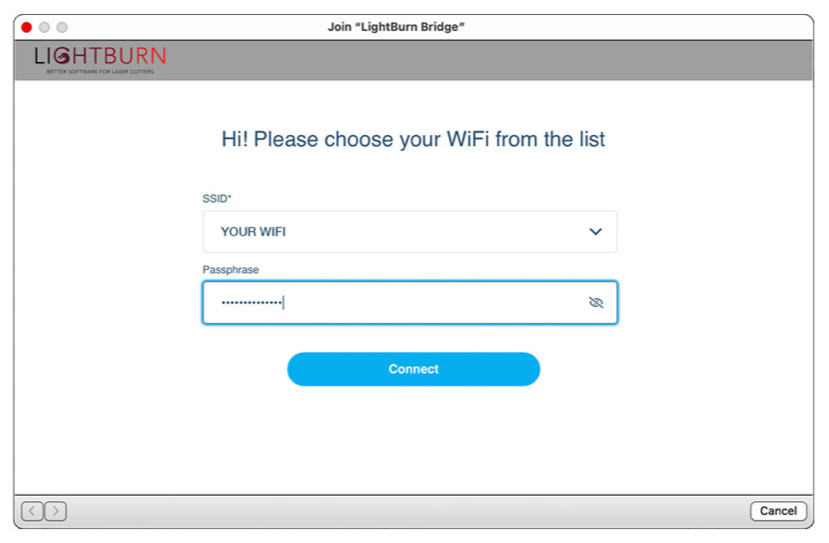
Join LightBurn Bridge window - Click on the Wifi icon in your taskbar again.
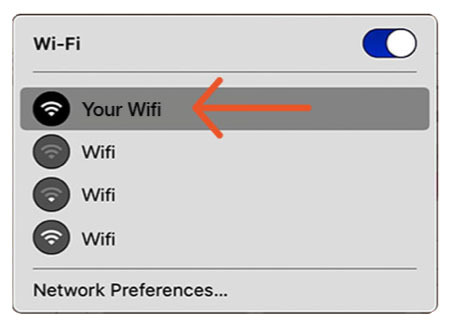
Wi-Fi icon Select your personal Wi-Fi network.
Choose your Wi-Fi - Open the LightBurn app.

LightBurn app logo - In the Laser Window, click on the Devices button.
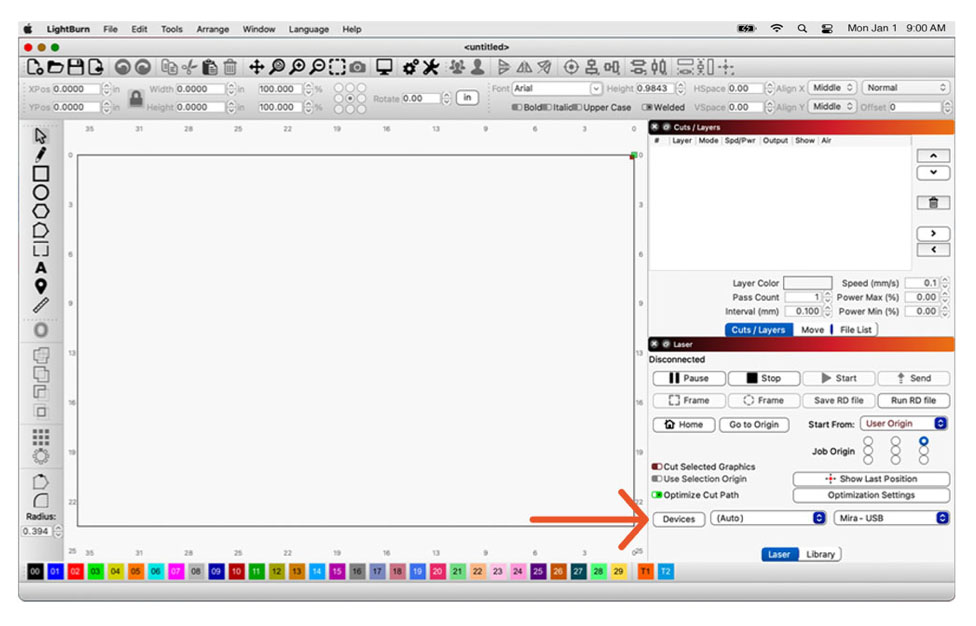
Laser Window - In the Devices Window, click on the LightBurn Bridge button.
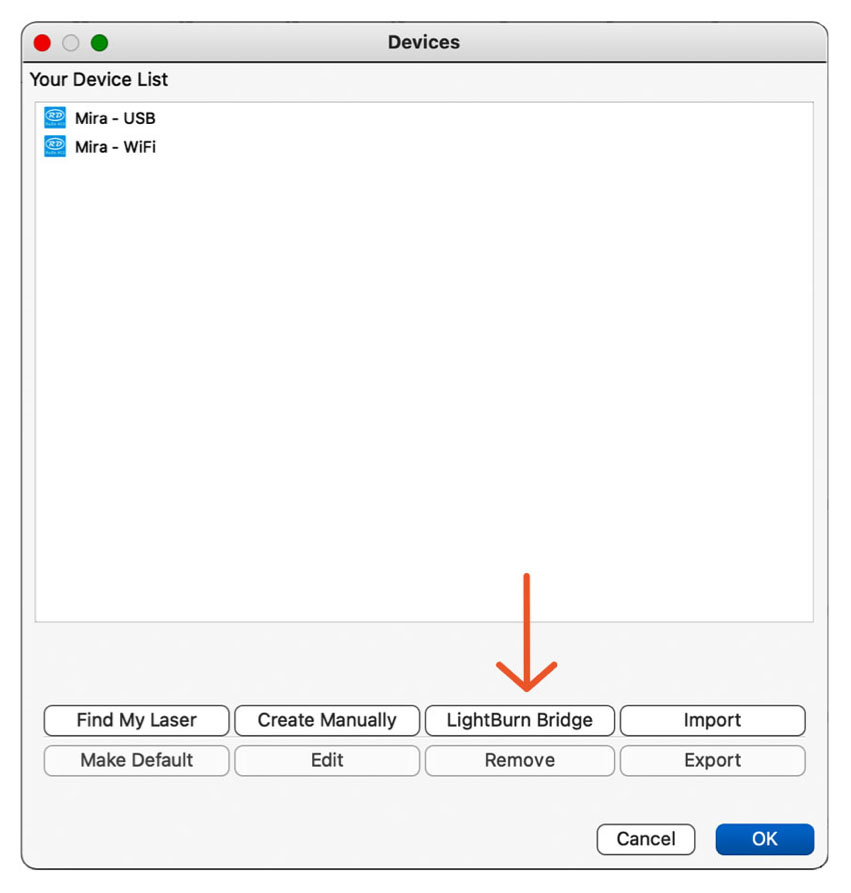
Devices Window - Click Next in the Bridge Discovery Wizard window.
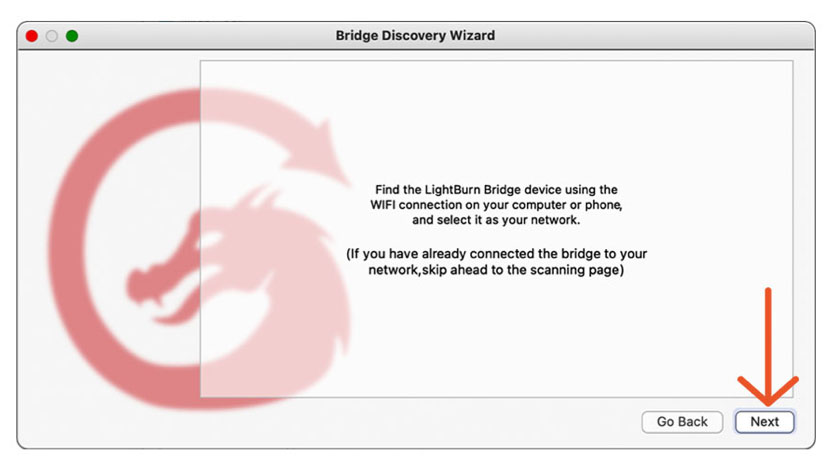
Bridge Discovery Wizard - Click Next again to scan your network for the LightBurn Bridge.
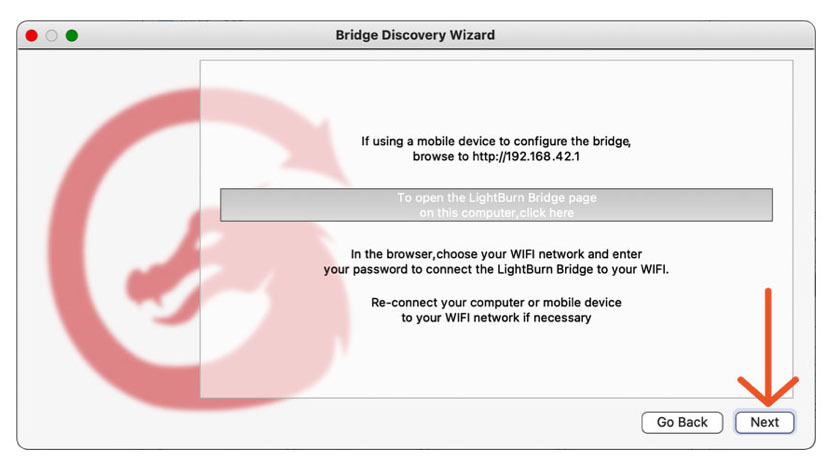
Bridge Discovery Wizard - Click Add Device.
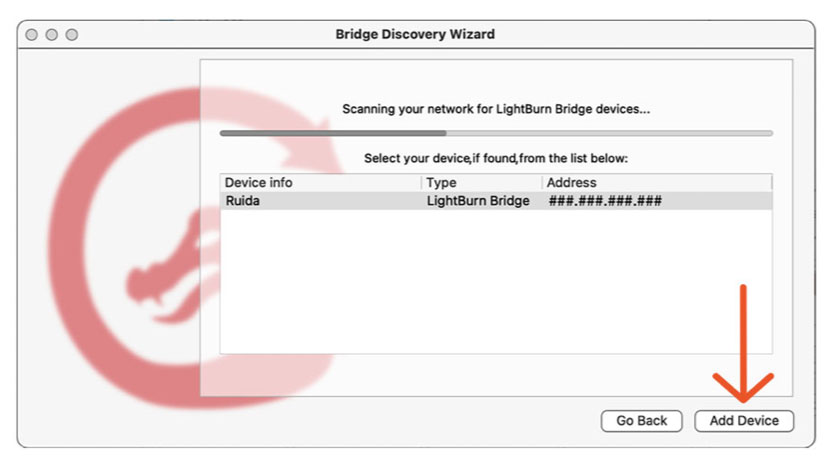
Bridge Discovery Wizard -
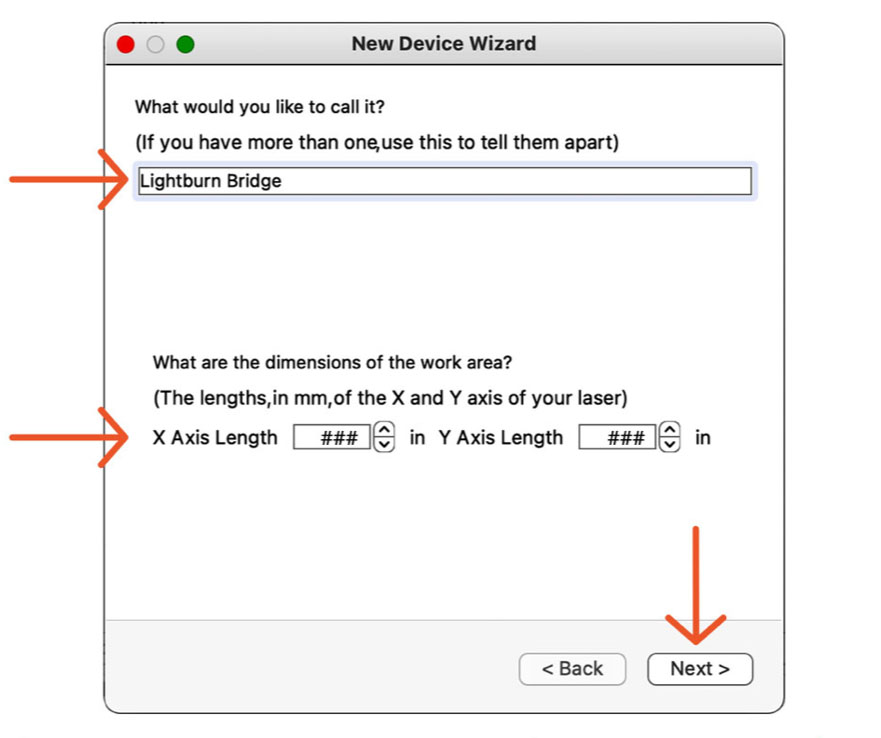
- Enter what you would like to call your LightBurn Bridge.
- Enter the dimensions for your machine’s work area.
X Axis Y Axis MIRA5 19.69/500mm 11.81"/300mm MIRA7 27.56”/700mm 17.72”/450mm MIRA9 35.43”/900mm 23.62”/600mm - Click Next.
New Device Wizard
- Set your Origin to the Rear Right.
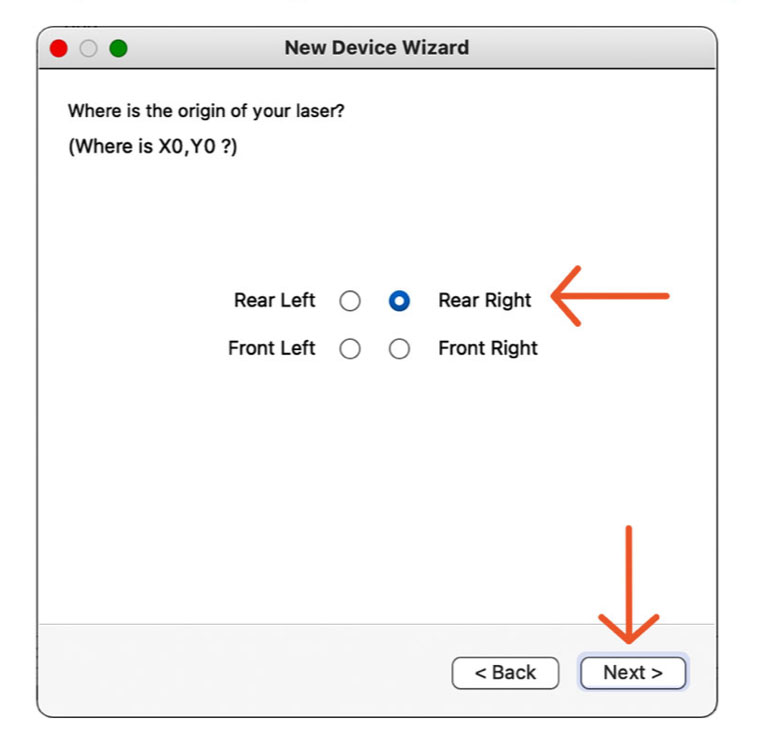
Origin set to Right Rear Click Finish to add the new device.
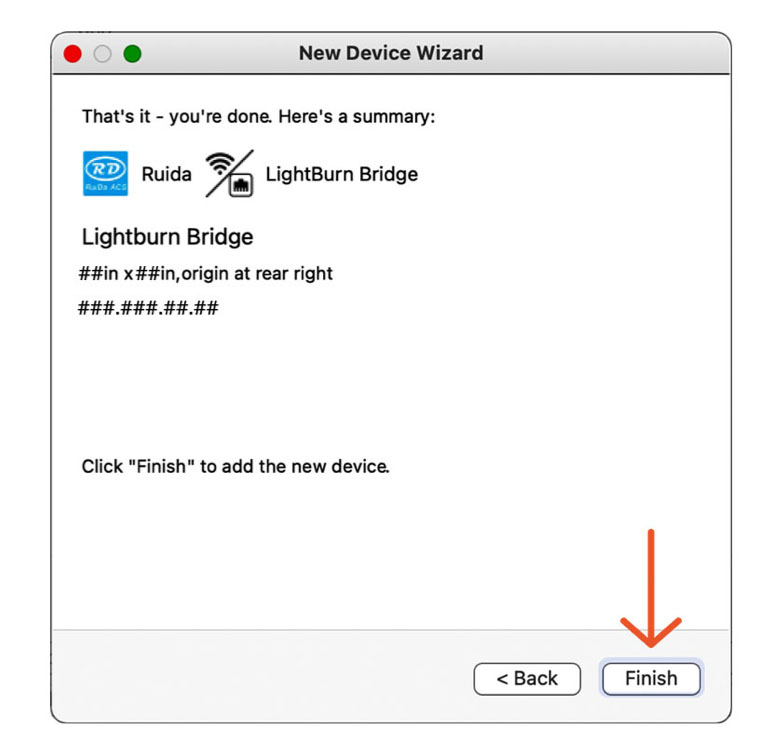
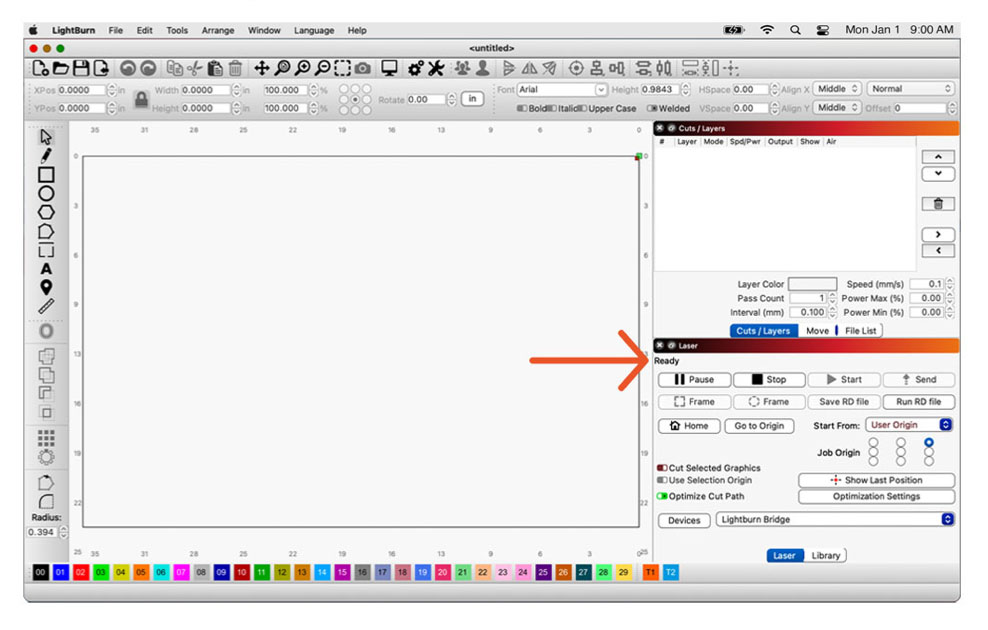
New Device Wizard, Finish - In the Laser window, select LightBurn Bridge from the Devices dropdown.

Laser window It is connected when it says “Ready” in the Laser window.
Laser window - Click on Device Settings in the toolbar.
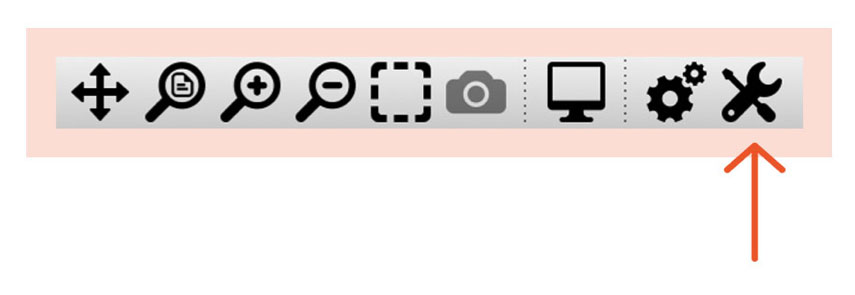
Toolbar, Device Settings Click the Import button.
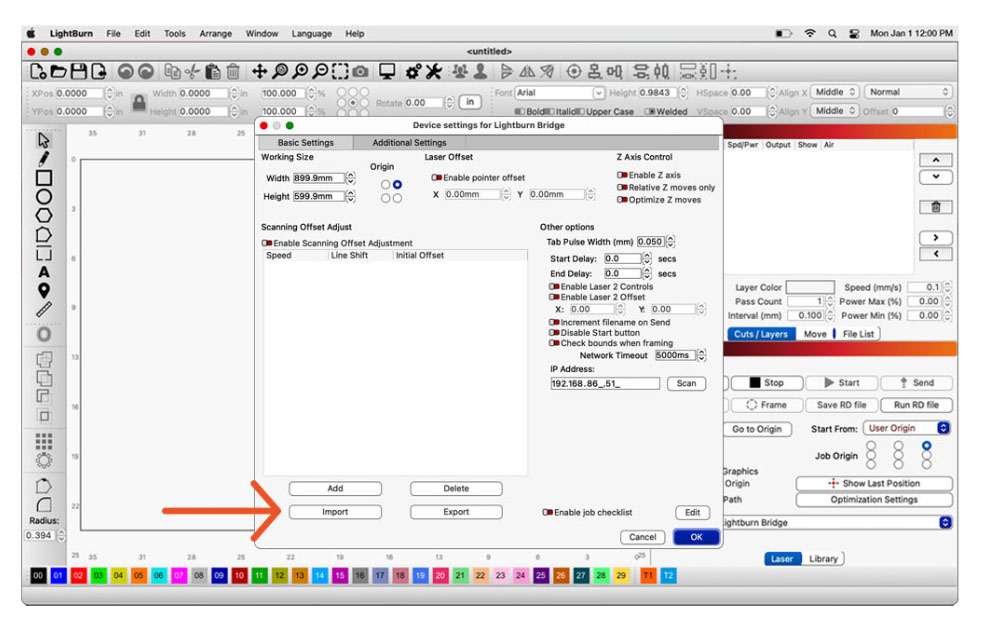
Import button - Plug the USB thumb drive that came with your laser into an open USB port on your computer.
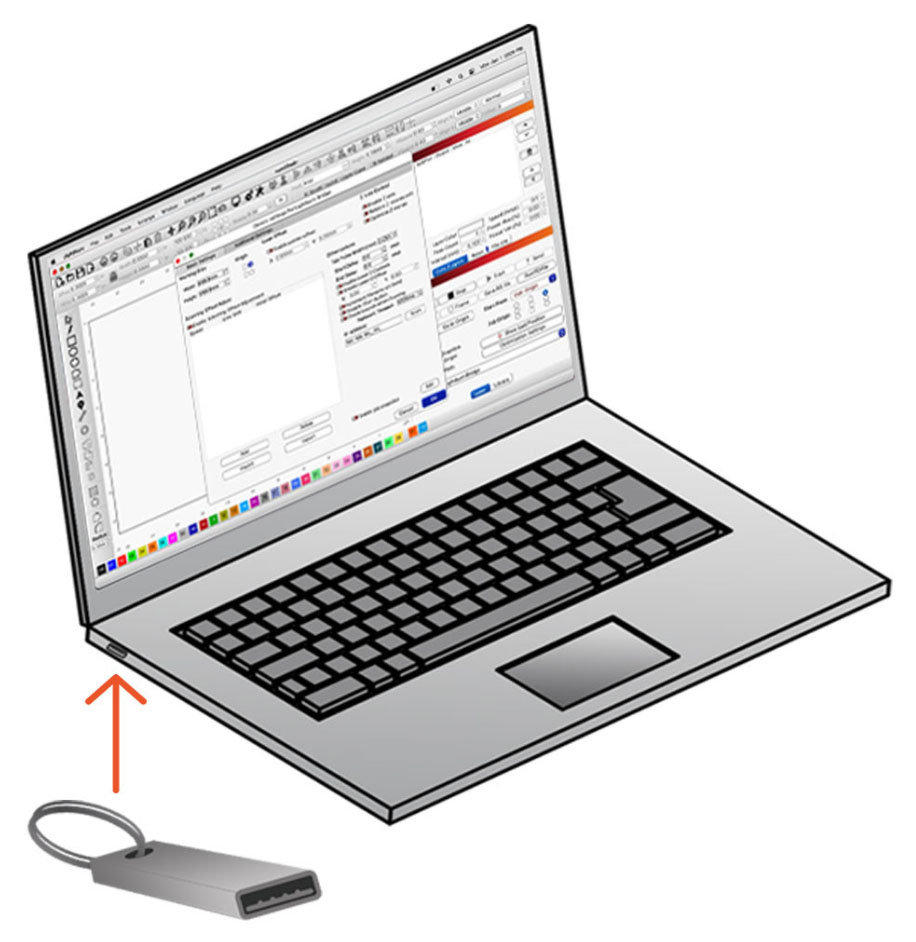
USB thumb drive Locate and click on the Settings file on the USB Thumb Drive.
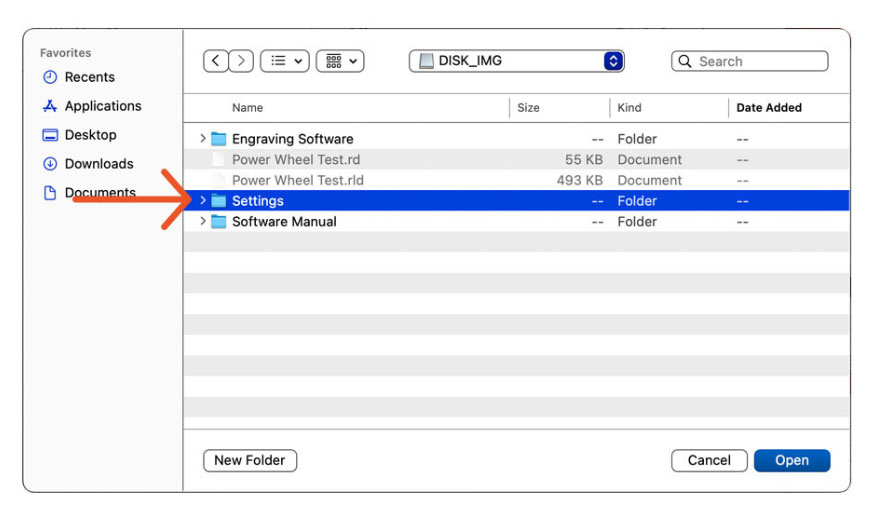
Settings file Click on Scanning Offsets.lbso.
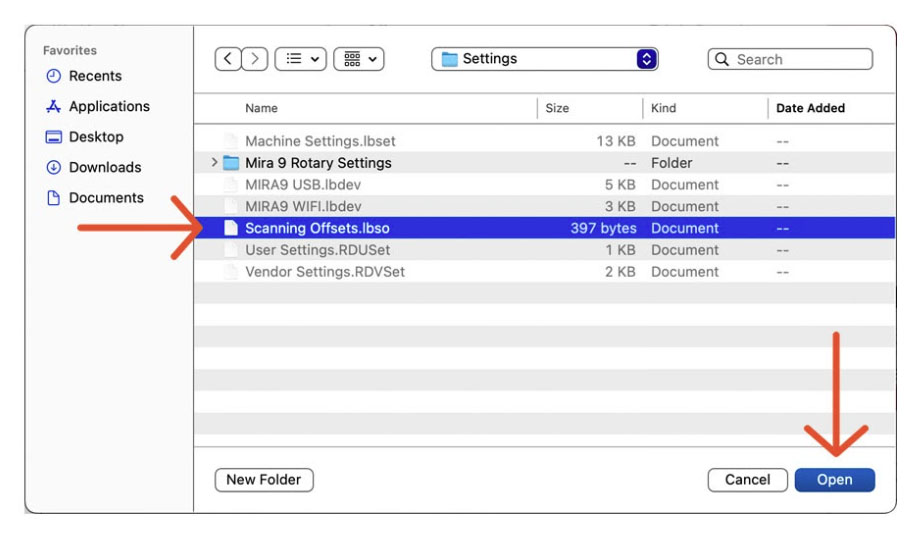
Scanning Offsets.lbso Click OK.
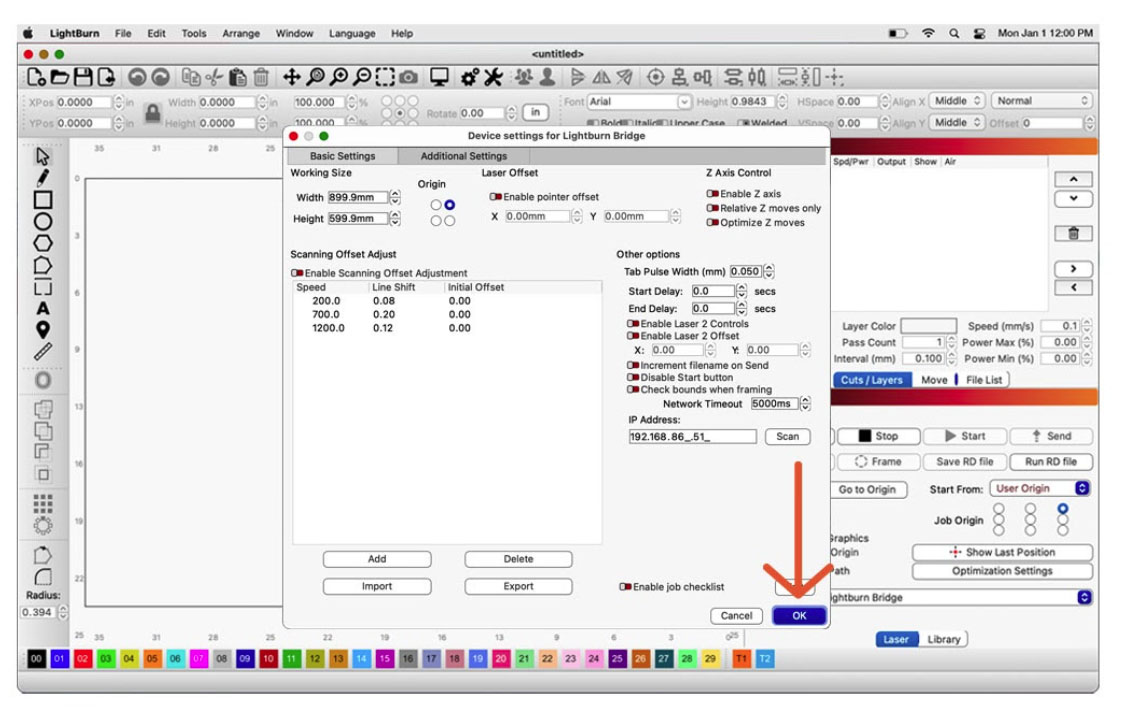
Device settings window
That's it!


