-

Getting Started 16
-

Maintenance 14
-

Troubleshooting 14
-

Repair 8
-

Laser 101 3
-

Materials 10
-

Accessories 20
-

Multi-Roller 7
-

LightBurn 9
Replacing the Auto Focus Pin


What you'll need
- Cloth (to catch any screws)
- 2mm Allen Key
- New Autofocus Pin
Video
Steps
- Place a cloth under the laser head, resting on the blades. This will catch any pieces that may fall.

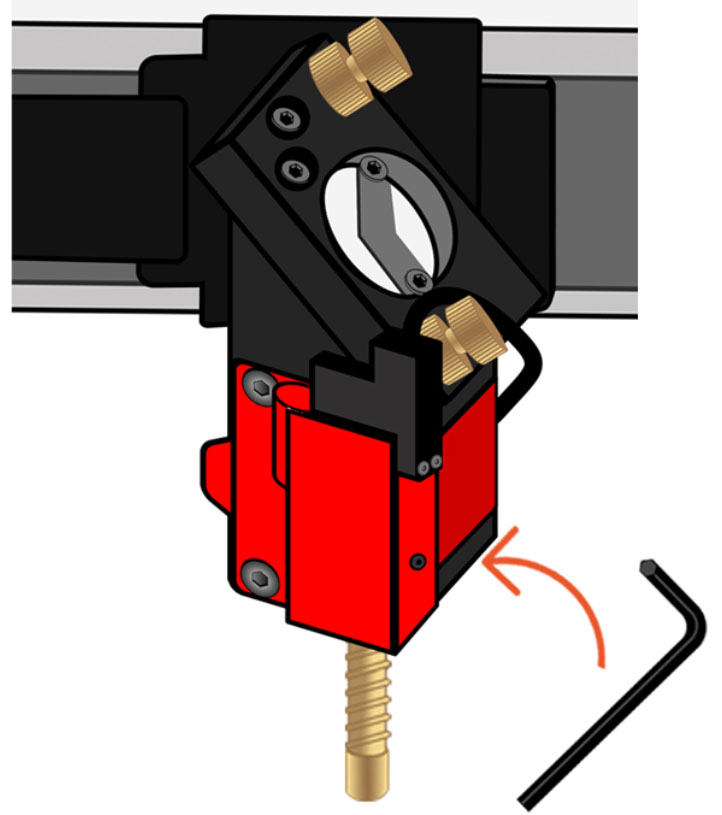
Aeon laser - Using a 2mm Allen key, loosen the set screw on the autofocus assembly. Do not remove the screw.
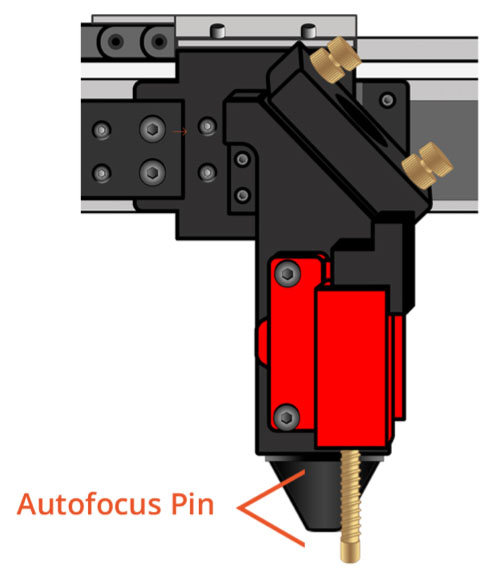
Set screw on the autofocus assembly - Unscrew the autofocus sensor pin, and carefully remove it.
Autofocus pin 📌 Note: Be careful not to let the red flag piece fall from the autofocus assembly. If it does, simply return it to the assembly, with the hole positioned inside the assembly.
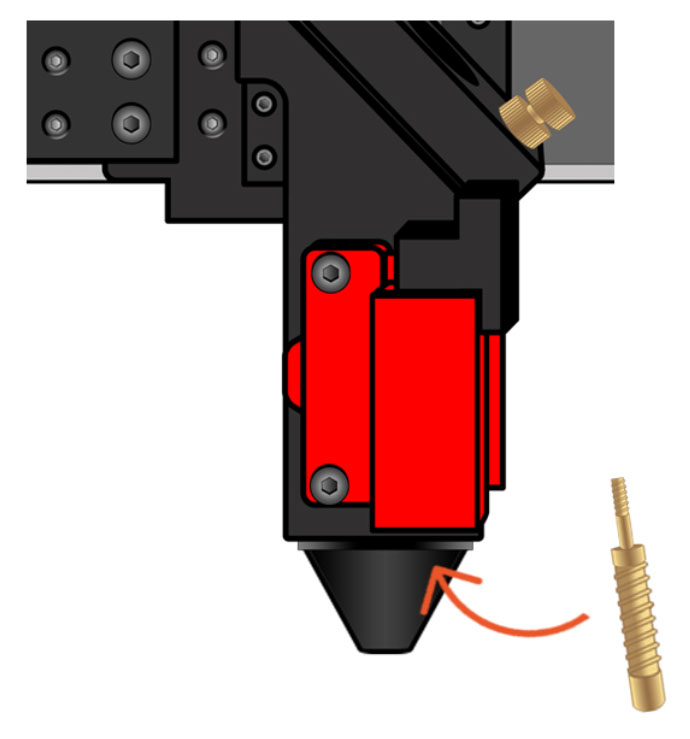
Red flag piece - While holding the red flag piece in place with one hand, screw the new autofocus pin into place.
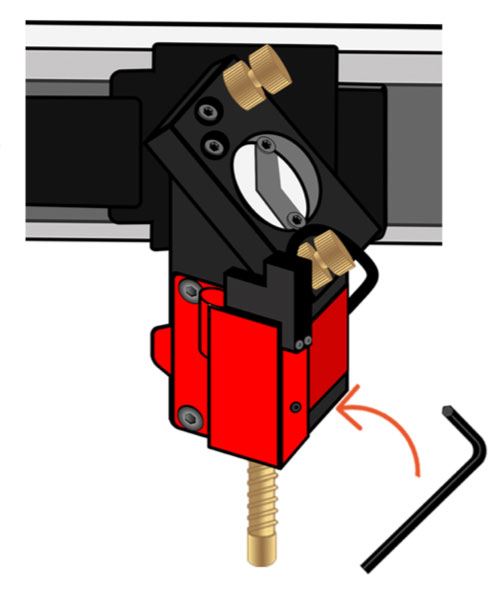
New autofocus pin - Using a 2mm Allen key, tighten the set screw on the autofocus assembly. Do not over-tighten.
2mm Allen key 📌 Note: Do not over-tighten the set screw. Turn it slowly until it is snug, then unscrew it by 1/4 of a turn.
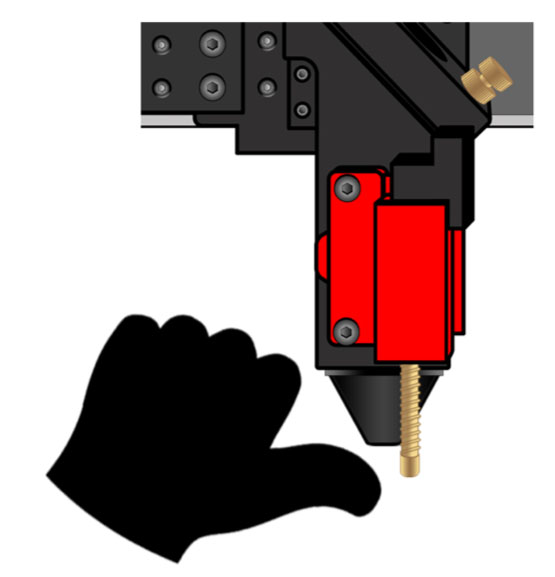
- Press the plunger up with your finger to ensure that it moves smoothly up and down.
Press the plunger up with finger - To ensure that the pin is seated correctly, power on the machine and watch that the red light turns on.
Make sure red light is ON


