EMP External Air Compressor
Overview
What you will learn
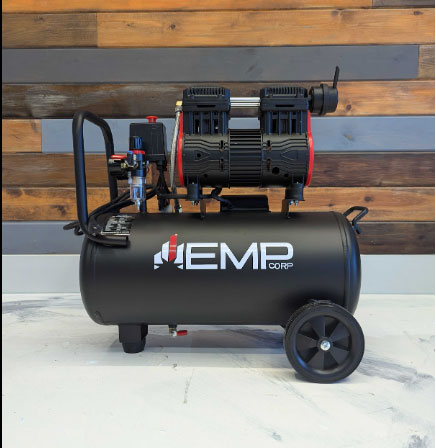
In this guide, you will learn the essentials required to start working with your EMP brand external air compressor. This includes assembly, as well as basic operation.
When to do this
This guide is intended for those setting up their EMP external air compressor for the first time.
What you need
- Phillips Head Screwdriver
- Adjustable Wrench
- Compressor Parts Kit (Included with Compressor)
Need assistance?
Book time with a qualified technician and get help setting up the external air compressor.
Assembly
- Cut the binding straps from the exterior of the compressor box.
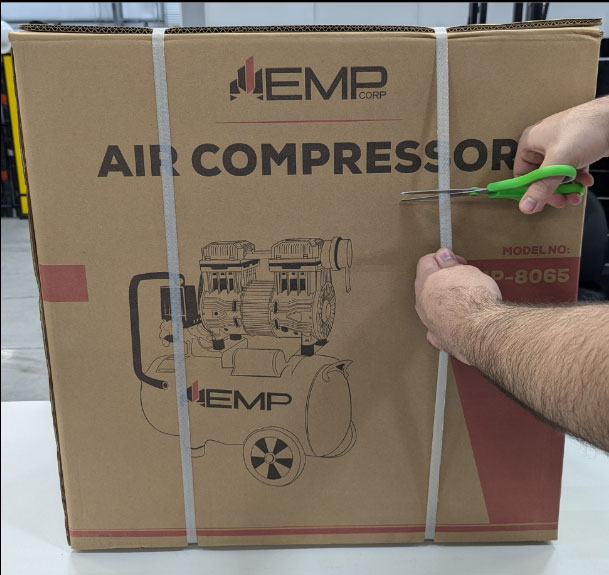
CAUTION: These straps are tensioned and may recoil suddenly as they’re cut.
- Open the box and remove all of the contents. Remove any packing material from the compressor.
- Retrieve the compressor wheels, front rubber foot, muffler, and mounting hardware from the included kit.
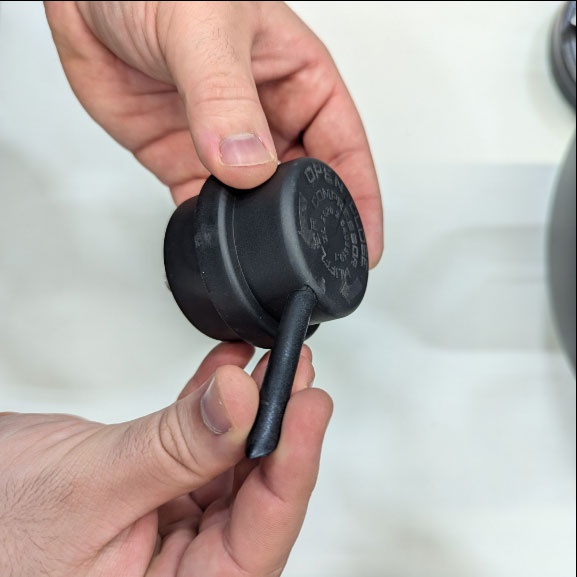
- Press the small black tube into the hole on the muffler as shown below. Push until it is fully seated.
- Screw the muffler into its mounting location on the rear of the compressor by hand.
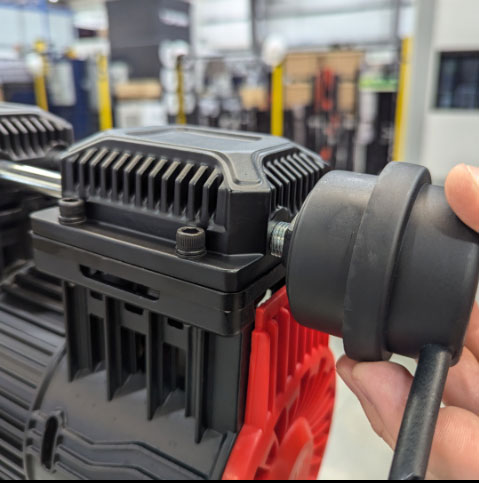
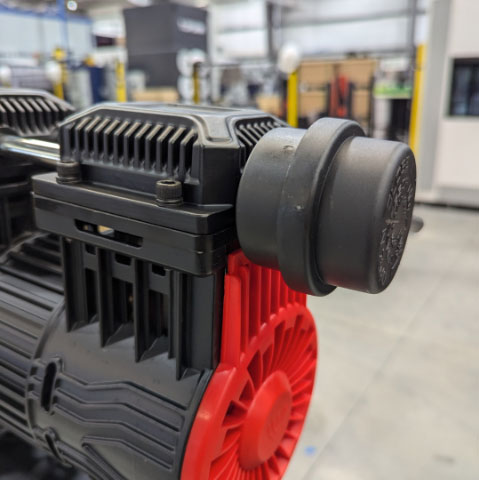
CAUTION: DO NOT add teflon tape to the threading for the muffler. The tape can potentially get sucked into the compressor and cause irreparable damage.
- Turn the compressor onto its side to access the mounting location for the front rubber foot, as well as one of the wheels.
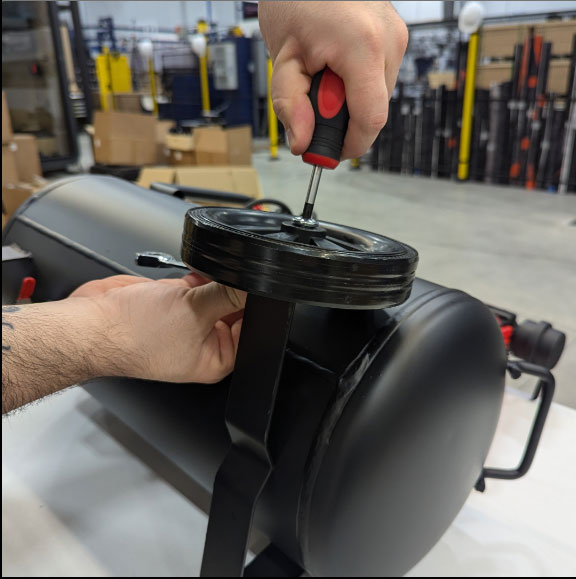
- Start with mounting one wheel to the compressor. Use a Phillips head screwdriver and an adjustable wrench (14 mm) to secure the compressor wheel to the chassis.
- Feed the mounting bolt through the wheel.
- Insert the bolt/wheel through the mounting hole in the chassis.
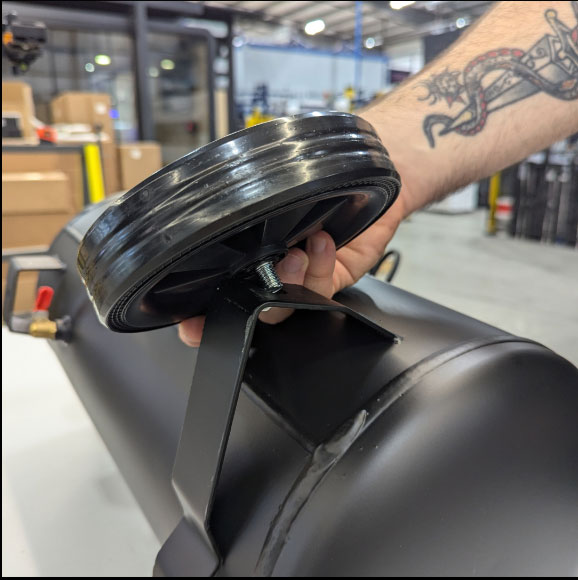
- Use a Phillips head screwdriver and an adjustable wrench to secure the wheel to the chassis.
- Next, use an adjustable wrench (12 mm) to mount the front rubber foot to the compressor chassis.
- Feed the mounting bolt through the hollow side of the rubber foot.
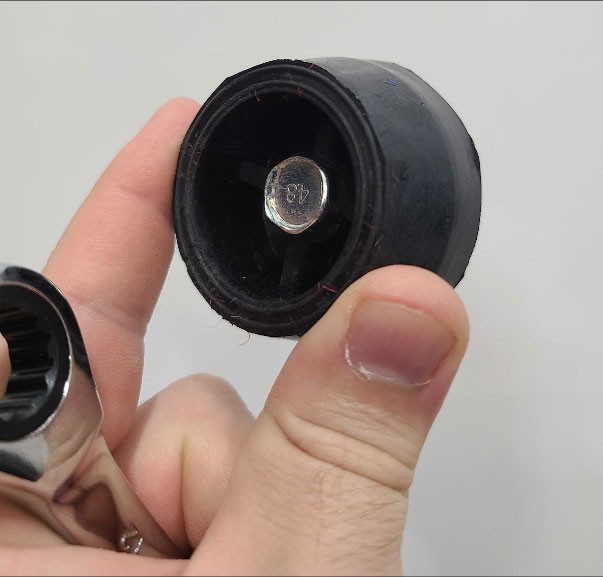
- Insert the bolt/foot through the mounting hole in the chassis.
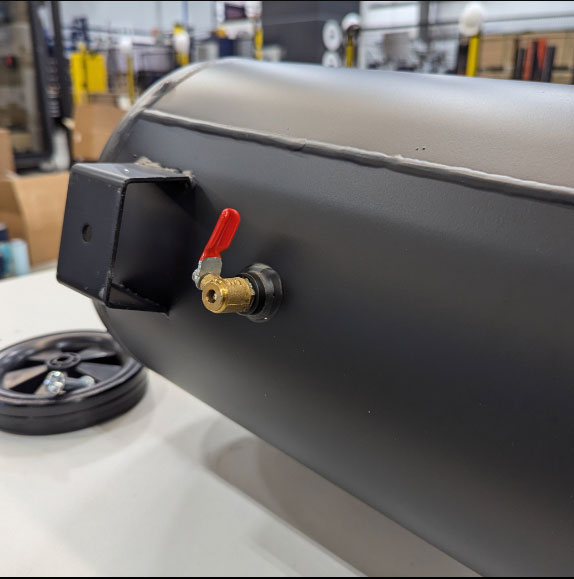
- Use an adjustable wrench to secure the foot to the chassis.
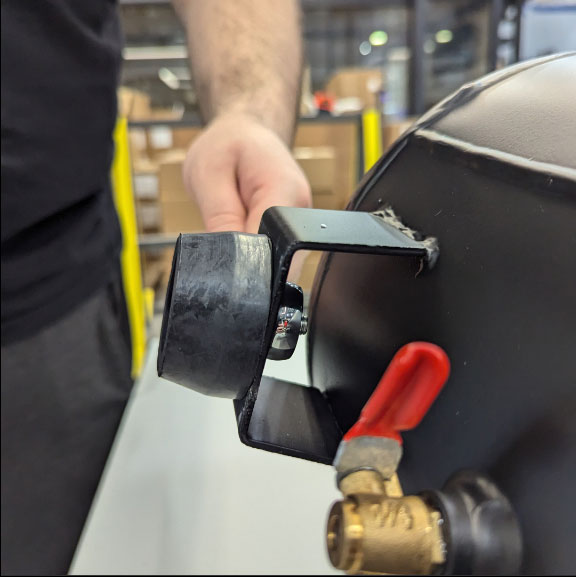
- Feed the mounting bolt through the hollow side of the rubber foot.
- Flip the compressor onto its other side to access the second wheel’s mounting location.
- Use a Phillips head screwdriver and an adjustable wrench (14 mm) to secure the remaining compressor wheel to the chassis.
- Feed the mounting bolt through the wheel.
- Insert the bolt/wheel through the mounting hole in the chassis.
- Use a Phillips head screwdriver and an adjustable wrench to secure the wheel to the chassis.
- Once both wheels and the front rubber foot have been installed, stand the compressor upright.
- Retrieve the teflon tape and 6 mm air fitting from the included kit.
- Apply a sufficient amount of teflon tape to the threading of the fitting's mounting location as shown below.
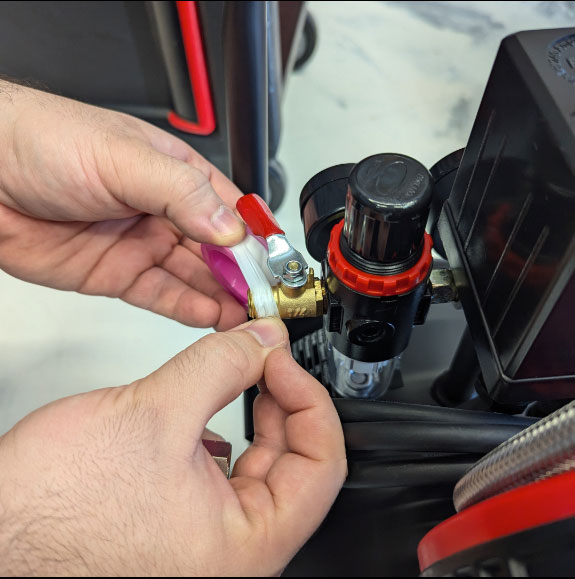
- Screw the 6mm air fitting onto the mounting location using an adjustable wrench.
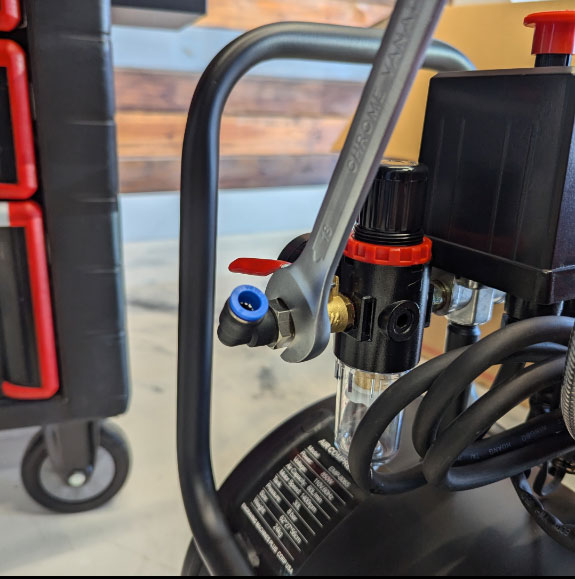
- Insert the included 6 mm air hose into the fitting by pushing it into the fitting, and route the air hose to the external air port on the machine.
- That's it! The air compressor is now hooked up and ready to use!
Operation
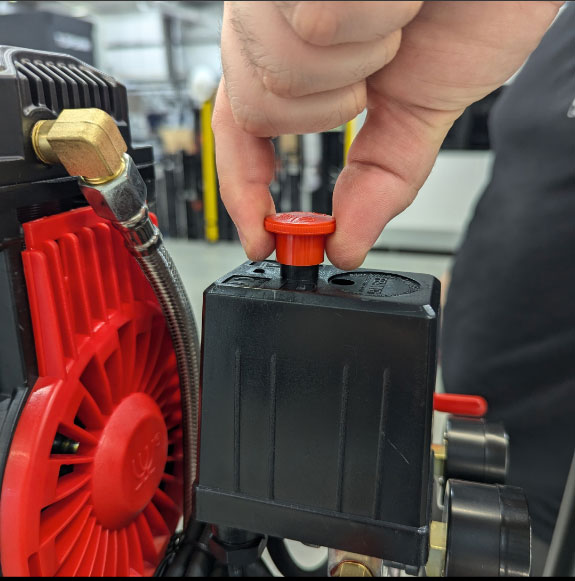
- To power ON and OFF the compressor:
- Push the red button DOWN to power OFF the compressor.
- Pull the red button UP to power ON the compressor.
- To regulate the PSI:
- Pull UP on the regulator knob on the water separator to unlock the knob.
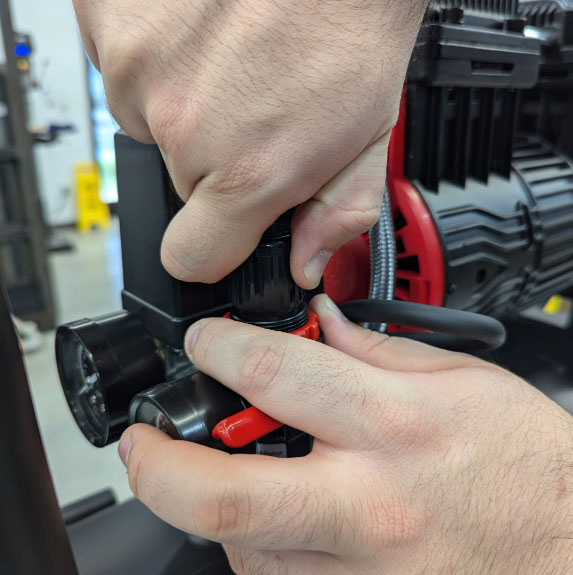
- Spin clockwise/counterclockwise to raise or lower the PSI. The top of the knob will notate which direction increases or decreases the pressure.
- Push DOWN on the regulator knob to lock in place.
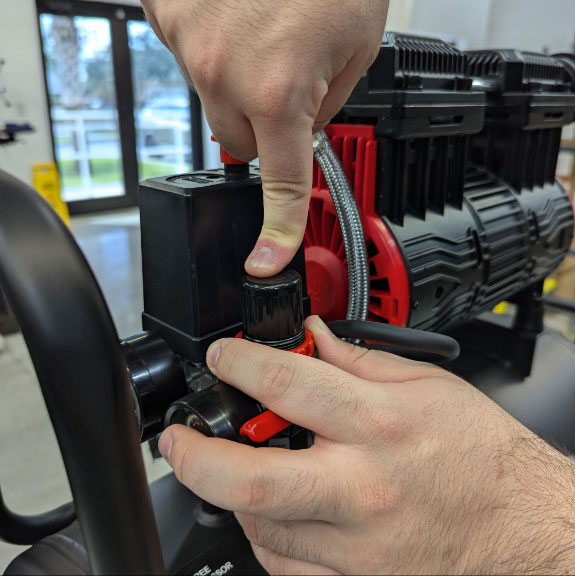
NOTE: It is recommended that the PSI should be set to a range of 15-40 PSI.
- Pull UP on the regulator knob on the water separator to unlock the knob.
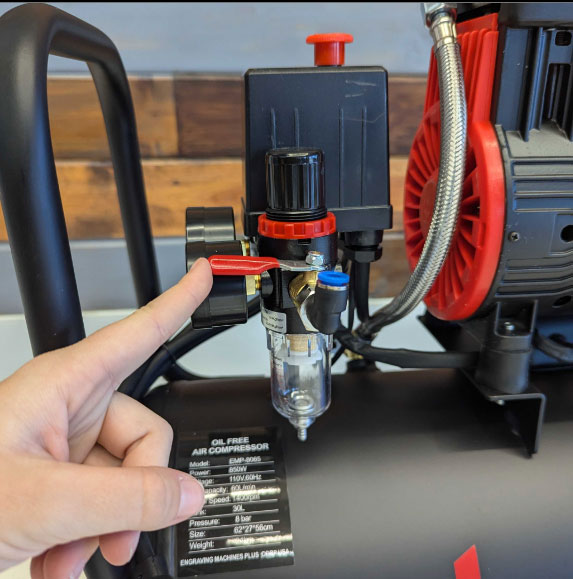
- To fully open or close the air valve:
- Turn the valve to the right to open the air path.
- Turn the valve to the left to close the air path.
- To drain the compressor tank of built up moisture:
- Ensure the compressor is powered OFF and unplugged.
- Release all pressure stored in the tank.
- Locate the drain valve at the bottom of the air compressor.
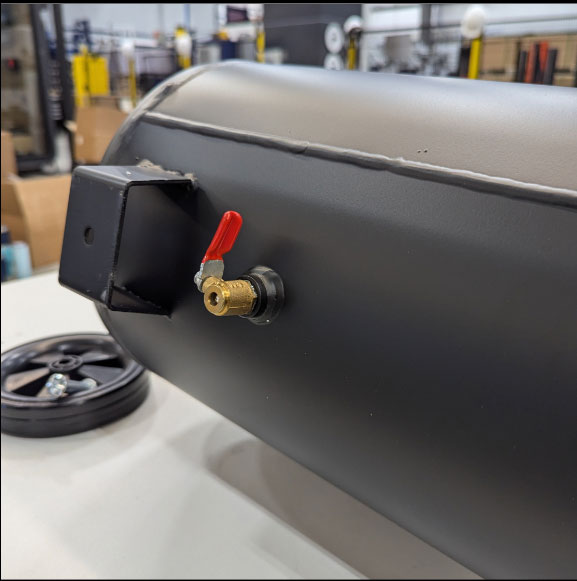
- Slowly open the valve. Water and air may spray out, so it is recommended you place a container under the valve to catch any water or use a rag to prevent spraying.
- Fully drain the air tank of all water.
- Let the tank drain until all moisture is released. You may need to tilt the compressor slightly to ensure all the water is drained.
- Once all the water is drained, close the drain valve securely to avoid any leaks.
If you have any questions or concerns, please send us an email at support@aeonlaser.us for the fastest service. If your laser is malfunctioning, please submit a support ticket.
Did you find this document helpful? Let us know what you liked or what we can improve on by sending an email to helpusgrow@aeonlaser.us.
Happy Lasering!
DISCLAIMER: AEON LASER USA AND ENGRAVING MACHINES PLUS, CORP ARE NOT RESPONSIBLE FOR ANY DAMAGES OR INJURIES THAT MAY RESULT FROM FOLLOWING THESE SUGGESTIONS. USE CAUTION AT ALL TIMES.


