-

Getting Started 16
-

Maintenance 14
-

Troubleshooting 14
-

Repair 8
-

Laser 101 3
-

Materials 10
-

Accessories 20
-

Multi-Roller 7
-

LightBurn 9
Connectivity Issues - Fiber Lasers


Overview
What you will learn
In this guide, you will learn a few basic methods for troubleshooting connectivity issues with your EMP fiber laser.
When to do this
These methods can be used if you experience a failure to connect or frame a job from LightBurn with your fiber laser.
What you need
- Computer with LightBurn
- Fiber Laser USB Cable
- Allen Key Set
Power Cycling
The first and easiest thing to try when experiencing an issue connecting to your fiber laser is to power cycle the system and reseat the basic connection points.
- Power the machine OFF following the standard sequence labeled on the face plate, near the power buttons and switches. Unplug the machine after powering OFF.
- Close LightBurn on your computer.
- Allow the machine to sit OFF and LightBurn to stay closed for AT LEAST 30 seconds.
- Reseat both the USB connection to your computer, as well as the connection point on the rear of the machine.
- Reopen LightBurn, plug the machine in, and power the machine ON following the proper sequence.
- Try seeing if you are connected again by framing a job.
Ensure the Device Profile is Correct
If power cycling did not do the trick, the next step is to ensure that the proper device profile is loaded. Many of our customers own both a CO2 laser, as well as a fiber laser. Our CO2 lasers also use LightBurn to create and send jobs, so it is possible that the profile selected is for the incorrect machine, thus giving connectivity issues.
- With the machine ON and connected to via USB, open LightBurn.
- Verify that the device profile for the fiber is selected and active in the “Laser” window in Lightburn. The profile should read something similar to “ST30R-290”, as opposed to “MIRA9”, “SuperNOVA14”, etc.
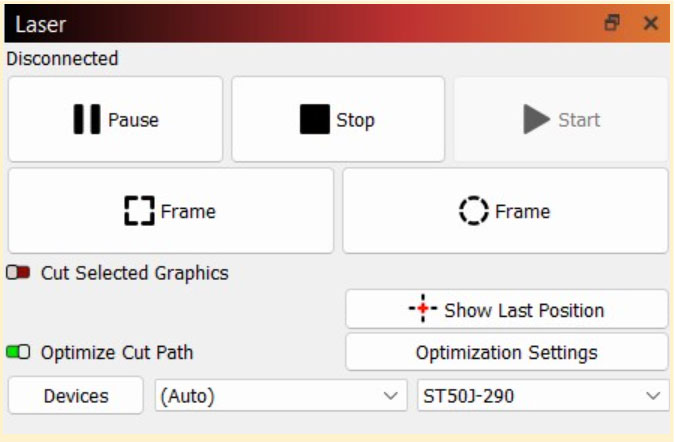
- Once the correct profile has been verified as active, or selected if it was not, try and see if you are connected again.
NOTE: If you do not see a device profile with the name listed similar as what was shown above, it is possible that they need to be loaded from the machine USB still. See our AEON Laser Knowledge Base article on LightBurn Setup for a fiber laser (start at Step 18).
Verify Driver Version and Installation
If power cycling fails, and we have verified that we are on the correct profile, it is possible the driver that allows for LightBurn and the laser to communicate either did not install, or had an issue while installing and did not load properly.
See LightBurn’s article on Installing the Driver to check if the driver for the fiber is functioning properly and to follow the steps to rectify a failure on the software side of things.
Once complete with the driver process, try and see if you are connected again.
Bypassing Connections
If all else has failed to get you connected to the machine, it is time to consider possible part failures. Generally this is seen in the form of a bad internal USB cable, but the controller board itself can fail as well.
- Power OFF and unplug the machine.
- Use a 5 mm Allen key to remove the top plate mounting bolts (6). Keep these bolts safe as you'll need them for reassembly.

- Locate the control board. There will be a USB connection on it with the same style plug as the USB that plugs into the rear of the machine.
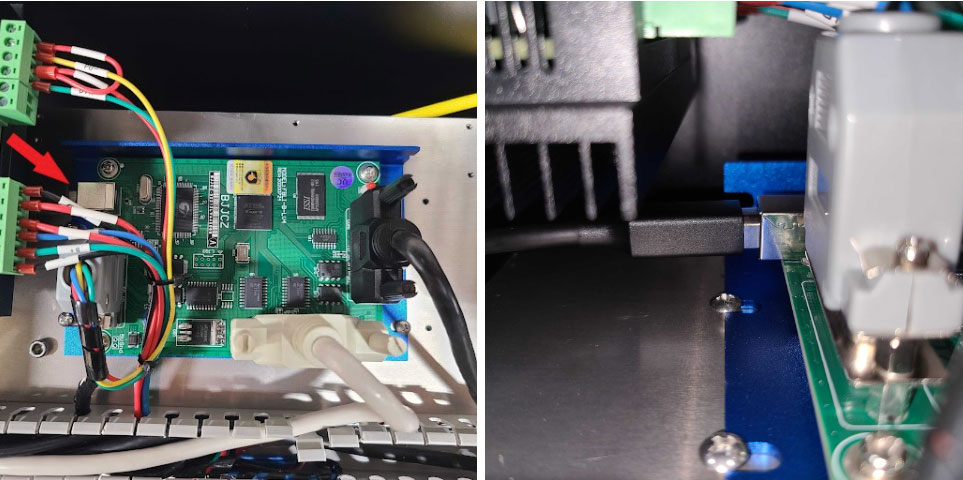
- Unplug the USB connection from the control board.
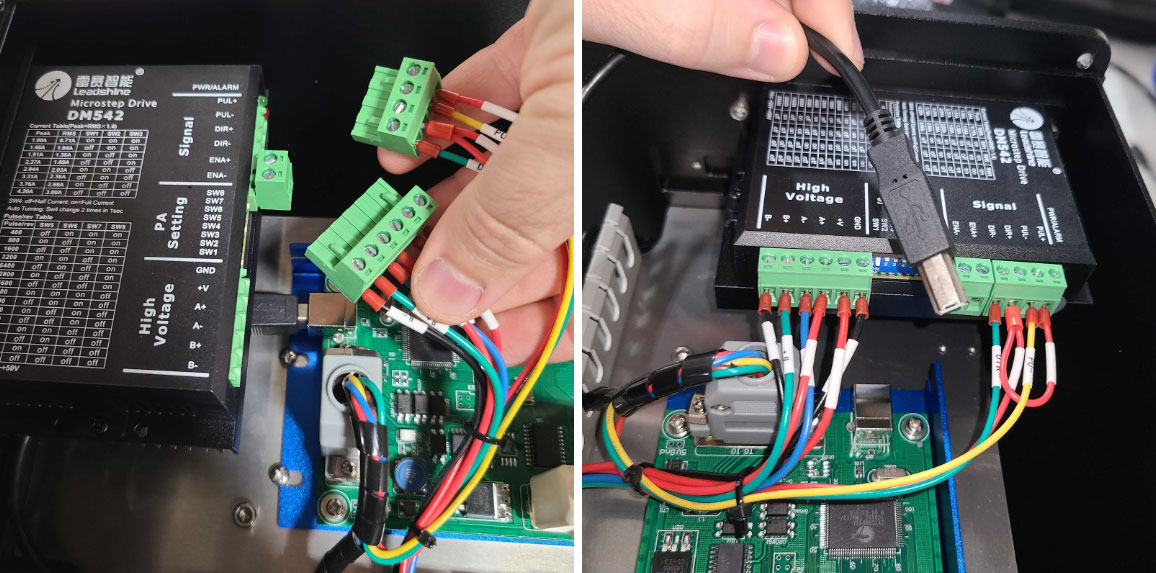
NOTE: The driver can have its green terminal block connections removed if they are in the way of accessing the USB port on the control board, though it is generally unnecessary to do so. The side panels can also be removed as needed to provide for more clearance.
- Retrieve the machine USB cord. Instead of plugging into the rear of the machine like you normally would, plug directly into the board where the internal USB was removed from.
- Power the machine ON.
- Open LightBurn, connect the USB to your computer, and try and see if you are connected again.If you are able to bypass the internal USB and connect directly to the board, that means the USB cord that is installed into the machine has failed and will need to be replaced. If you are still unable to connect, there may be a component failure that will require more in depth troubleshooting. Either way, please submit a support ticket and the team will reach out to troubleshoot further or get a replacement cable sent your way.
- The machine can have the cover reinstalled after the part replacement is complete.
If you have any questions or concerns, please send us an email at support@aeonlaser.us for the fastest service. If your laser is malfunctioning, please submit a support ticket.
Did you find this document helpful? Let us know what you liked or what we can improve on by sending an email to helpusgrow@aeonlaser.us.
Happy Lasering!


