Multi Roller LightBurn Setup
LightBurn Settings
- Launch LightBurn on your computer.
- Ensure you are running version 1.3.01 or newer. Update your LightBurn at this time if needed.
- Plug the USB thumb drive that came with your laser into an open USB port on your computer.
📌 Note: If you did not receive a USB thumb drive with Multi-Roller settings, please email support@aeonlaser.us.
Load the LightBurn Settings
- In LightBurn, go to Edit>Machine Settings
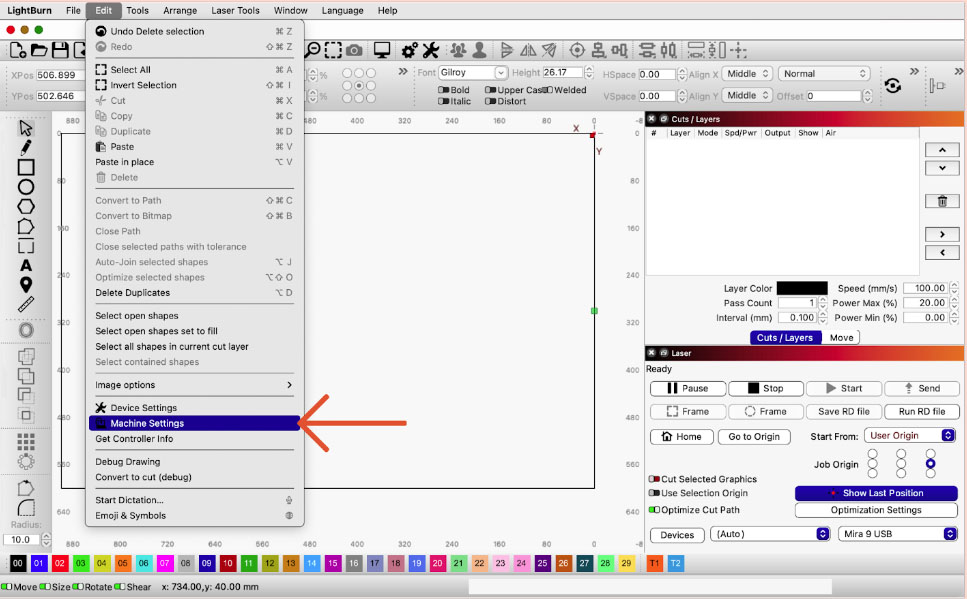
Edit > Machine Settings - Click Load.
- Navigate to the Multi-Roller settings on the USB drive and select the appropriate .lbset file.
- Click Open. Click Write. Click OK.
- Return to the laser. Using the keypad, reset the U Axis. Press the ZU key.
Press the UP Arrow key until AXES RESET+ is highlighted. Press ENTER.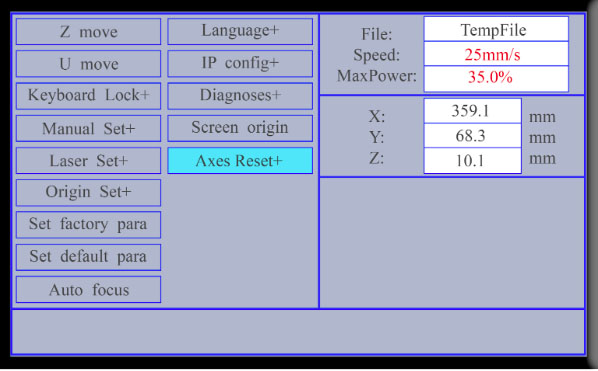
AXES RESET+ is highlighted - Press the UP Arrow key again until U AXIS RESET is highlighted. Press ENTER.
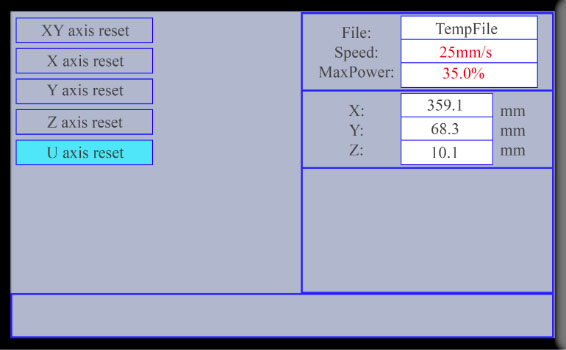
U AXIS RESET is highlighted 📌 Note: Once you have reset the U Axis, you can now use the UP/DOWN arrow keys to move the gantry backward and forward. To do this:
- Press the ZU key on the keypad
- Use the DOWN arrow key to highlight U MOVE and hit the ENTER key
- Use the UP and DOWN arrow keys to move the gantry to the desired location
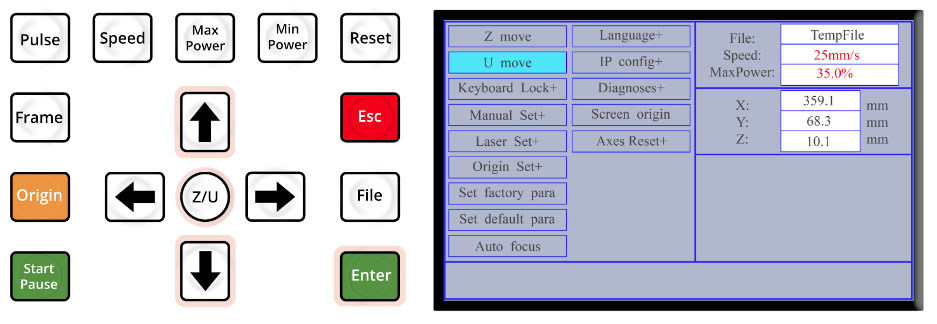
U MOVE is highlighted
Load the Toolpaths
- Go to File > Open
- Open the Multi-Roller tool file that corresponds to the style tumbler you are using.
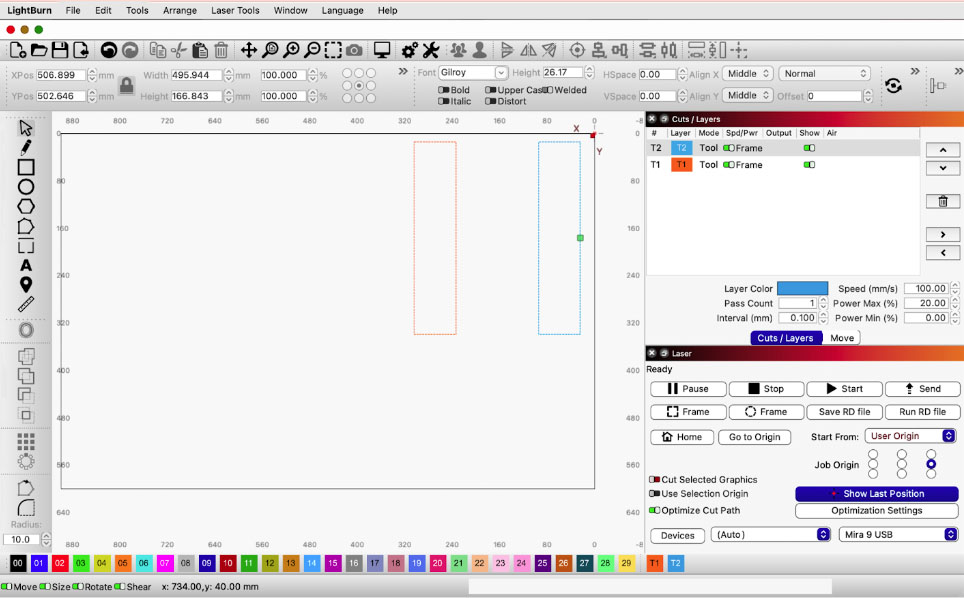
Multi-Roller tool file 📌Note: In this example we are using 30oz RTIC tumblers.
Choosing the Toolpath
The Multi-Roller Toolpaths represent the available surface area on the tumblers that you can place your artwork. The Multi-Roller has been tested on 20oz and 30oz RTIC and Yeti tumblers, as well as the 20oz Makers tumblers from Save a Cup.

These templates are available on the USB thumb drive.
📌Note: If you did not receive a USB thumb drive with Multi-Roller Toolpaths, please email support@aeonlaser.us.
- In the Laser Window, set Start From: to User Origin and select the CENTER RIGHT radio key for the Job Origin.
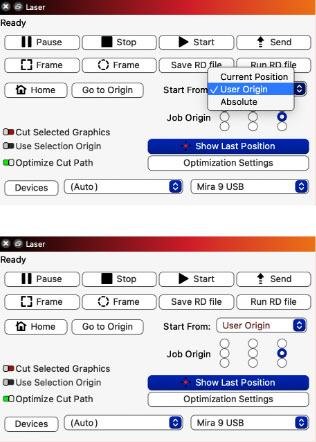
User Origin set to CENTER RIGHT
Load the Design
- Go to File>Import.
- Open your design. In this example we are using the Aeon Laser USA logo.
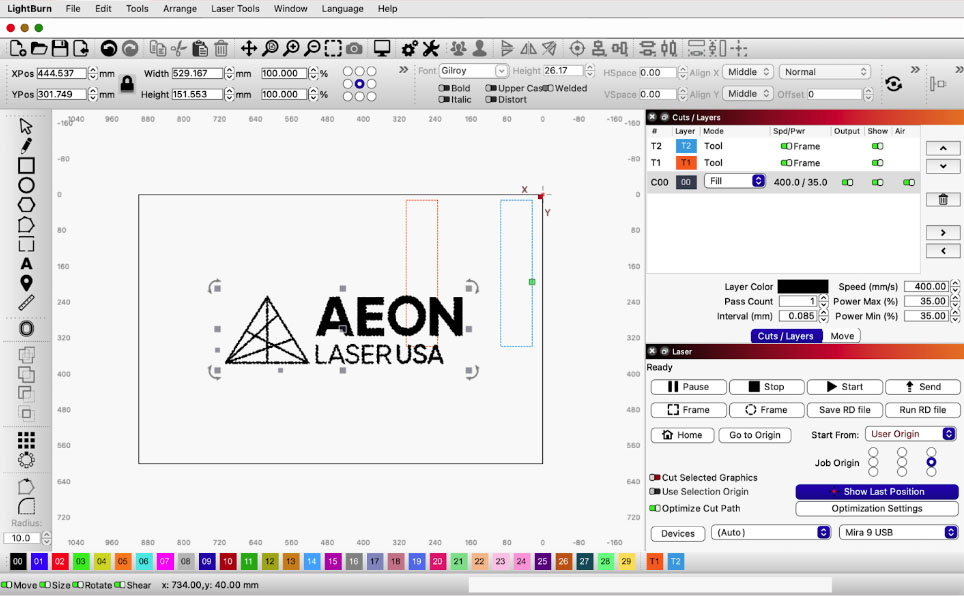
LightBurn with Aeon Laser USA logo - The toolpaths represent the area that can be engraved on the tumbler.
- Insert your artwork into the toolpaths.
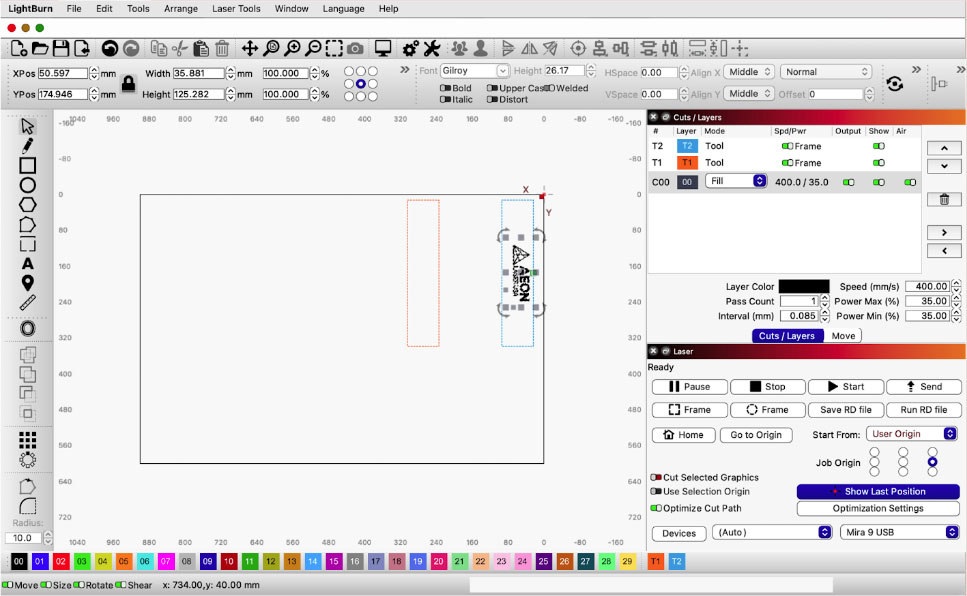
Artwork in the toolpaths 📌 Note: In most cases, you will need to rotate the design so that it correlates with the way the workpiece is positioned on the Multi-Roller. The green square on the toolpath will represent the rim of the tumbler.
- Scale it to the appropriate size using the Toolpaths as guides.
- If you are using a second piece of artwork, import it and rotate/size it.
- If you are using the same piece of artwork, duplicate it and place it in the second toolpath.
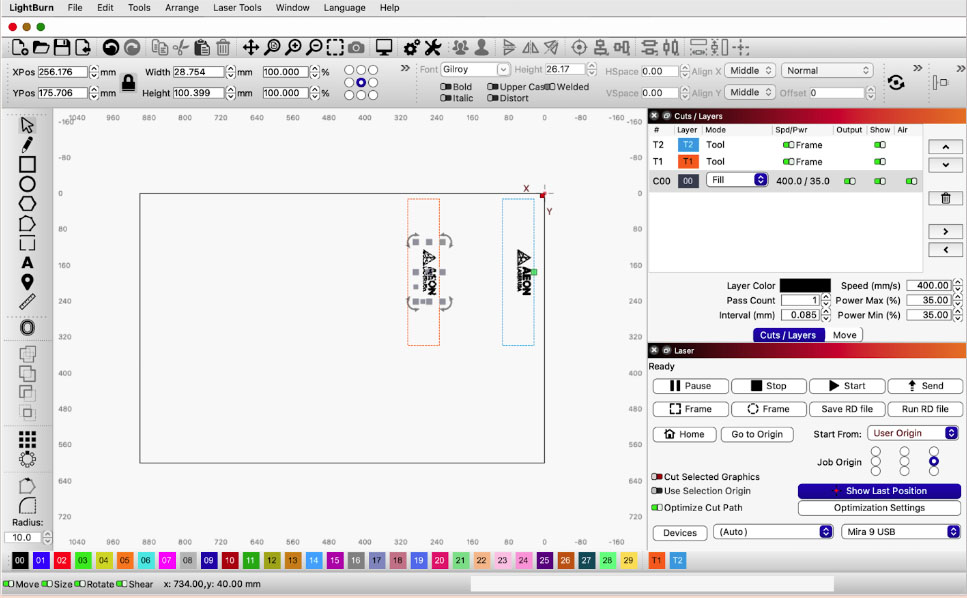
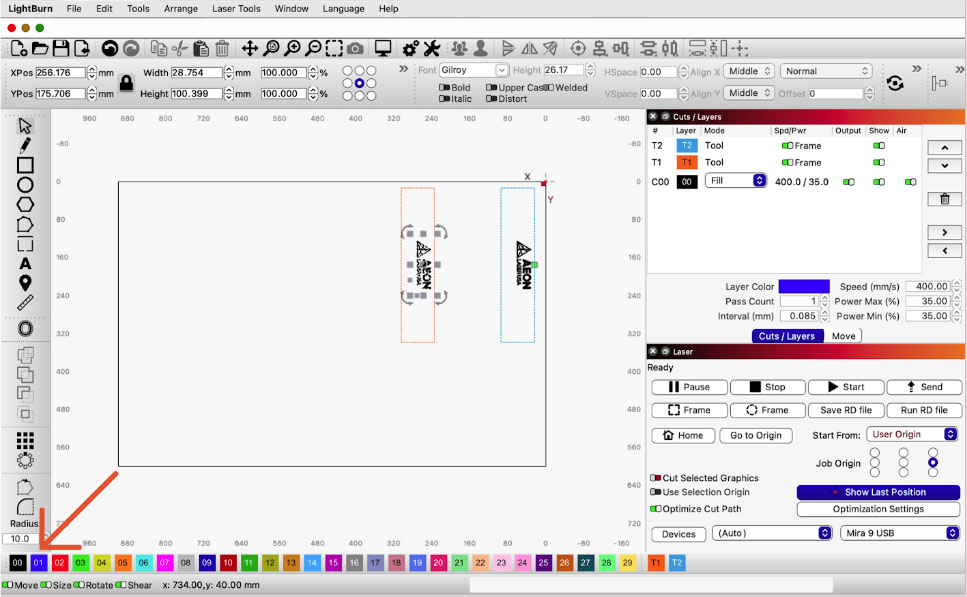
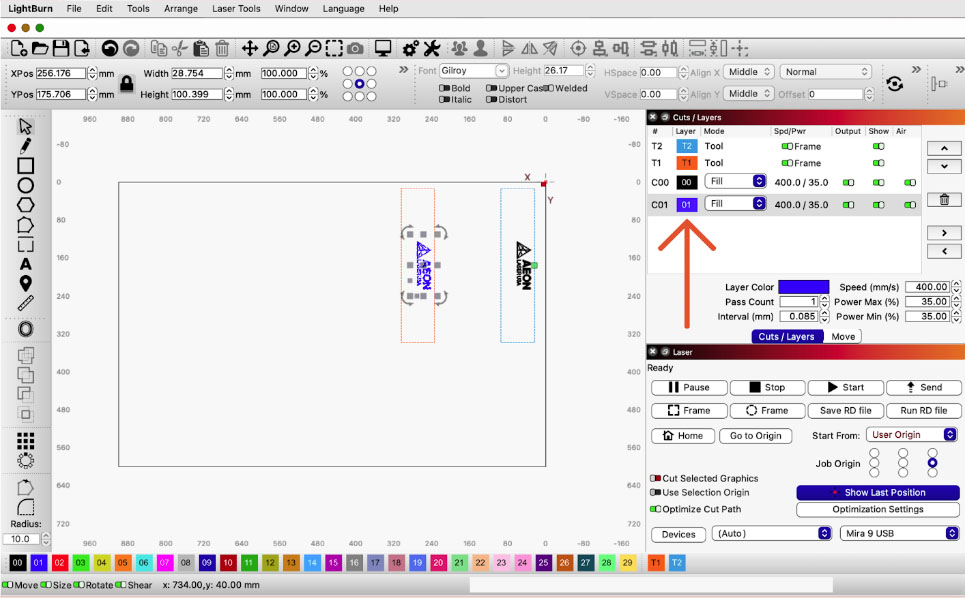
Duplicate artwork on the second toolpath - To ensure the fastest engraving speeds, select the artwork in the second toolpath and click on the CO1 (Blue) layer at the bottom of the window to create a second layer.
Create a second layer - In the Cuts/Layers window double click on a design layer to set the parameters.
Set the parameters in the Cuts/Layers window - For most engraving applications where the Fill mode is selected, a speed of 300-400 mm/sec is where you’ll achieve the utmost efficiency.
- The Power should be adjusted according to the material type and desired depth. The Lines Per Inch (LPI) on coated metals and glass should be kept as low as possible, so as to help dissipate unnecessary heat. Keep the LPI between 200-300 to achieve the utmost efficiency.
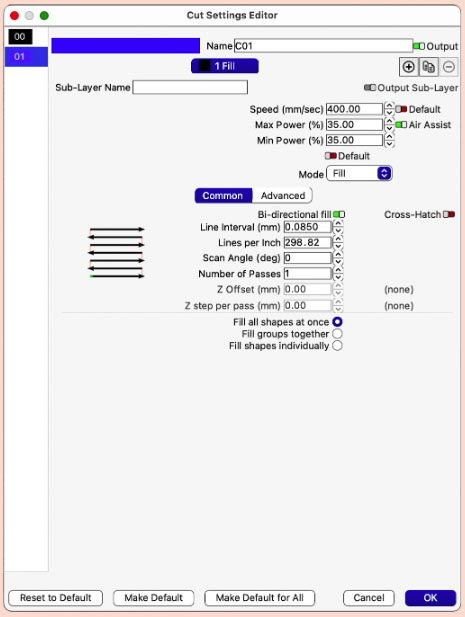
Cut Settings Editor 📌 Note on air source:- If using the internal air pump, ensure the Air Assist is toggled ON.
- If using an external air compressor with the 1st gen solenoid, set your regulator between 2-3 PSI.
- If using an external air compressor with the 2nd gen solenoid, ensure the Air Assist is toggled OFF.
- Click OK
- Repeat with the same settings in the second design layer.
Feeder Setup
- You will now need to tell LightBurn how many tumblers you will be running in the job. The number of tumblers you run per job will determine your next steps:
1 Tumbler
- Load the artwork into one toolpath.
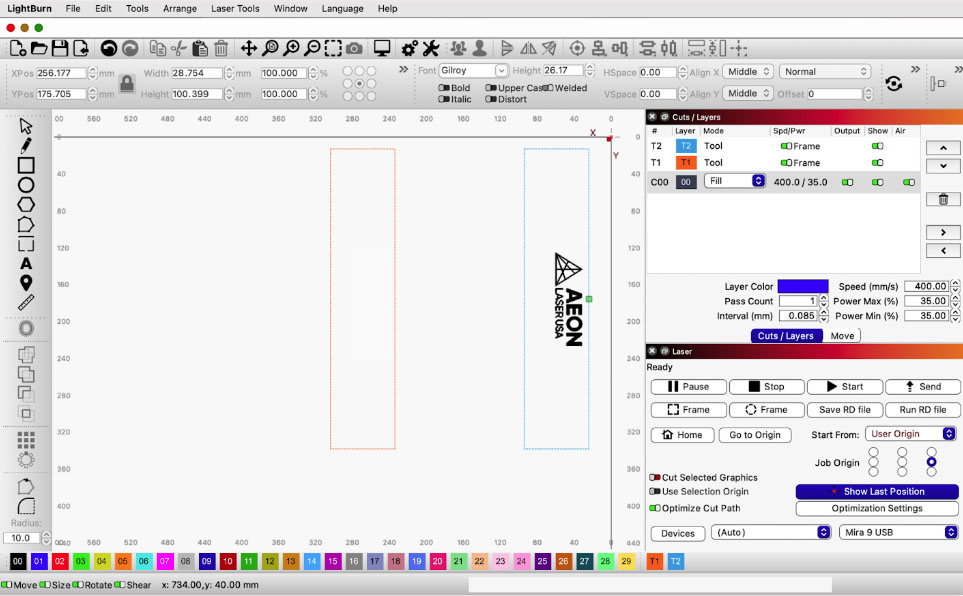
Loaded artwork - Load one tumbler onto the Multi-Roller.
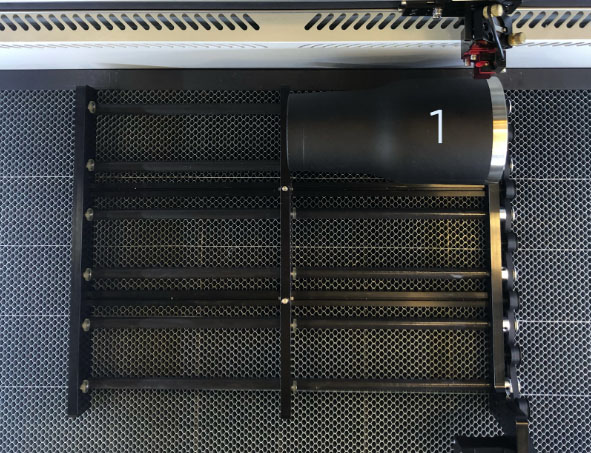
One tumbler loaded on Multi-Roller - Skip to Step 5 of Feeder Setup
2 Tumblers
- Load the artwork into two toolpaths
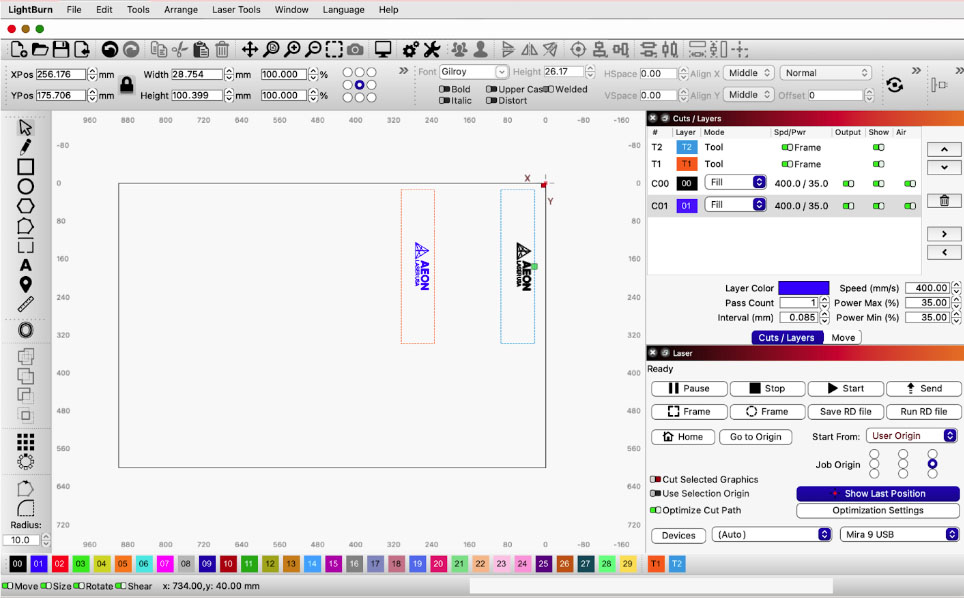
Artwork on two toolpaths - Load two tumblers onto the Multi-Roller.
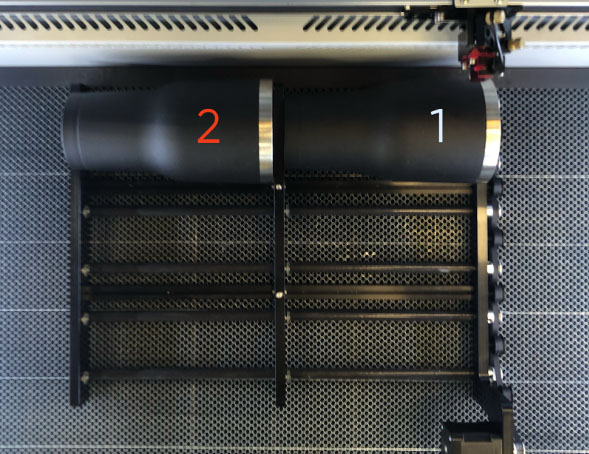
Two tumblers loaded on Multi-Roller - Skip to Step 5 of Feeder Setup
3 Tumblers
- Load the artwork into one toolpath.
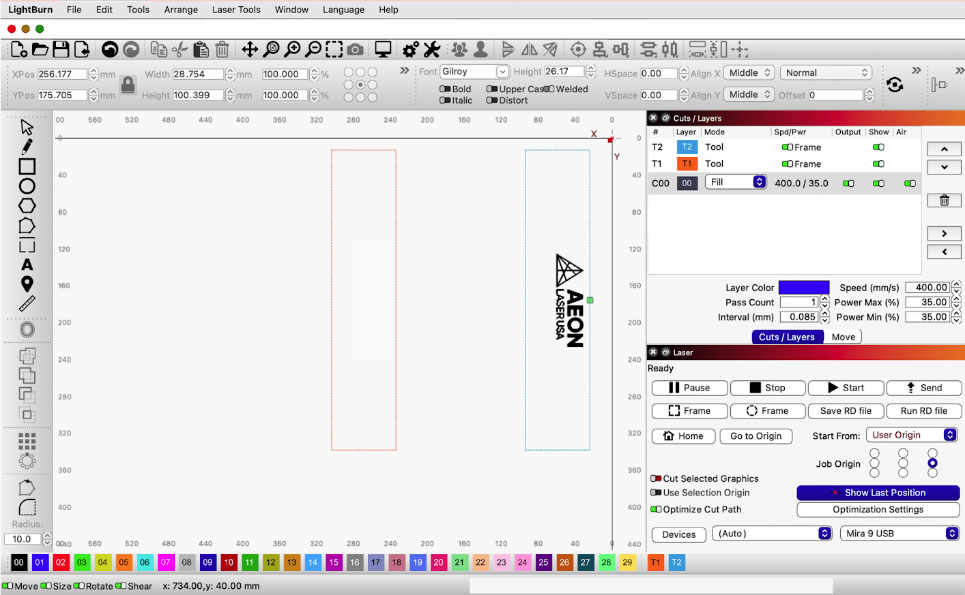
Artwork on one toolpath - Load the tumblers onto rollers on the right side of the Multi-Roller.
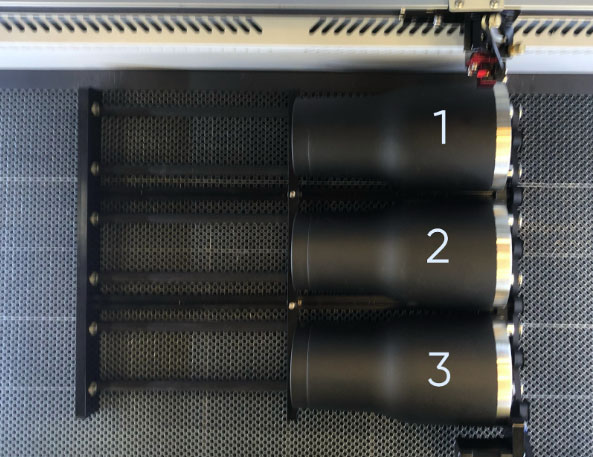
Three tumblers loaded on right side of Multi-Roller - Skip to Step 2 of Feeder Setup
4 Tumblers
- Load the artwork into two toolpaths.
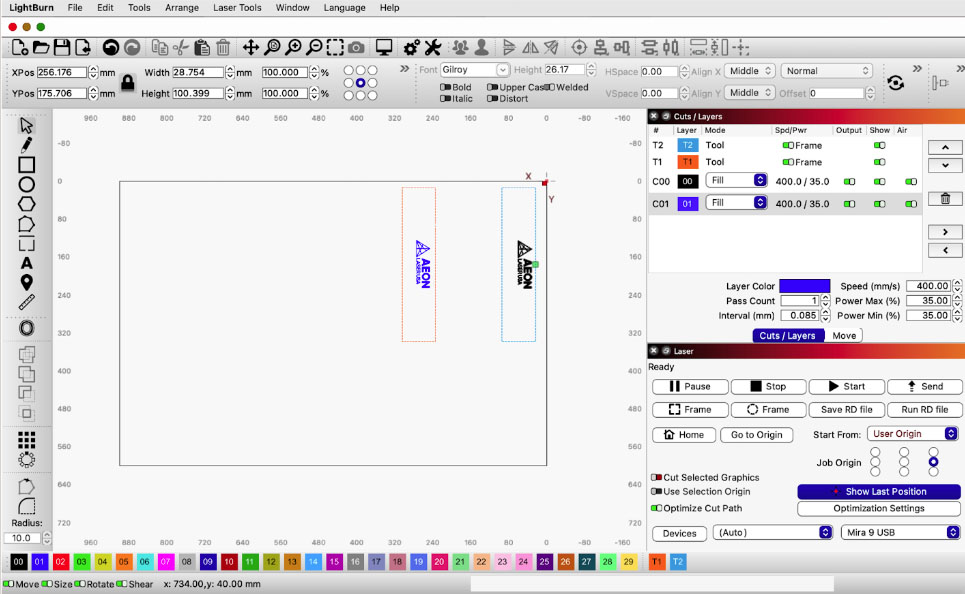
Artwork on one toolpath - Load the tumblers onto the Multi-Roller.
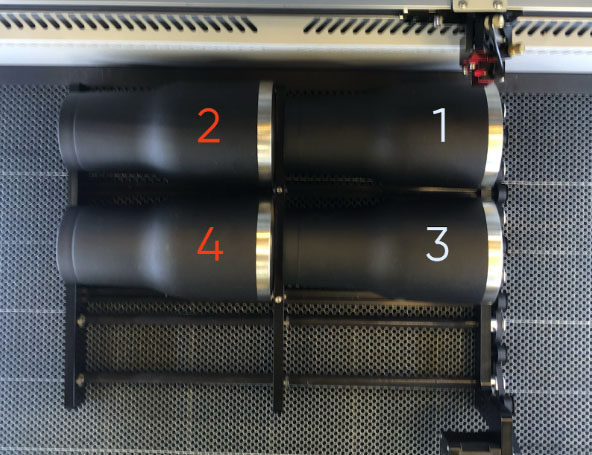
Four tumblers loaded on Multi-Roller - Skip to Step 2 of Feeder Setup
6 Tumblers
- Load the artwork into two toolpaths.
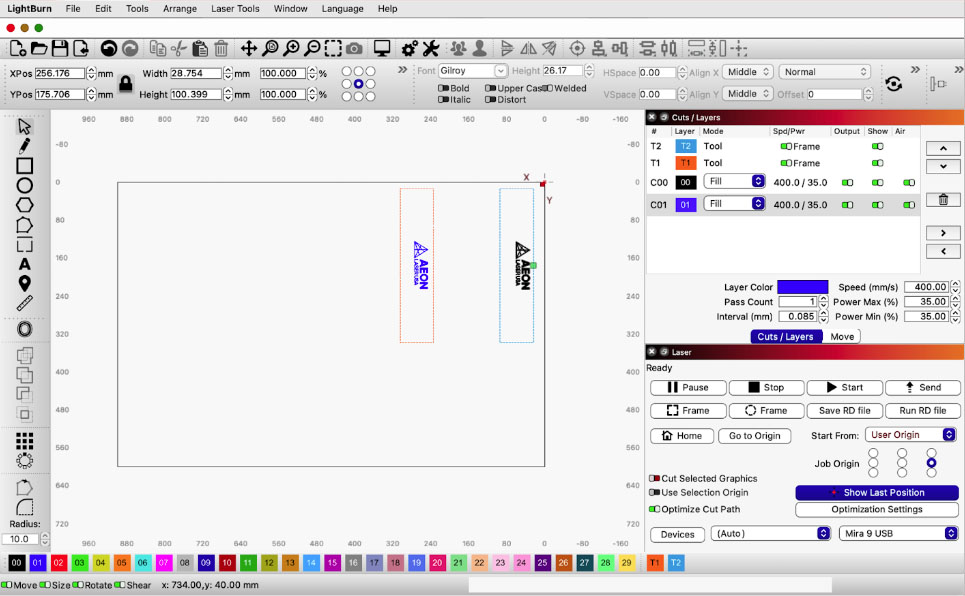
Artwork on one toolpath - Load the tumblers onto the Multi-Roller.
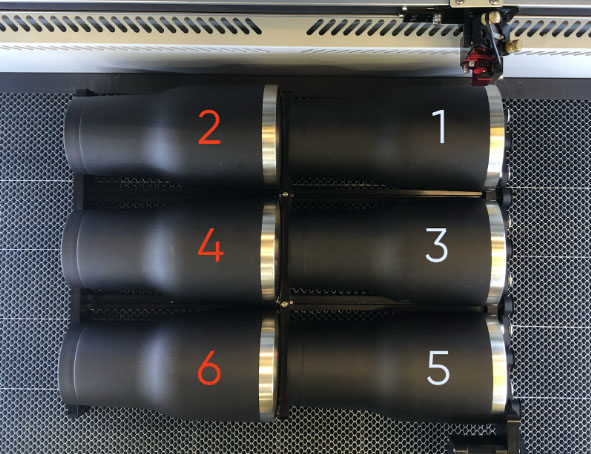
Six tumblers loaded on Multi-Roller - Continue to Step 2
- Load the artwork into one toolpath.
- To run the job on three, four, or all six tumblers, go to Laser Tools and select Feeder Setup.
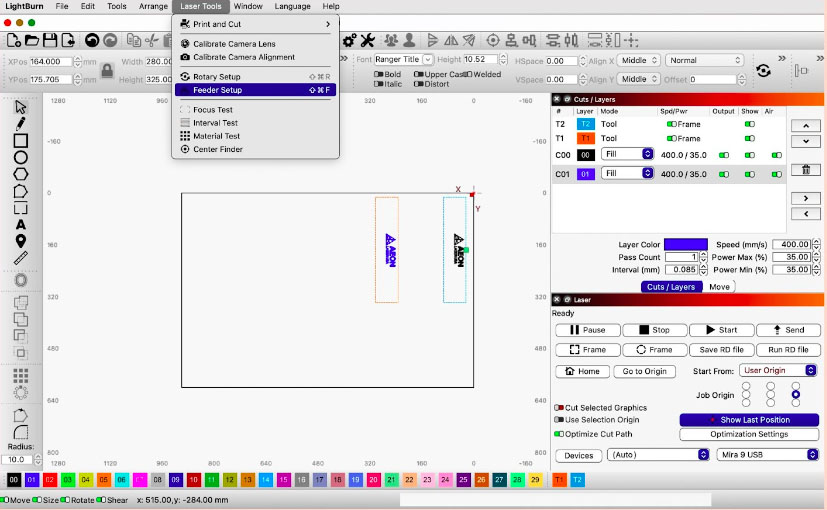
Laser Tools > Feeder Setup - In the Auto-Feed Settings, toggle the Enable Auto-feed to ON, Select Manual from the dropdown, adjust the distance to 240.00mm. Set the Repeat Count based on the number of tumblers you are running. Click OK.
3 Tumblers - Repeat Count: 3
4 Tumblers - Repeat Count: 2
6 Tumblers - Repeat Count: 3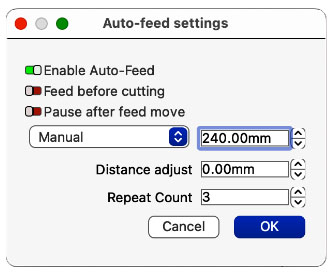
Auto-Feed Settings - Click OK
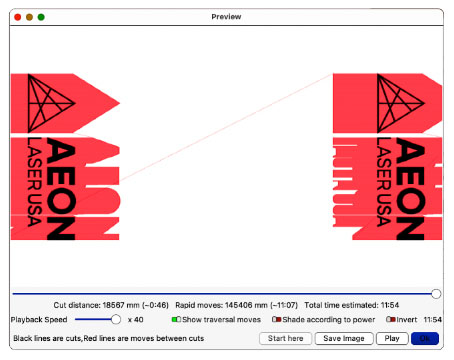
- Before sending the job to the machine, click Window>Preview, followed by the Play key.
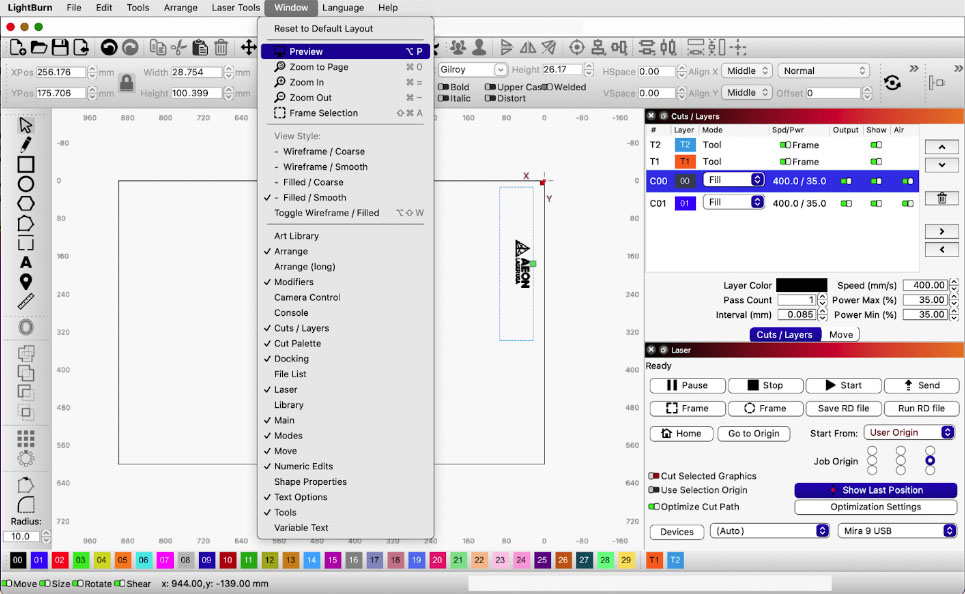
Window > Preview - Make sure the entire job sweeps from front to back of the machine (bottom to top of the screen) in one fluid motion. Click OK once confirmed.
Preview - Connect your computer to your machine.
- In the Laser Window, ensure you have a connection. It should say Ready.
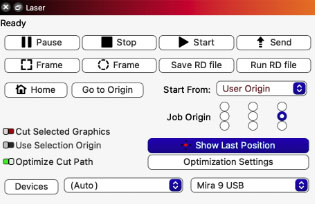
Laser Window 📌 Note: If it says Disconnected, make sure the laser is powered ON and connected to your computer via USB, Ethernet, or Wi-Fi. Then, reset the connection by right-clicking the Devices key in the Laser Window.
- Finally, click Send, name the file, and click OK. The job is now saved into the machine’s memory.
- Press File, followed by the DOWN arrow key to highlight the name of the job you wish to run, then press Enter to confirm.
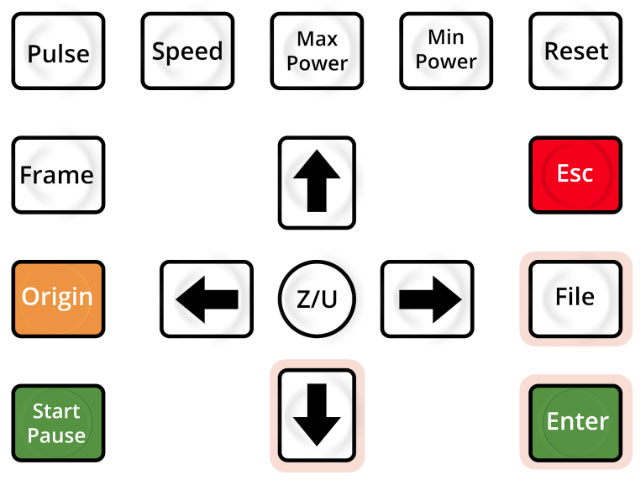
Keypad, File > DOWN > Enter 📌 Note: The job previews should now be displayed on the screen of the keypad and should be rotated to match the orientation of the workpiece on the Multi-Roller.
- Use the LEFT or RIGHT arrow keys to move the red pointer to the position on the workpiece, where you’d like for the center of your artwork to be.
- Press Origin to set the starting position.
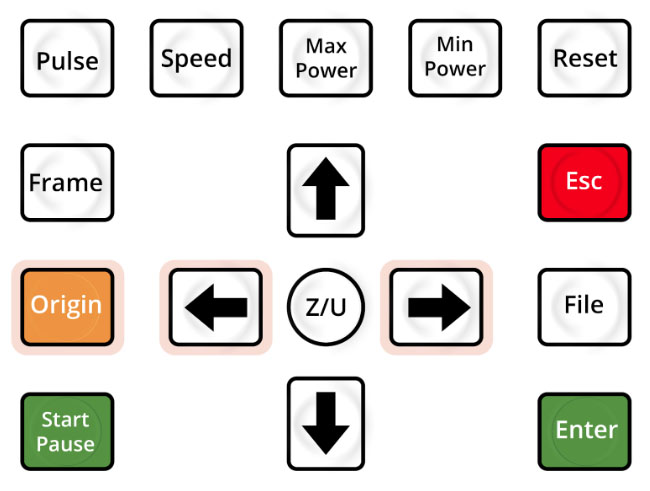
Keypad, ORIGIN and arrow keys 📌 Note: The Origin/Starting Position corresponds to where the Job Origin (little green square) is positioned in LightBurn. The center right radio button was used in the example and is best when using the Multi-Roller.
- Press Frame on the keypad to ensure the perimeter of the job is in agreement with the desired engraving location on the workpieces. If it’s not, adjust the Origin per the previous step, until the desired location is achieved.
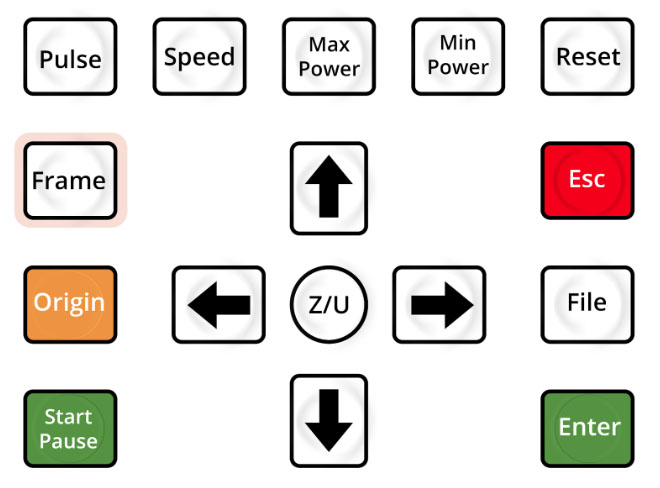
Keypad, FRAME 📌Note: Watch the rollers and the workpieces closely, as the laser head frames to ensure smooth transmission in all directions. If the workpieces wobble or slip at any point, reevaluate the way they are positioned on the rollers.
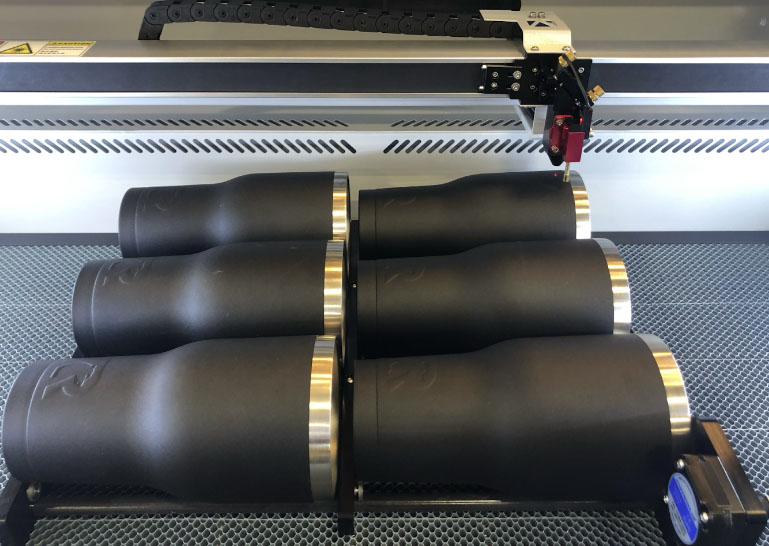
Six tumblers on Multi-Roller Y Slop Error
If you receive a Y Slop error on the keypad, press ESC to exit the error screen. Then, press ESC again so that the laser head returns to the center of the workpiece. Use the UP or DOWN arrow keys to jog the rollers back to the center of the Y axis.
The Y coordinate on the keypad should read the following (+/-5mm):
- 150mm for the MIRA5
- 225mm for the MIRA7
- 300mm for the MIRA9
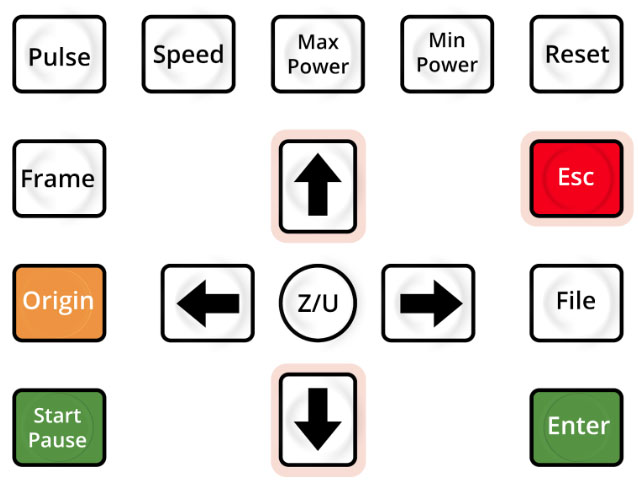
Keypad, ESC and arrow keys Press Origin to record the new starting position. Return to the previous step and attempt to Frame again.
Run the Job
- Close and lock the lower access door. Gently shut the lid, closing the power cord between the lower access door and the lid. Turn on the exhaust fan, and put on laser safety glasses.
- Press Start/Pause on the keypad and keep your finger resting on the button, in case you feel the need to Pause the operation.
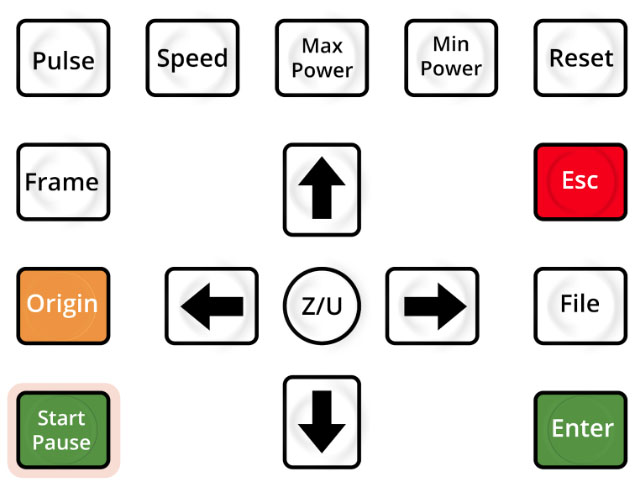
Keypad, Start/Pause ⚠️CAUTION ⚠️ In the event of a small flare up or a collision, Pause the job or press the Emergency Stop button and contact Customer Support.
- When the job is complete, use the LEFT or RIGHT arrow keys to jog the laser head out of the way. You can then remove the workpieces from the Multi-Roller, start with the piece on the left and then remove the piece on the right. .
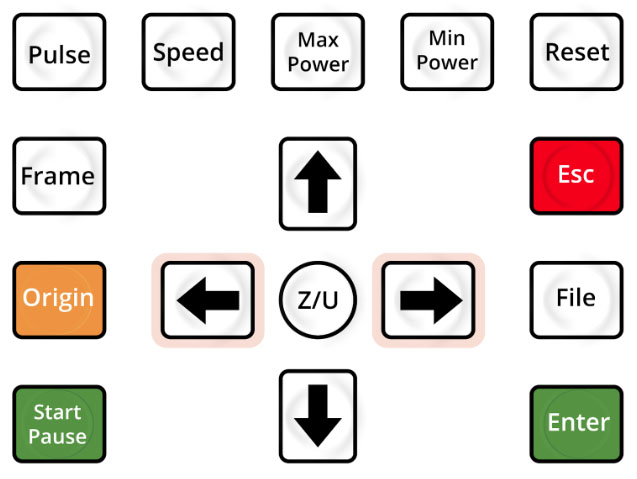
Keypad, LEFT or RIGHT arrow keys 📌 Note: Avoid moving the Multi-Roller if you wish to run another job on the same type of tumbler. If running the same file again, simply load the new workpieces onto the Multi-Roller and press Start. You will not need to reposition the laser head or the rollers. The previously set Origin will maintain the starting position until you decide to change it.
Returning to Flat Engraving
When you are done using the Multi-Roller, you will need to return your laser settings back to flat engraving, and remove the Multi-Roller from the machine bed.
- Plug the USB thumb drive that came with your laser back into an empty USB port on your computer.
- In the Laser Window, ensure that you have a connection. It should say Ready. If it says Disconnected, make sure the laser is powered ON and connected to your computer via USB, Ethernet, or Wi-Fi. Then, reset the connection by right-clicking the Devices button in the Laser Window.
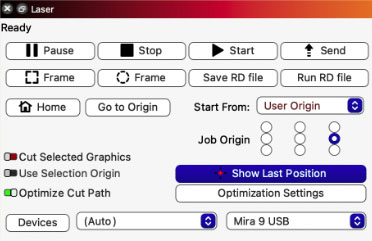
Laser Window - In LightBurn, go to Edit > Machine Settings, and then click Load.
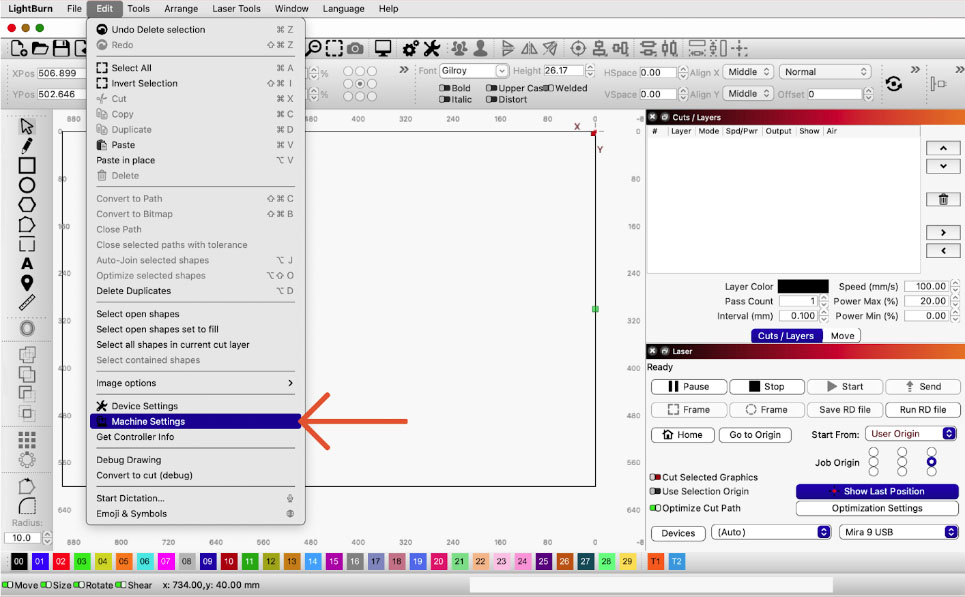
Edit > Machine Settings > Load - Navigate to the Rotary Settings folder of the USB thumb drive and select the file labeled “Flat Settings.lbset”. Click Open. Click Write. Click OK.
⚠️CAUTION ⚠️ Never turn off the laser prior to returning to the Flat Settings. Doing so will make it impossible for the laser to initialize correctly upon start up, which will result in an extremely slow initialization sequence and a limited range of motion along the Y axis. If this happens, simply press ESC on the keypad during the initialization sequence and follow the previous steps.
- Go to Laser Tools and select Feeder Setup
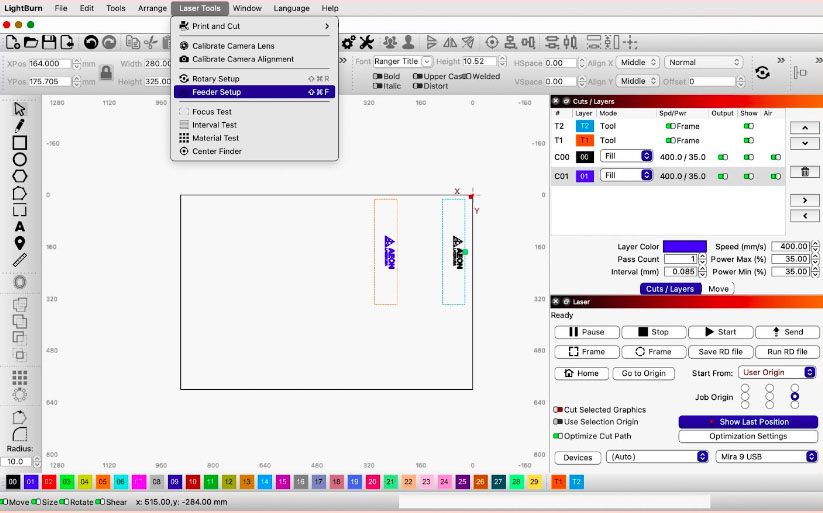
Feeder Setup - In the Auto-Feed Settings, toggle the Enable Auto-feed to OFF. Click OK.
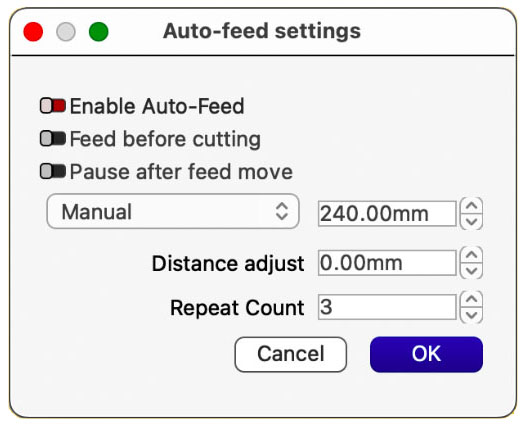
Auto Feed Settings - Unplug the Multi-Roller from the Rotary Port in the right cabinet.
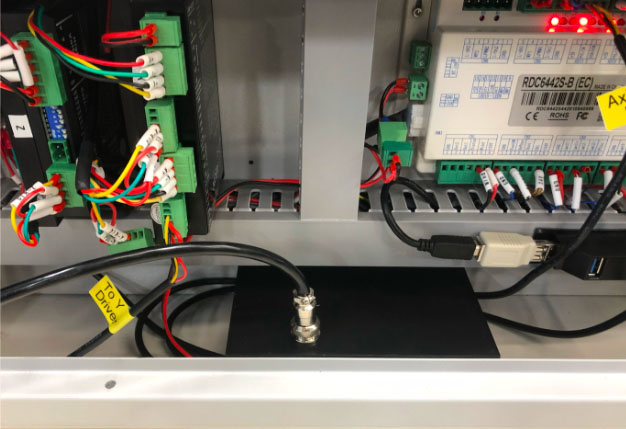
Unplug the Multi-Roller from the Rotary Port - Remove the Multi-Roller from the laser bed.
- Close and lock the side cabinet.
- If you are done using your laser, you can now turn it OFF. If you’d like to continue working, simply press Reset on the keypad.
⚠️CAUTION ⚠️ Always ensure that the laser head is not on a collision course with your workpiece or the Multi-Roller prior to pressing Reset. Not doing so can result in a collision, which may knock your laser head and Mirror 3 out of alignment.
Happy Lasering! 😊


