-

Getting Started 16
-

Maintenance 14
-

Troubleshooting 14
-

Repair 8
-

Laser 101 3
-

Materials 10
-

Accessories 20
-

Multi-Roller 7
-

LightBurn 9
Engraving Raster Images


Overview
What you will learn
In this guide, you will learn how to identify a raster image and important things to consider when trying to engrave a photorealistic image with your laser.
When to do this
This guide can be used as a reference for the basics when it comes to photo engraving technique.
What you need
- Computer with LightBurn
- Image(s) to Engrave
- Material to Engrave
NOTE: This guide was created with more advanced users of LightBurn and the machine in mind. The basic features and locations of tools and functions will be assumed to be known. If you are unfamiliar with LightBurn in general, check out the LightBurn website for additional information. You can also reference our AEON Laser Knowledge Base article on LightBurn Basics. For more information on the machine in general, see our AEON Laser Knowledge Base.
Video
What is a Raster Image?
A raster image, also known as a bitmap, is a type of digital image that is composed of a grid or matrix of individual pixels. Each pixel in a raster image is assigned a specific color, and together, they form the visual representation of the image. The term "raster" refers to the grid or matrix structure used to organize and display the pixels. The common file formats are JPEG and PNG, among others, but JPGs and PNGs are what you will most commonly see in the context of trying to engrave an image.
Raster images are resolution dependent, meaning that their quality can be affected when resized. Enlarging a raster image can result in a loss of sharpness and detail, while reducing its size may lead to a loss of information.
Picking an Image
The first step is to choose an image you wish to engrave. An important thing to consider when choosing an image is to decide if the image can be simply converted into a vector in LightBurn.
For example, an image like the one below could be run in its raster form, but the results would be better if it was converted into a vector before sending it to the machine. Converting the image will give the standard settings options in the “Cuts/Layers” window as well, and the file can be run as it normally would. See more information on LightBurn's trace feature for how to best convert a raster image such as this:

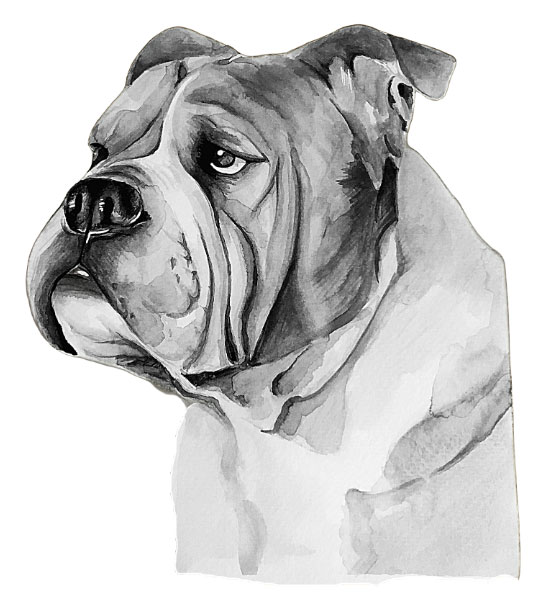
Another important thing to consider is the image quality. Having a good quality, high resolution image will make a world of a difference when trying to engrave it. Essentially, the higher quality the photo is, the easier it is for the software to create shading and depth to the image; this is called dithering. If an image is poorly lit, out of focus, etc. it will naturally not engrave well because it will not dither well. Starting with a low quality product will lead to getting a low quality engrave. An example of an image that would not engrave well is this:

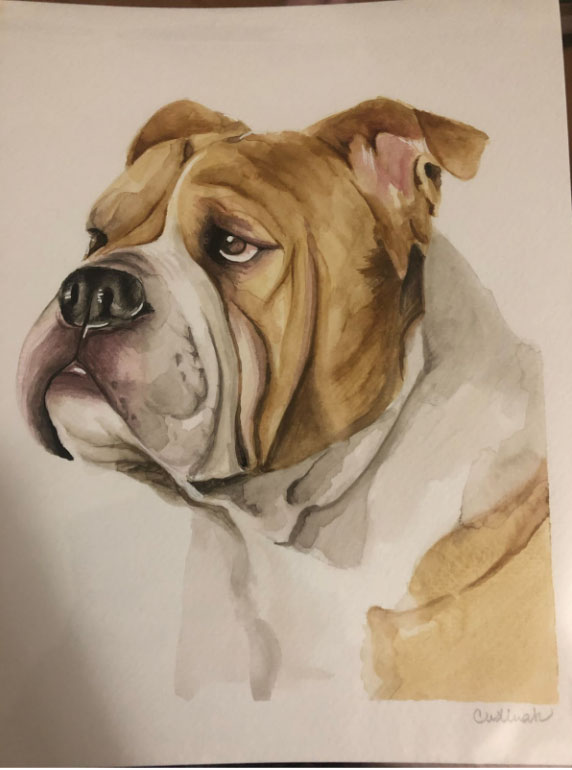
An image like the example below would be better off running in its raster form and the picture quality should lead to a good result. Capturing things like fine detail, subtle shadows, etc. are better run without tracing the image. The quality of the image is good and the photo is in focus.
Initial Editing
Once a suitable image is found, it needs to be processed. LightBurn has an integrated feature to do this and the process can be entirely done within LightBurn. Oftentimes it is easier and better results can be achieved by processing your image through an external image editing software like Photoshop. For this guide, the editing of the image was done entirely on the phone the picture was taken on.
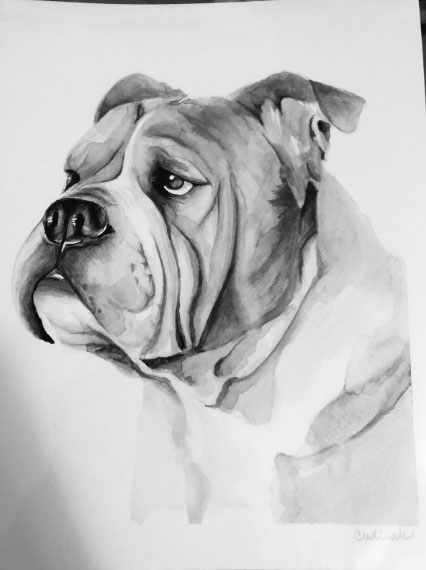
Firstly, the photo must be changed to a grayscale; LightBurn will import the image this way regardless.
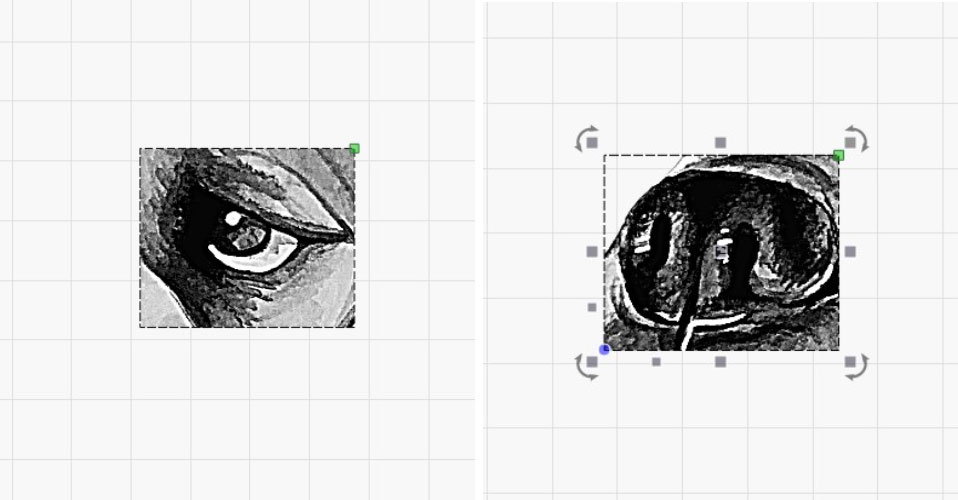
Once changed to grayscale, the image should then be cropped as desired. The more background that can be removed from the image, the better. Leaving excess background in the image will increase overall job time, and detail can be lost when engraving due to the overall color balance of the image changing. Many modern image editing softwares have features that will precisely trace the outline of the portion of the image you want. See the example below of the background cut out (left) vs. background left in (right):
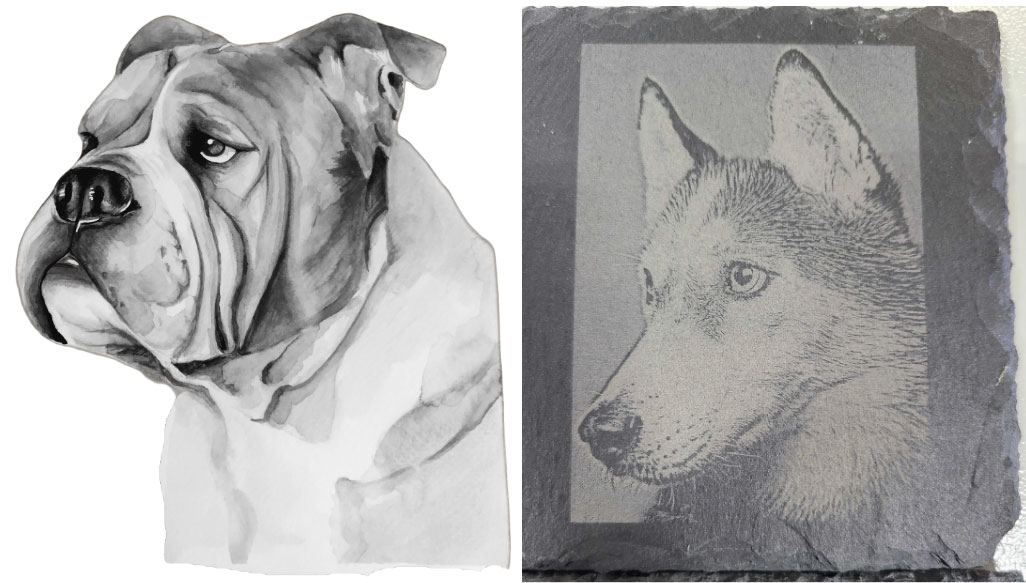
The background of the image will be included in the engraving if it is not removed. If you want the background in the image, it is OK to leave it there as well. Settings will need to be fine tuned to get the full image to engrave properly.
Photo editing is an overall visual process that is entirely subjective to the user when determining what values look best. Manipulate the following settings to find out what looks best for you:
- Contrast
- Brightness
- Gamma
- Sharpness
Further components like highlights, shadows, tone, etc. can all be adjusted to achieve the desired result as well. The four main settings listed above will make the most significant differences to the image. The goal is to have the image look as crisp as possible, with solid contrast and definition from light to dark areas.
Once initial editing is complete, the image should be saved and imported into LightBurn.
LightBurn File Creation
Import the edited image to LightBurn, and open the “Adjust Image” menu.

There are a few things to look at in this window. All major controls will be at the bottom of the window.

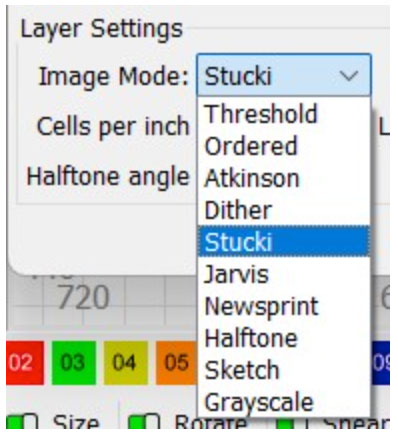
- Image Mode
- There are several different modes available, each with their own use case. You can experiment with the different modes and select what results look best to you. The most commonly used modes are "Stucki" and "Jarvis". These modes will be most likely to produce a replica of the imported image. Stucki was used for this guide.
- Negative Image and DPI
- Changing the image to a negative is dependent on the result desired and on the material used. For example, if the image were to be engraved on a material that darkens when lasered, such as wood, it's likely that the image wouldn't need to be converted into a negative. This is because the dark and light highlights would appear in the correct positions after engraving.
If the material would turn lighter than its original color, like slate, making the image negative will cause the result to have dark and light highlights in the proper areas. For this guide, we used slate as the material. The image was made negative as a result.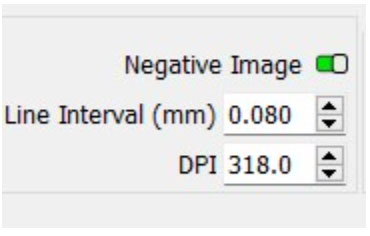
- DPI will depend heavily on the material used and the desired finish of the final result. It is best to manually run tests with different DPIs to see what works best for you. We used a DPI of 318 for this guide.
- Changing the image to a negative is dependent on the result desired and on the material used. For example, if the image were to be engraved on a material that darkens when lasered, such as wood, it's likely that the image wouldn't need to be converted into a negative. This is because the dark and light highlights would appear in the correct positions after engraving.
- Contrast, Brightness, and Gamma all act the same as they would in any image editing software.
- Enhance Radius and Enhance Amount
Enhance Radius and Enhance Amount work in conjunction to sharpen any edges in the image. 'Amount' is the strength of the enhancement, and 'Radius' controls the area of the effect. See the example images below, as this setting is better understood by visual inspection.
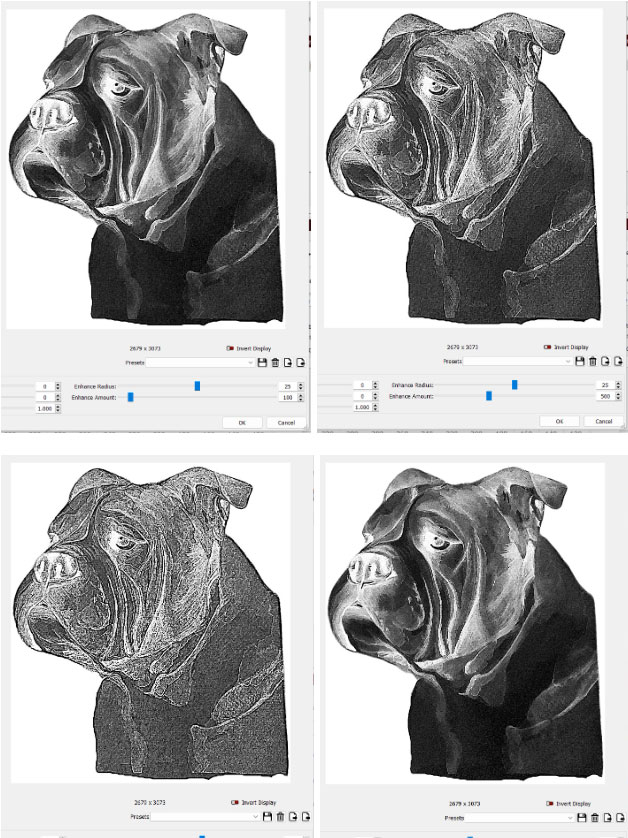
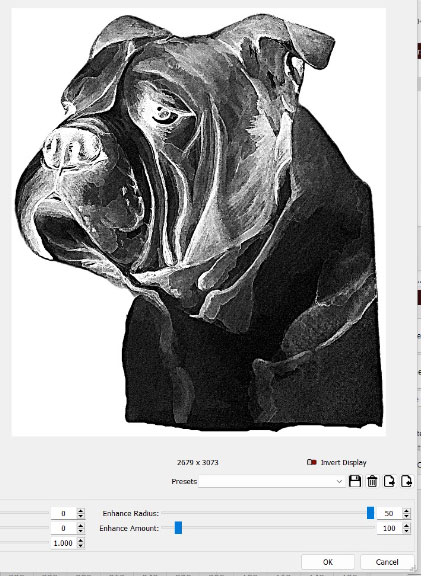
Manipulate these settings to see what works best for you. For this guide, a radius setting of 25 and an amount setting of 100 were used.
File Settings
The settings for the file will depend on material, tube wattage, etc. Run tests of the file to see how it will come out with various settings on a scrap piece of material. The material used here was slate, a 60W CO2 tube was used to engrave, and the settings used for this guide can be seen below:
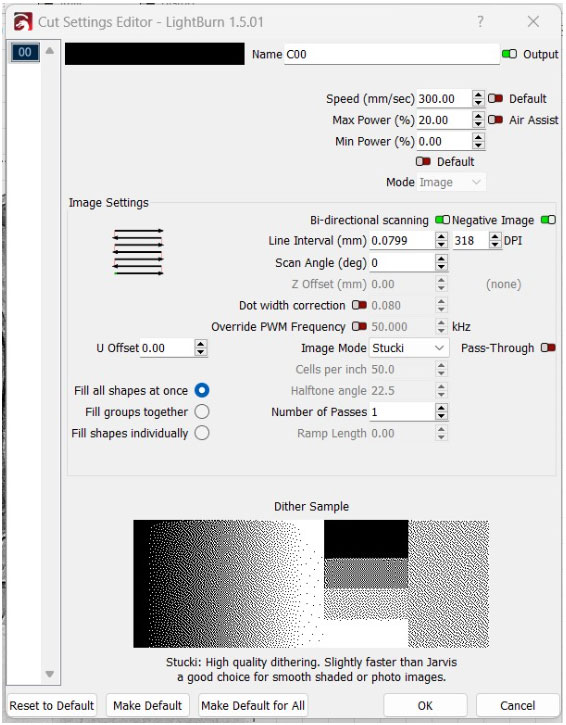
In this example, the most important factors to take note of are speed and power settings. We kept both our speed and power on the lower end of the spectrum. We also have a large difference between our minimum and maximum power settings.
Having a large gradient in the power allows for the machine to add shading to the image. Less densely dotted areas will engrave with less energy, whereas densely dotted areas will receive more energy. For our file on slate, that will make engraved areas turn nice and light, and non engraved areas will stay the untouched dark slate color.
When trying to test your settings, there are two main methods for testing.
- Shrink the entire image and run a small-scale version:
- This will create a miniaturized version of the entire job on a small scale, with which the final results can be analyzed. Be cautious using this method, however. Remember earlier in the guide when we discussed how the quality of a raster image depends on its size? Shrinking the entire image effectively increases the DPI. This means that areas which would receive less engraving at the final product's scale will get more energy when the full image is reduced. Keep this in mind when testing on a scaled-down version of the image, as you may need to adjust the power or other settings accordingly.
- Run a small portion of the image at full scale:
- This will display a small section of the file at its final scale. The dot density will remain consistent, giving the entire image a similar appearance to the test piece. However, the drawback of this approach is the challenge of selecting a portion of the image that accurately represents the full range of dot densities found throughout the entire image. Consequently, while a setting may appear satisfactory to the eye, certain areas like the nose might end up too dark and get washed out in the final product.
Run the Job
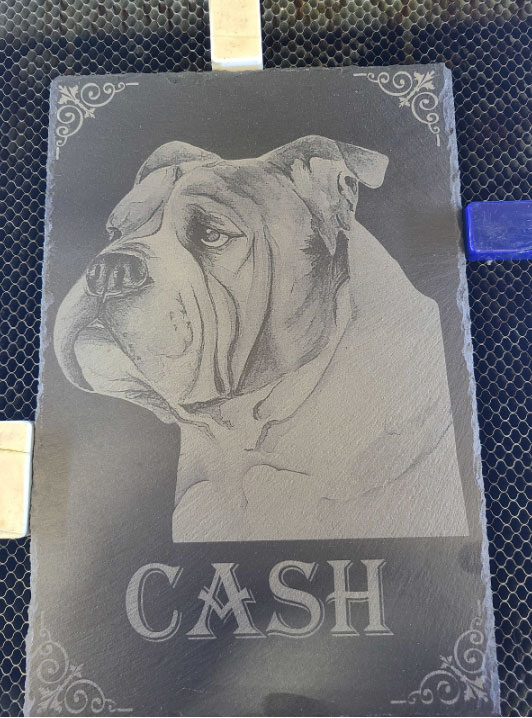
Once the file is created, tests have been conducted, and all preparations are complete, the final step is to execute the file! There's typically no need to adjust the machine setup; simply concentrate on positioning the material in the center and origin/frame as usual. If all goes according to plan, the outcome should resemble something like this:
That's really all there is to it. Getting the hang of the process and learning what each settings change looks like on the material does take some time to learn, but if you are patient, the results of the hard work will be well worth it.
If you have any questions or concerns, please send us an email at support@aeonlaser.us for the fastest service. If your laser is malfunctioning, please submit a support ticket.
Did you find this document helpful? Let us know what you liked or what we can improve on by sending an email to helpusgrow@aeonlaser.us.
Happy Lasering!


