-

Getting Started 16
-

Maintenance 14
-

Troubleshooting 14
-

Repair 8
-

Laser 101 3
-

Materials 10
-

Accessories 20
-

Multi-Roller 7
-

LightBurn 9
Removing the Internal Chiller MIRA7


Overview
What you will learn
How to remove the Internal Chiller on the MIRA7 laser.
When to do this?
To prevent water damage, you will need remove the chiller if you need to turn the machine on its side, in order to move through stairways, hallways and doorways.
What you need:
- Phillips Head Screw Driver
- Masking Tape
- Towel
- Wire Cutters/Scissors
- Bucket
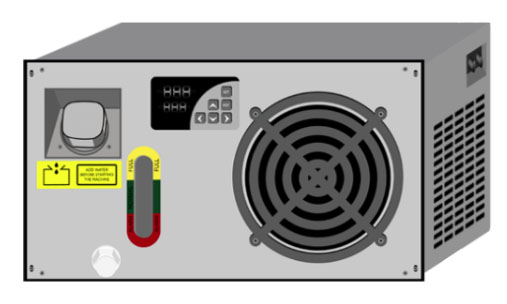
What is the chiller?
Video
Steps
☠️ WARNING ☠️ Turn off and unplug your machine before starting
⚠️CAUTION ⚠️ Drain the chiller completely prior to removal.
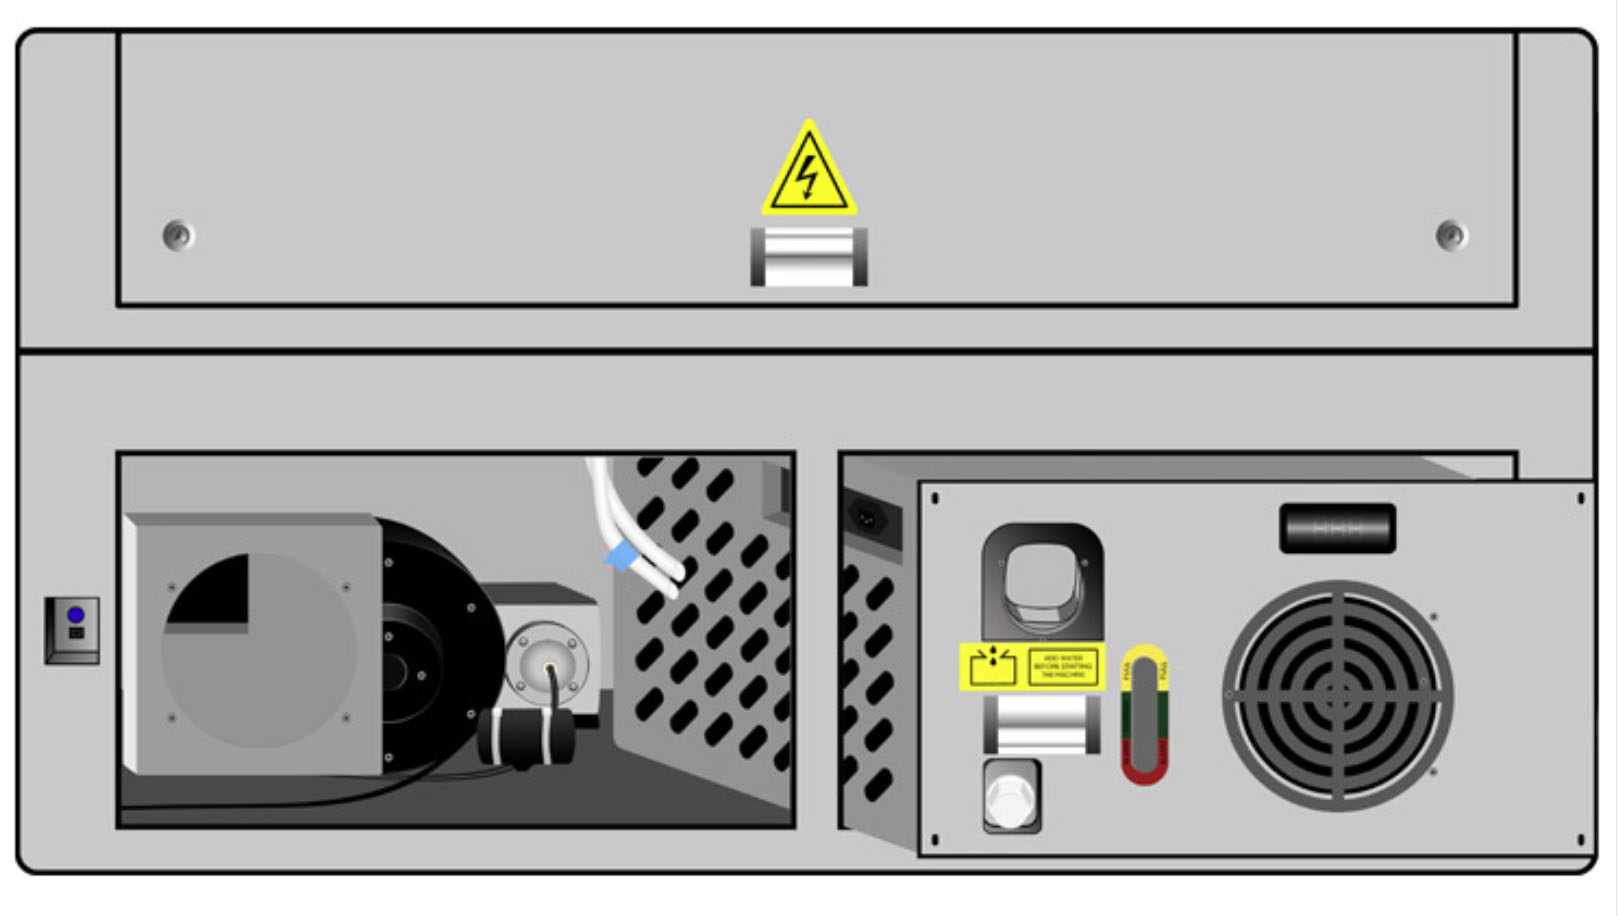
- Using a Phillips head screwdriver, remove the 4 screws to open the exhaust system access panel on the back of the machine.
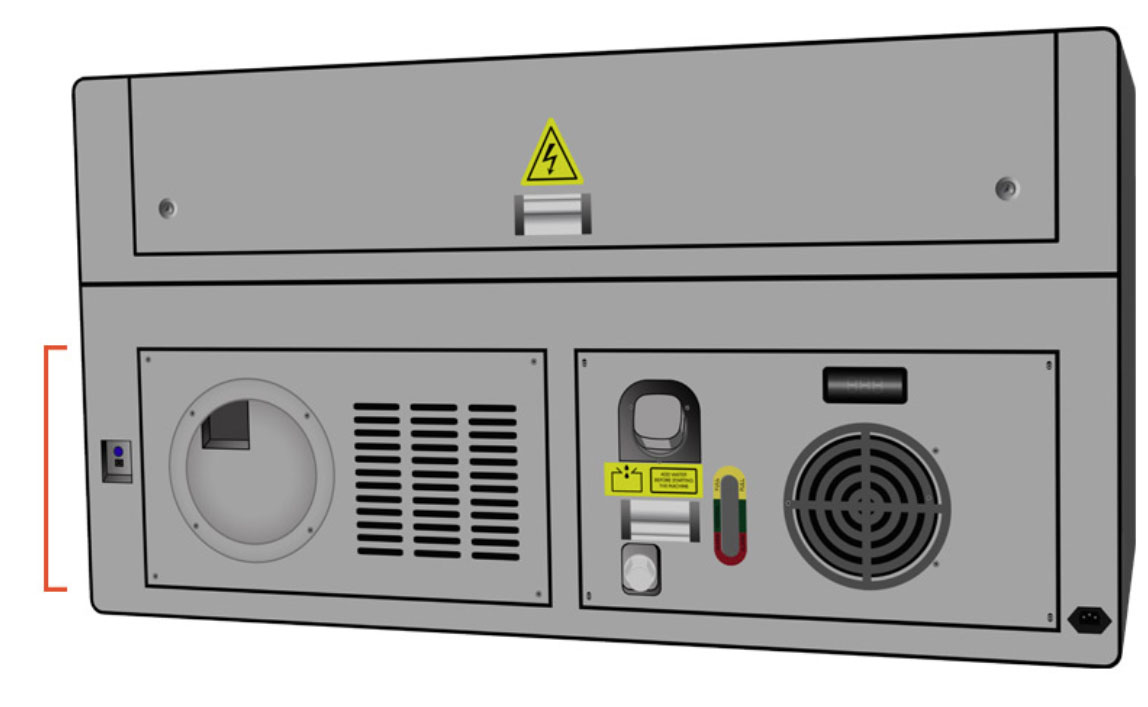
Back of laser, remove 4 screws on bottom left panel 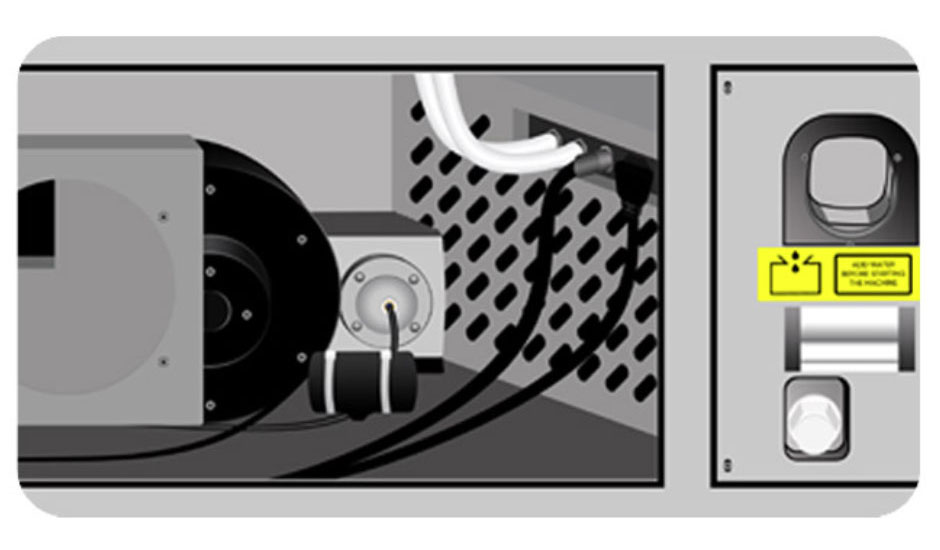
Back of laser, bottom left panel is open - Locate the side of the chiller: the power plug, signal wire, and 2 silicone hoses that connect the chiller inlet and the chiller outlet.
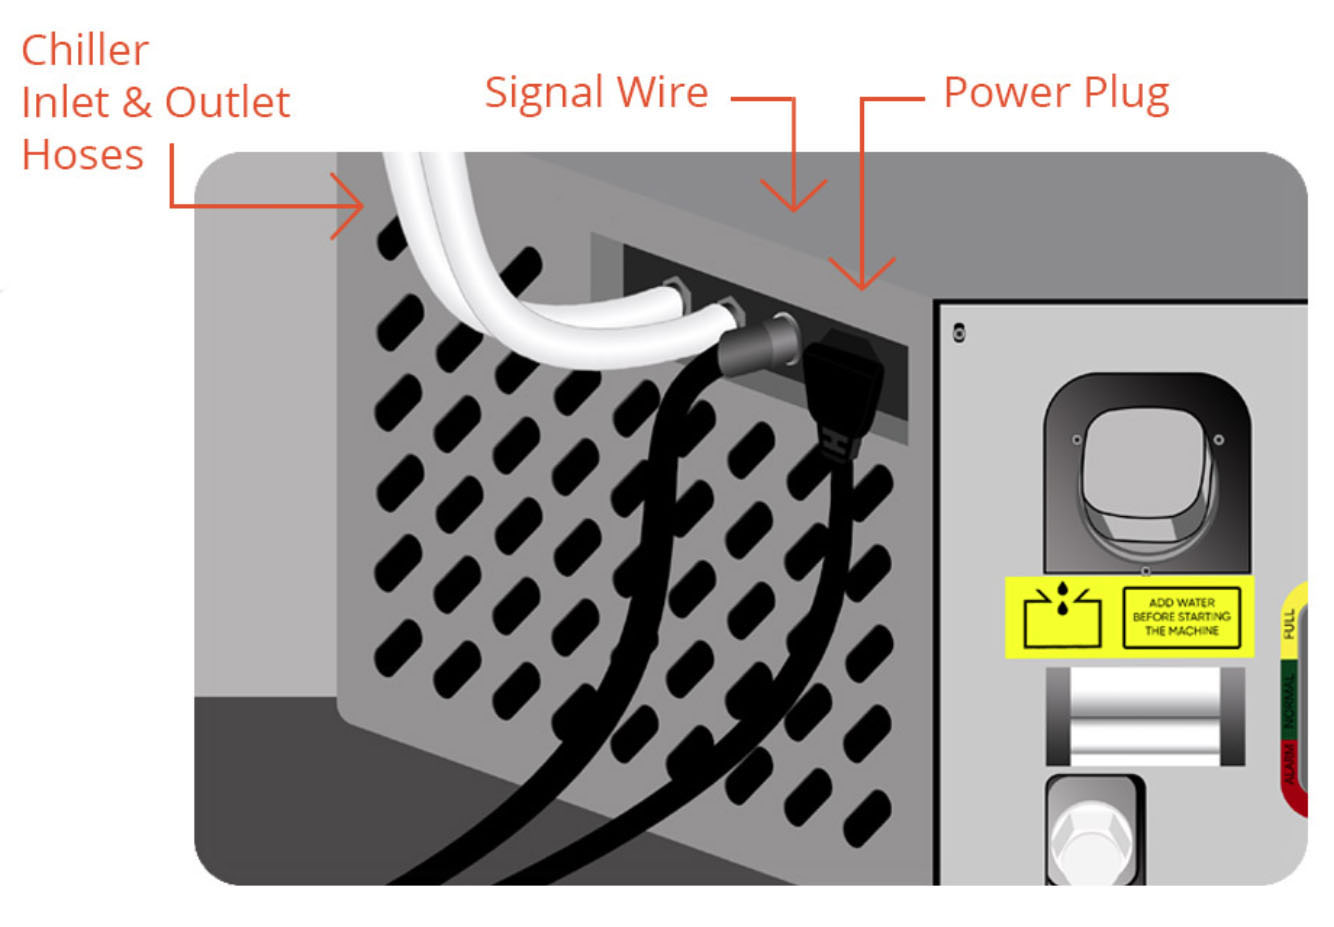
Power plug, signal wire, and 2 silicone hoses - Unplug the power plug from the chiller by gently pulling it out. Remove the signal wire from the chiller by unscrewing its retaining ring and then pulling it out.
- Wrap a piece of masking tape around one of the hoses, and place a second piece of tape on the side of the chiller that the hose is connected to.
This will indicate which fitting that hose connects to and ensure that both hoses get reconnected properly.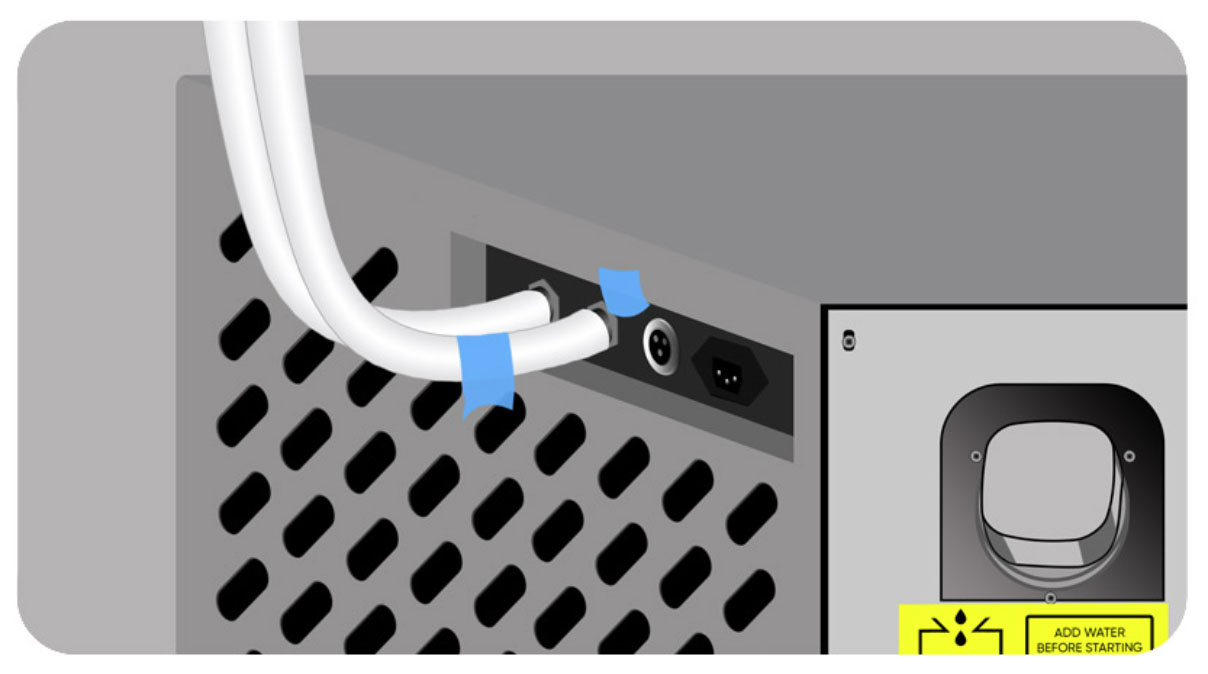
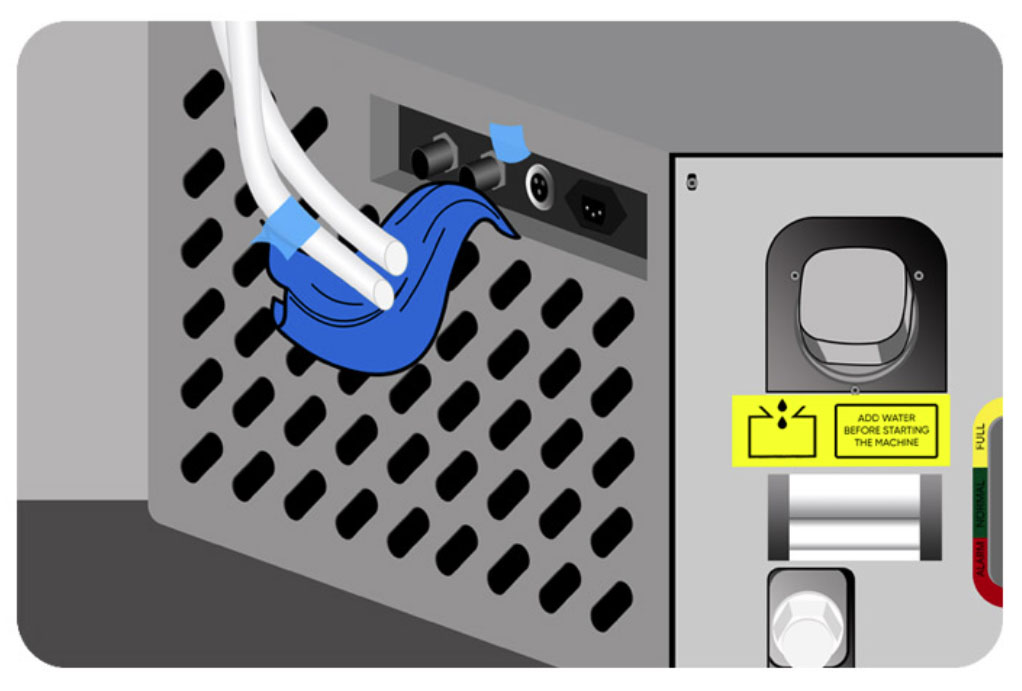
Piece of masking tape around one of the hoses, second piece of tape on the side of the chiller - Using a pair of small wire cutters, clip the zip ties that connect the hoses to the chiller.
⚠️CAUTION ⚠️ Do this at the CHILLER end of the hoses, NOT the MACHINE end.
- Gently pull the hoses off of the chiller inlet and outlet. Have a towel or bucket ready to catch any water spillage.
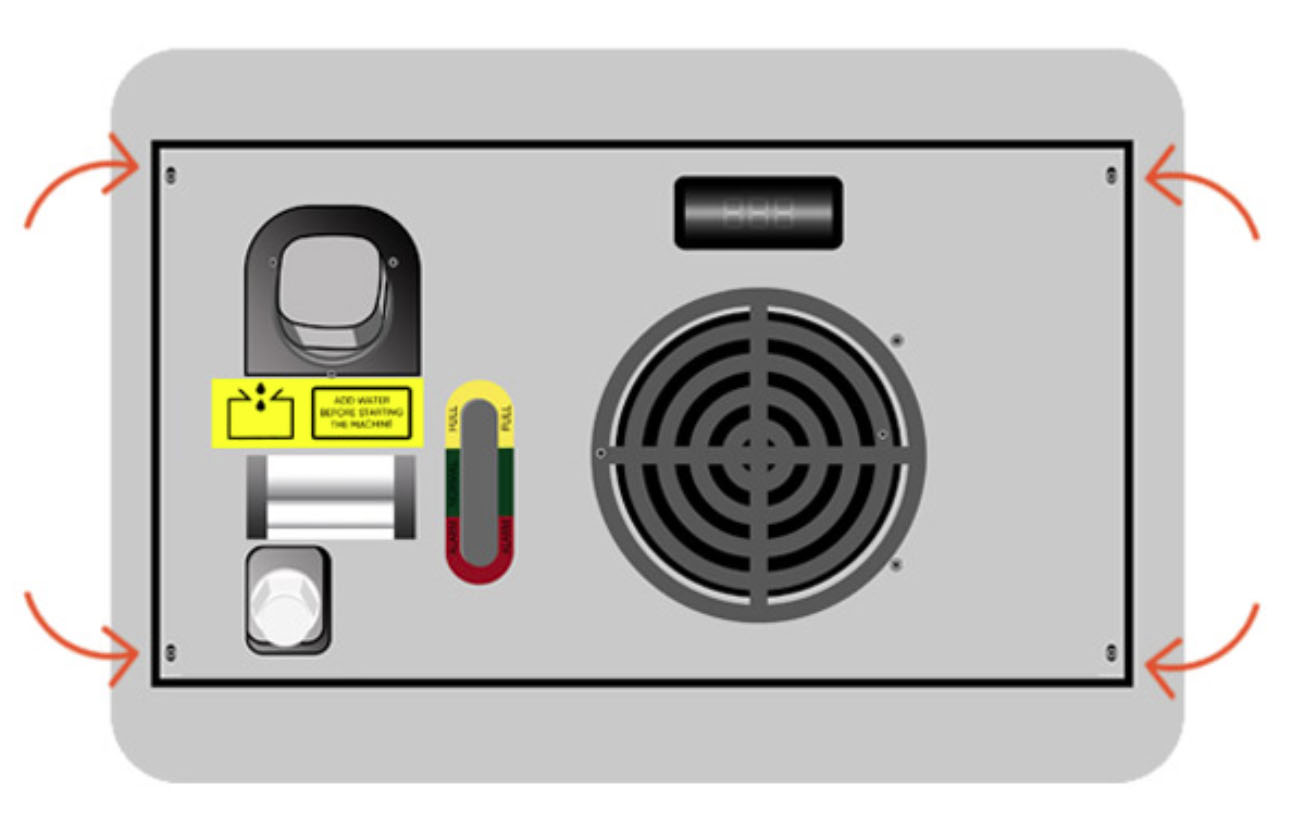
Hoses removed from the chiller inlet and outlet - Remove the 4 Phillips head screws that hold the chiller into the machine; one on each corner of the chiller’s rear panel.
Four screws that hold the chiller into the machine - Gently slide the chiller from the machine. Use the open side panel to carefully move the chiller out of the back of the machine.
Chiller sliding out from the machine


