-

Getting Started 16
-

Maintenance 14
-

Troubleshooting 14
-

Repair 8
-

Laser 101 3
-

Materials 10
-

Accessories 20
-

Multi-Roller 7
-

LightBurn 9
Install a 2.5" Lens MIRA


Overview
What you will learn
In this guide, you will learn how to install and properly focus a 2.5” focal lens with your MIRA.
When to do this
The 2.5” lens should be installed when seeking to engrave tall objects, such as a cup with handle tabs. It gives more distance from the laser head, ideal for such cases.
What you need
- Latex or Nitrile Gloves
- Microfiber Cloth
- Allen Key Set
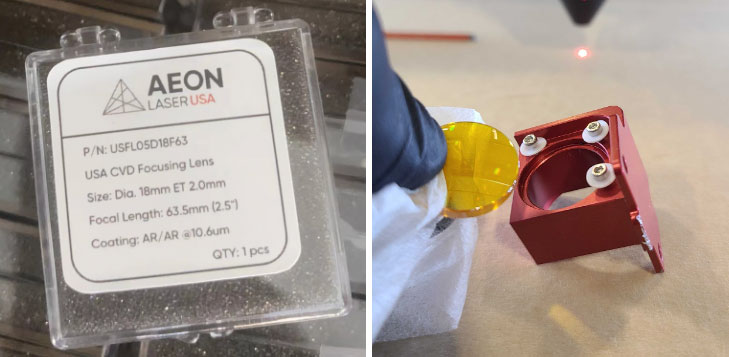
- 2.5” (63.5 mm) Lens
- Manual Focal Gauge (.5 Steps)
Need assistance?
Book time with a qualified technician and get help with Swapping Lenses.
CAUTION: When working with optics, it is recommended you wear latex or nitrile gloves to protect the coating of the optics.
NOTE: Put something down on your work area to catch the bolts or lens in case they get dropped. A microfiber cloth works great and is safe for the lens to be rested on.
Steps
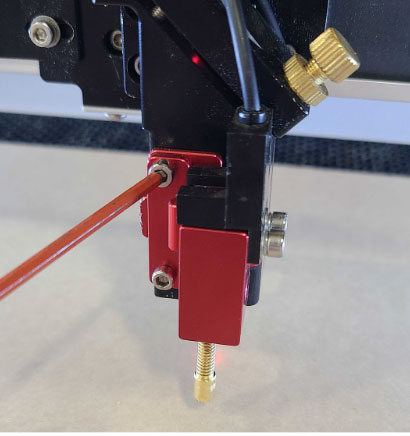
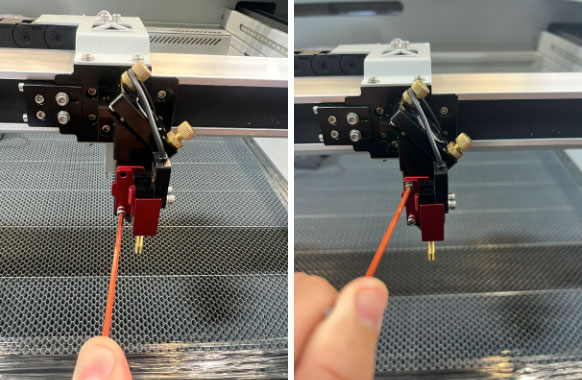
- Use a 2.5 mm Allen key to remove the auto focus assembly and lens housing from the laser head. Drape the auto focus assembly out of the way.
- Use a 1.5 mm Allen key to carefully loosen the bolts/washers holding the 2” lens in the housing and set them aside. Remove the old lens and put it aside in a safe place where it will not get dirty or scratched.
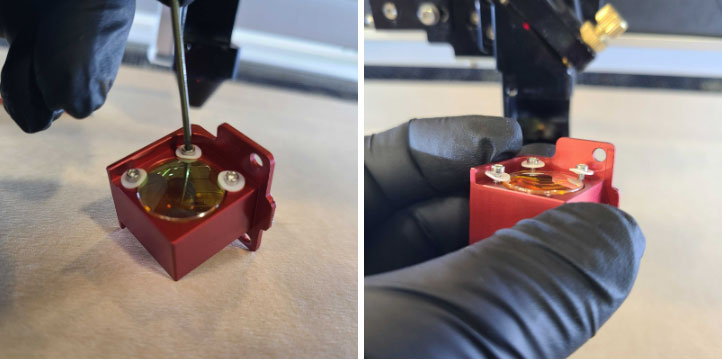
- Retrieve the 2.5” lens and install it convex side facing upwards (dome side facing up) into the TOP of the housing. Then retighten the tiny mounting bolts.
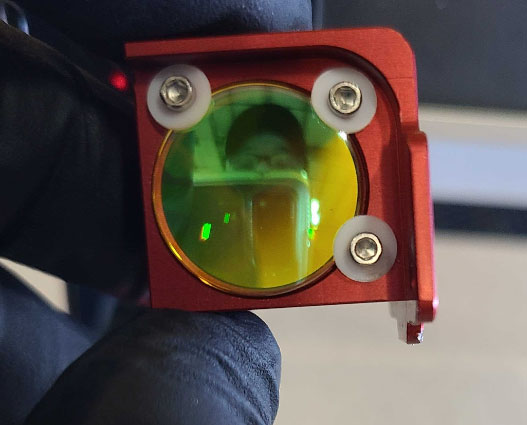
NOTE: An easy way to check if the lens was installed in the proper direction is by looking at your reflection. When viewing the lens from the top down,your reflection should be right side up. It will be like looking in a tiny mirror.
- Reinstall the auto focus assembly and lens housing back into the laser head. Ensure the housing is sitting flush before fully torquing the mounting bolts.
Focusing
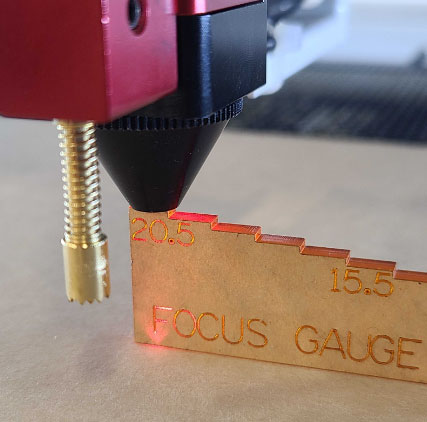
The machine is calibrated at the factory for the auto focus feature to get the standard 2” lens into focus. When switching from a 2” lens to a 2.5” lens, you will need to manually focus to include another 0.5“ of focal depth. This correlates to about 20.5 mm on the focus gauge. See our AEON Laser Knowledge Base article on How to Manually Focus a MIRA Laser if you need guidance.
The proper focal distance can be seen here. Instead of focusing to 8.5 mm (where the little engraved arrow is) on the manual gauge, we will focus to 20.5 mm:
Once properly focused, conduct a 5-point test. If you need assistance conducting the test, see our AEON Laser Knowledge Base article on How to conduct a 5-Point Test with your MIRA.
That's it!
If you have any questions or concerns, please send us an email at support@aeonlaser.us for the fastest service. If your laser is malfunctioning, please submit a support ticket.
Did you find this document helpful? Let us know what you liked or what we can improve on by sending an email to helpusgrow@aeonlaser.us.
Happy Lasering!


