-

Getting Started 16
-

Maintenance 14
-

Troubleshooting 14
-

Repair 8
-

Laser 101 3
-

Materials 10
-

Accessories 20
-

Multi-Roller 7
-

LightBurn 9
Multi-Roller Slider Setup


What You Need
- Multi-Roller
- Slider
- Allen Key Set
- 2 T-Slot Nuts
- 2 M3 x 20mm Screws
Steps
- Begin by laying the Multi-Roller on a flat surface.
💡 Tip: If you are using the laser bed, lay a towel or board under the Multi-Roller to catch any screws that may fall during the setup.
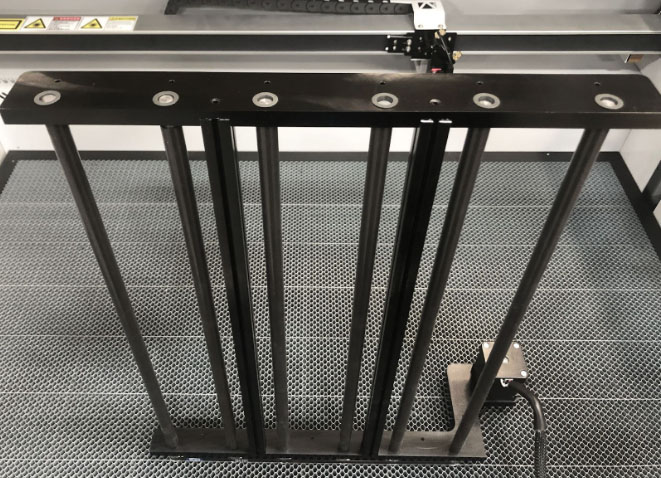
- Unscrew the two M3 x 20mm screws on the center beam and remove it from the Multi-Roller. Set aside.
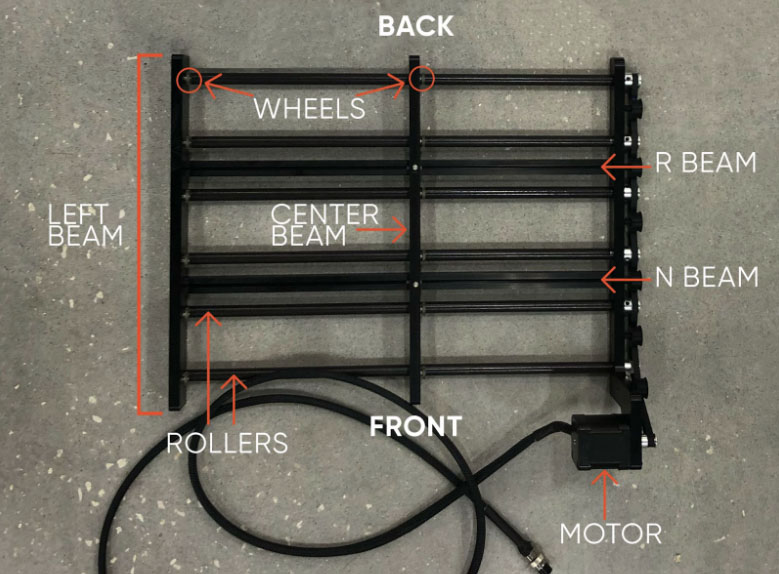
Multi-Roller, center beam - Turn the Multi-Roller so the motor is facing away from you.
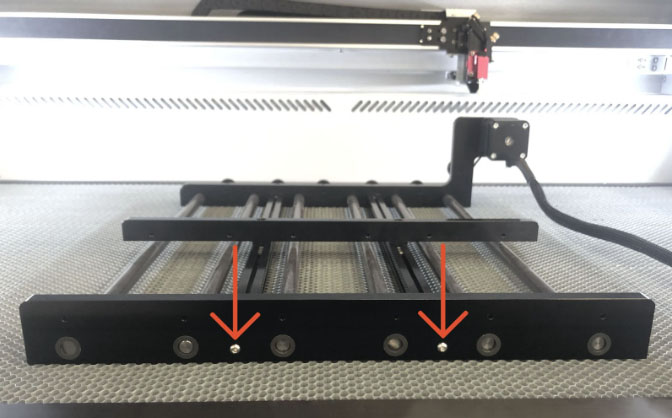
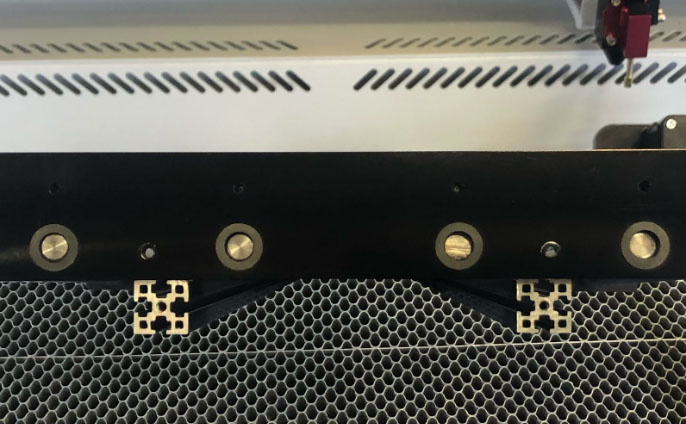
Multi-Roller, turned with motor in the distance - Locate the two screws on the outer side of the Multi-Roller.
- Using a 2.5 Allen key, remove the screws and set them aside.
- Locate the N-Beam and the R-Beam.
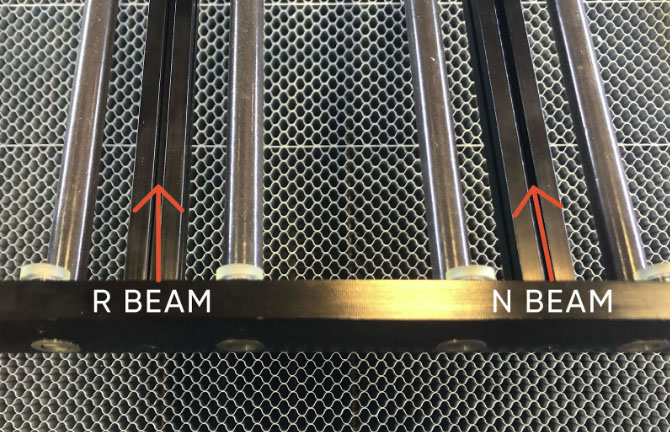
N-Beam and R-Beam - Gently push down on the R- & N-Beams from the top of the Multi-Roller until they have separated from the Left Beam.
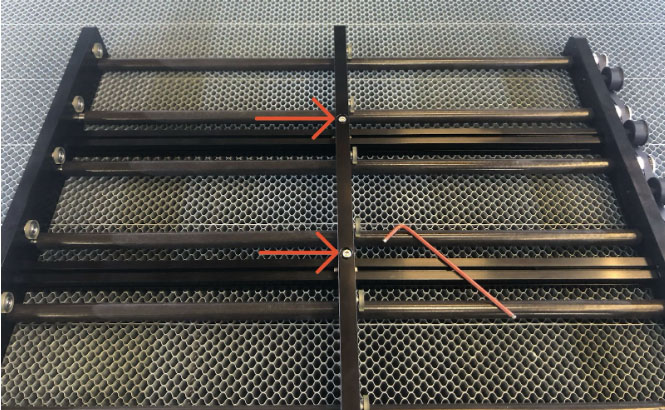
laser bed - Once you can see the channel at the top of the beam, locate the two T-Slot Nuts.
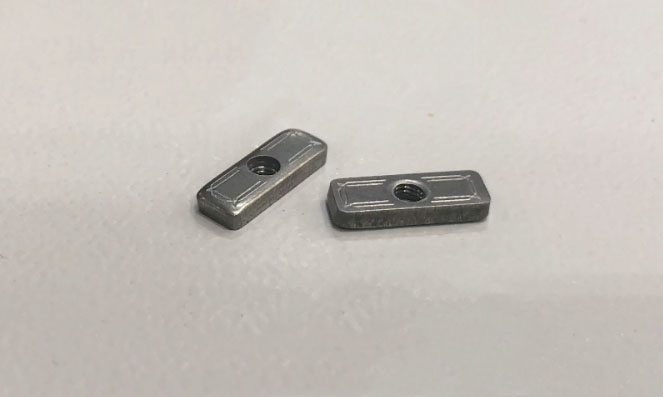
T-Slot Nuts - Take a close look at the T-Slot Nuts. You will notice that one of the sides is beveled. With the beveled side down, place one T-Slot Nut in the channel of the R-Beam and allow it to slide down the beam. Repeat with the N-Beam.
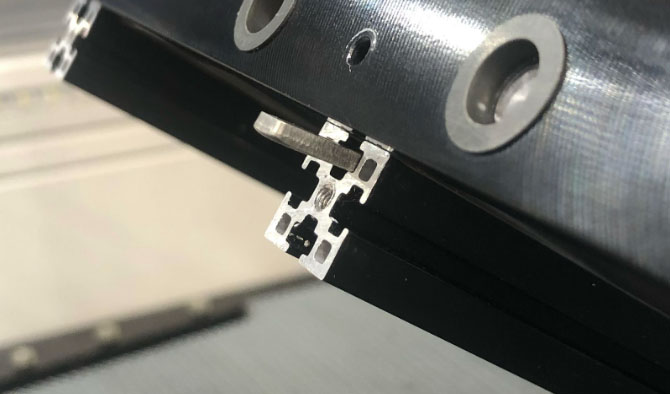
T-Slot Nut in the channel of the R-Beam - Carefully push the beams back into place.
📌 Note: If the outer side of the Multi-Roller comes off during this process, do not worry! Set the Multi-Roller on a table so that it is resting motor side down.
rollers and beams Position the outer bar over the rollers and beams and carefully position each roller and beam back into their original opening. Ensure that the rollers are facing the middle of the Multi-Roller.
rollers and beams - Once the outer bar is back in place, replace the screws and use an allen key to secure them into place.

Outer bar - Lay the Multi-Roller flat, as you would in the bed, with the motor facing you.
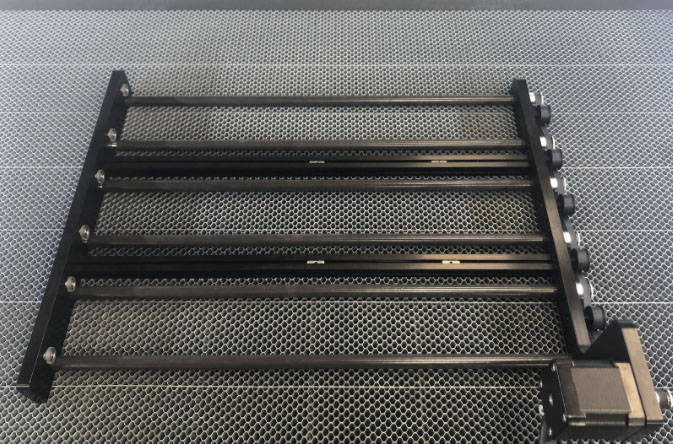
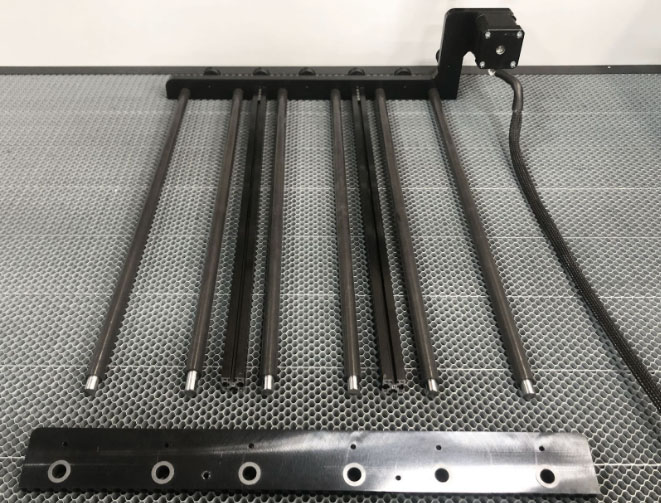
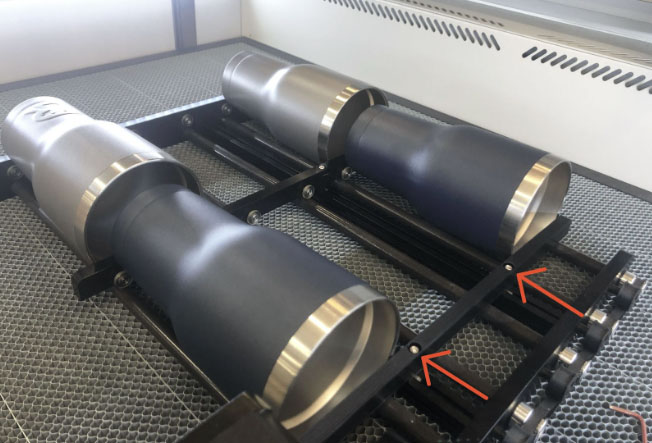
Multi-Roller, laying flat - Locate the T-Slot Nuts in the R- & N-Beams that are furthest to the left. Lay the Center Beam that came with the Multi-Roller across the rollers so that the holes on the Center Beam are over the holes on the T-Slot Nuts. Ensure the wheels are facing right, toward the motor. Use an Allen key to tighten the screws.

T-Slot Nuts in the R- & N-Beams that are furthest to the left - Locate the two remaining T-Slot Nuts. Lay the new Slider bar across the rollers and align the holes with the holes on the T-Slot Nuts. Use the Allen key to tighten the screws in place.
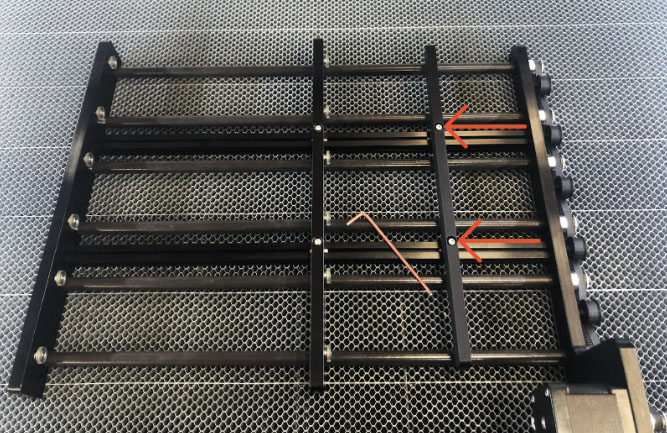
Two remaining T-Slot Nuts
Using the Multi-Roller
- When you are ready to begin a new job using the new Slider, set up the Multi-Roller using the Setting Up the Multi-Roller resource for your model: MIRA5, MIRA7 or MIRA9.
- Once the Multi-Roller is in place, start by placing the one tumbler on the back left rollers and one tumbler on the front left rollers. Move the Center Beam toward the mouth of the tumblers until it is snug.
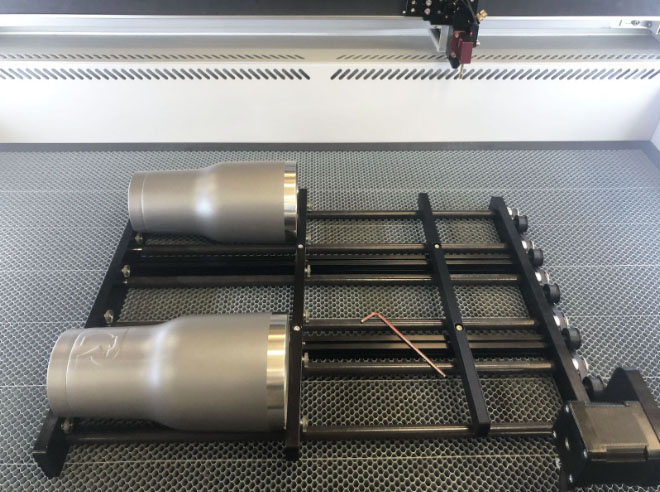
Multi-Roller, with two tumblers - Next, move the new Slider all the way to the right side of the Multi-Roller. Place a third tumbler on the back right rollers and a fourth tumbler on the front right rollers.
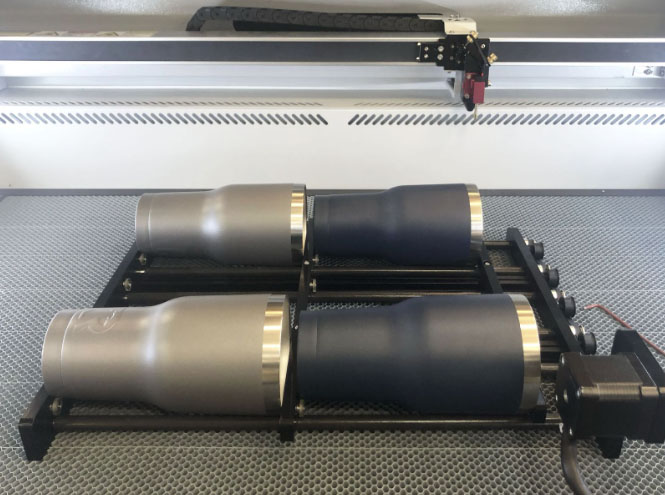
Multi-Roller, four tumblers - Move the new adjustment bar toward the mouth of these tumblers until it is snug. Using the allen key, tighten all of the screws on the center beam and adjustment bars so that they are firmly in place.
Multi-Roller, four tumblers - Using the UP and DOWN arrow keys on the keypad, ensure that the tumblers are moving smoothly. If they appear to be stuck, loosen the screws on the Center Beam and Slider to reposition. Once you are happy with the new positioning of the tumblers, tighten the screws again and use the arrow keys on the keypad to again rotate the tumblers.
- Once the four tumblers are moving smoothly, add the last two tumblers into place on the center rollers.
- Use the UP and DOWN arrow keys on the keypad to ensure the tumblers are moving smoothly around the rollers. Adjust as needed.
- When you have successfully set up the Multi-Roller with the new Slider, you are now ready to run the job!


