-

Getting Started 16
-

Maintenance 14
-

Troubleshooting 14
-

Repair 8
-

Laser 101 3
-

Materials 10
-

Accessories 20
-

Multi-Roller 7
-

LightBurn 9
EMP Electric Cap Press User Manual


Overview
What you will learn
In this guide, you will learn how to properly configure your cap press.
When to do this
The following guide is to be used as a reference when setting up your electric cap press prior to operation. It should be used as a reference when needed for information surrounding basic safety, machine parameters, or settings.
What you need
- Electric cap press
- Protective gloves (heat resistant)
- Adequate power source
Guarantee
The product is strictly based on the Consumer Protection Law and Product Quality Law of the People's Republic of China. If a performance failure occurs within 12 months from purchase, as defined in the Product Performance Failure Table, the manufacturer will provide free repair and maintenance service. This warranty does not cover damages caused by force or human error.
Safety
Please read the following instructions before operating the machine:
- Unplug the machine when moving or installing accessories.
- Place the machine on a flat, stable surface and operate under ventilated conditions.
- Wear protective equipment while using the machine.
- Do not operate the machine in hazardous locations.
- Do not allow children or untrained individuals to operate the machine.
- Do not disassemble or repair the machine. If repairs are needed, contact a professional.
- Use an appropriate power source and do not touch the heating plate when the machine is operating.
WARNING: Improper use of the machine may result in electric shock, fire, personal injury, or other damages. Always adhere to safety instructions to avoid hazardous situations.
Basic Parameters
Product Name: Electric Cap Press
Model: F136
Heating Method: Heating Coil
Rated Voltage/Frequency:
- 110-130V~60Hz (350W)
- 220-240V~50Hz (310W)
Temperature Range: 40°C–205°C (104°F–401°F)
Time Range: 1-999 seconds
Net Weight: 7.2 kg
Gross Weight: 8.1 kg
Dimensions (L×W×H): 420×200×395mm
Outer Box Volume: 0.033 m³
Warranty
Whole Machine: 1 year (excluding accessories)
Accessories: No warranty for consumables.
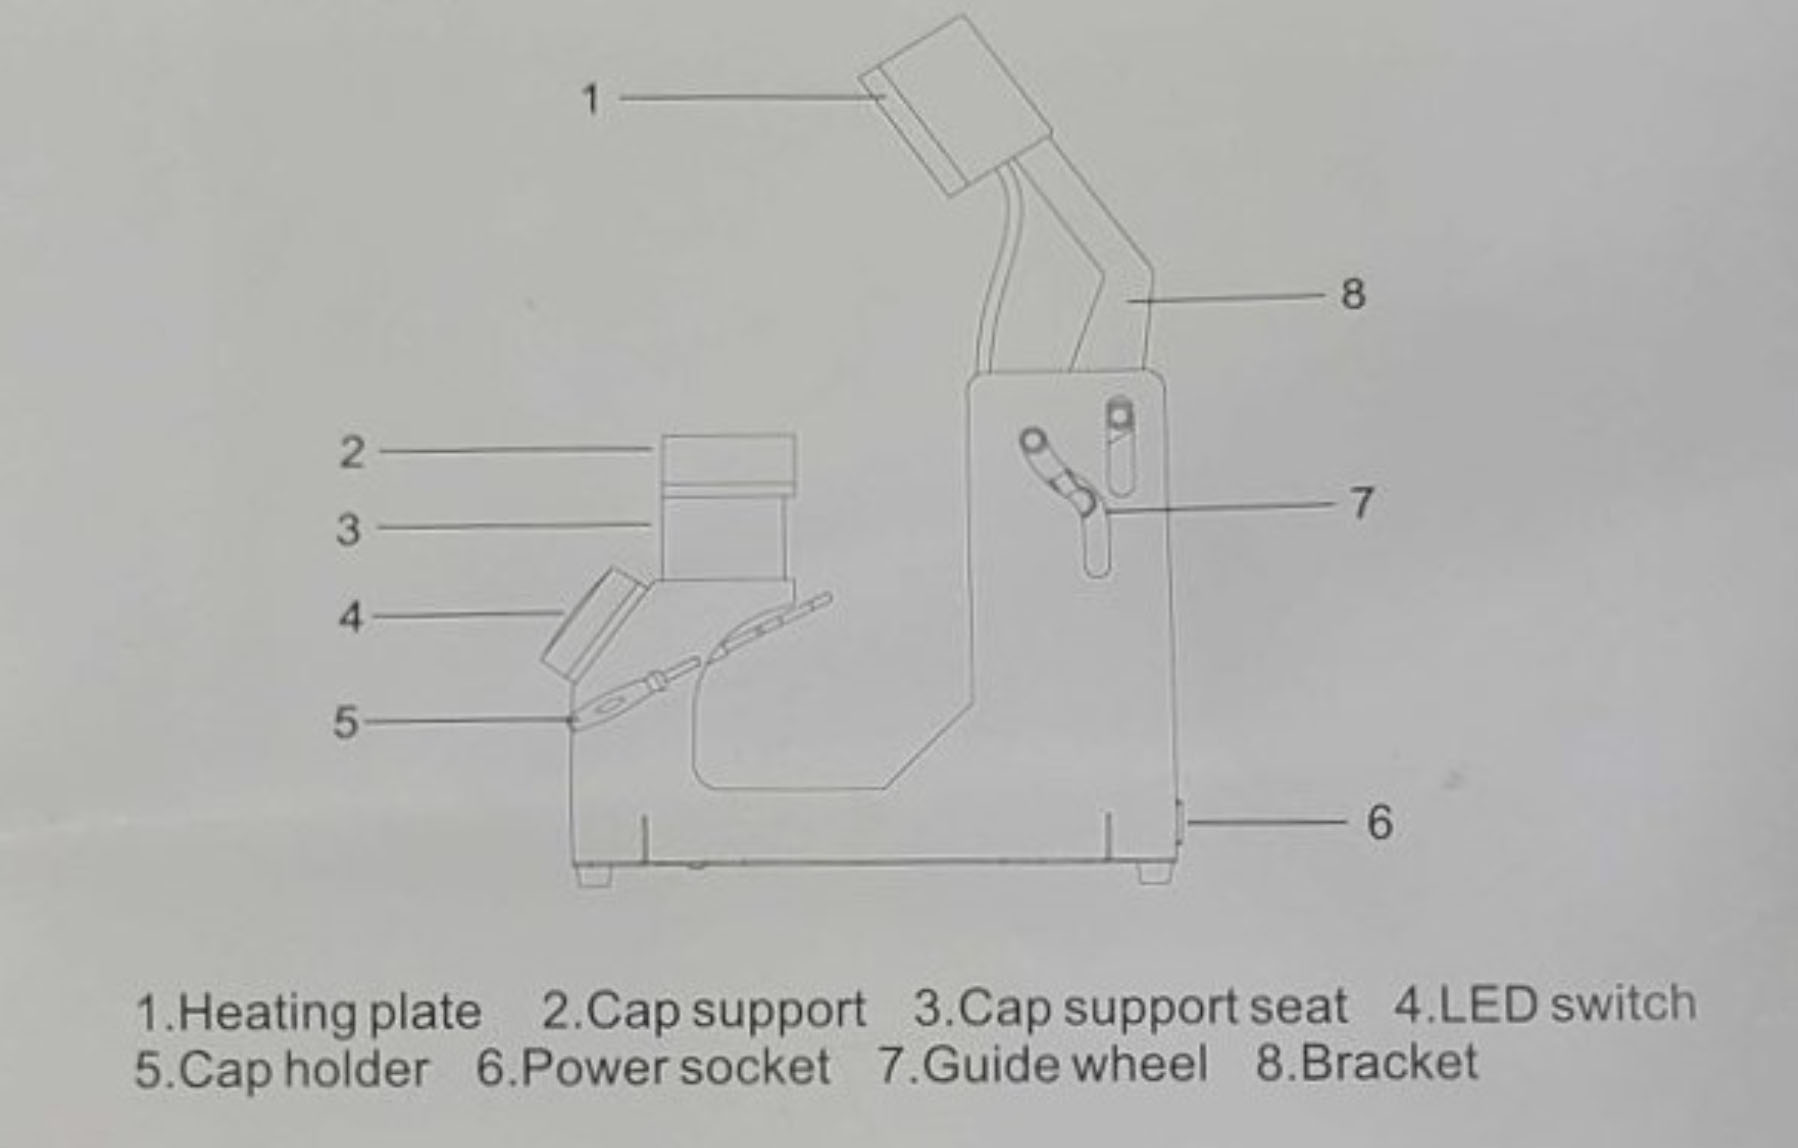
Introduction
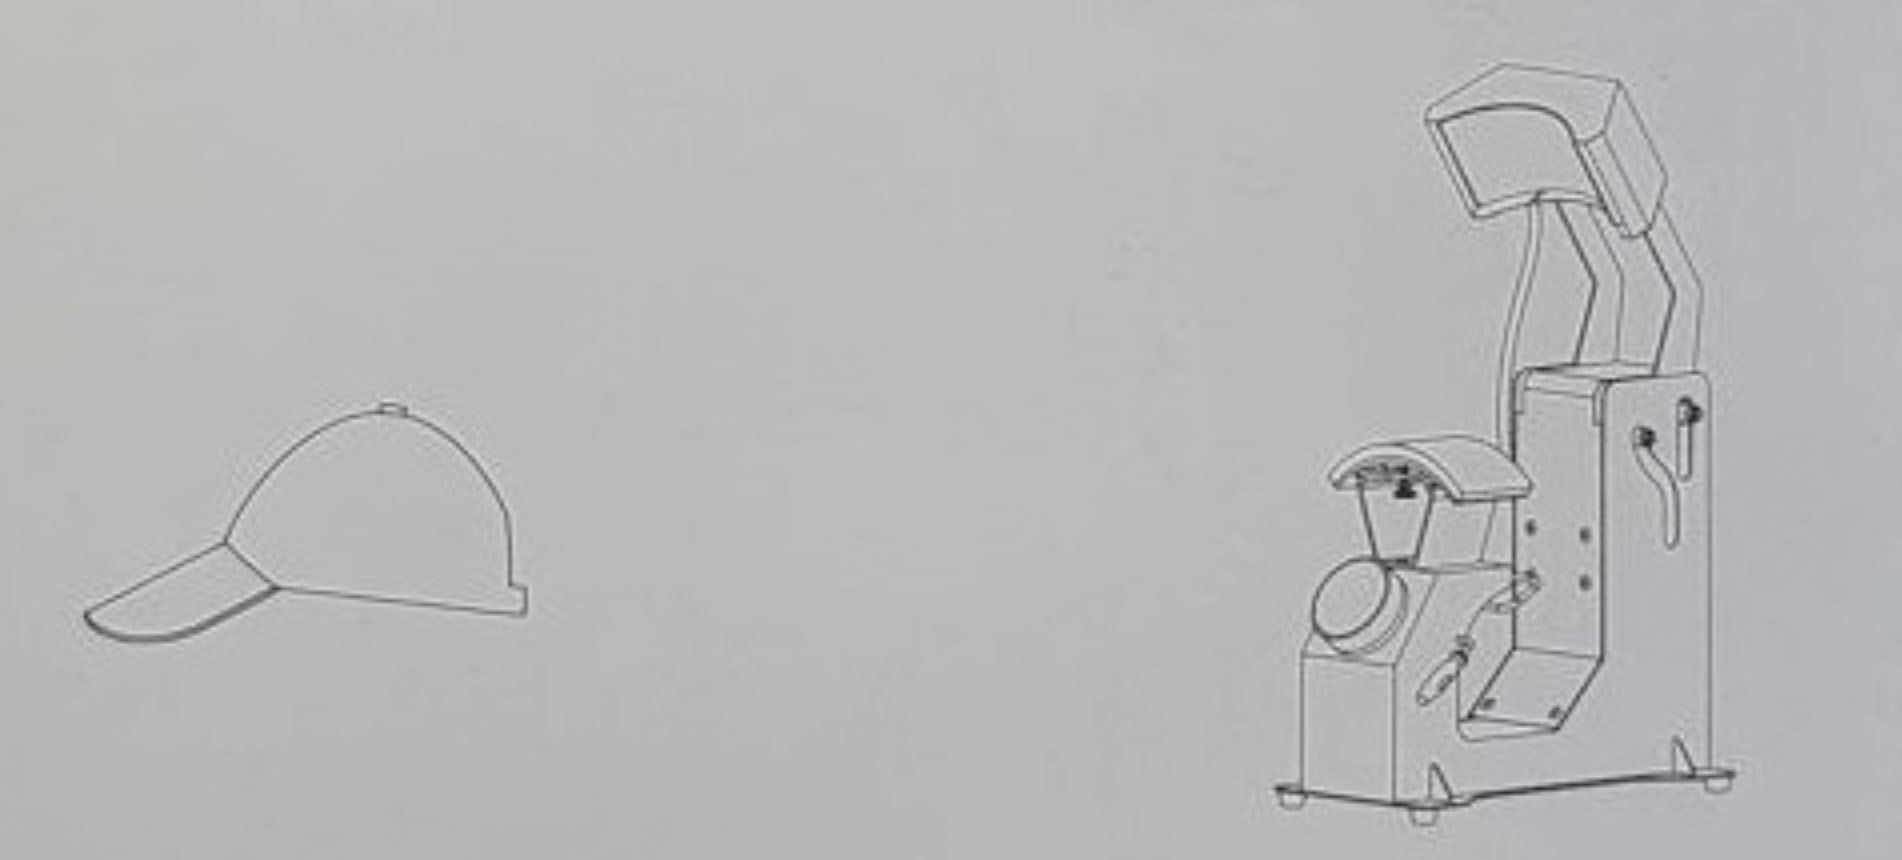
The Electric Cap Press is designed for efficient cap printing. It features a heating plate, cap support, power socket, and control panel with temperature and time settings. Accessories can be customized for various cap sizes.
Temperature Units and Settings
Switching Units (°F/°C):
- In shutdown state, press and hold the start button for 6 seconds.
- Use the switch to select the desired unit (°F or °C).
- Press the start button to save the setting and start the machine.
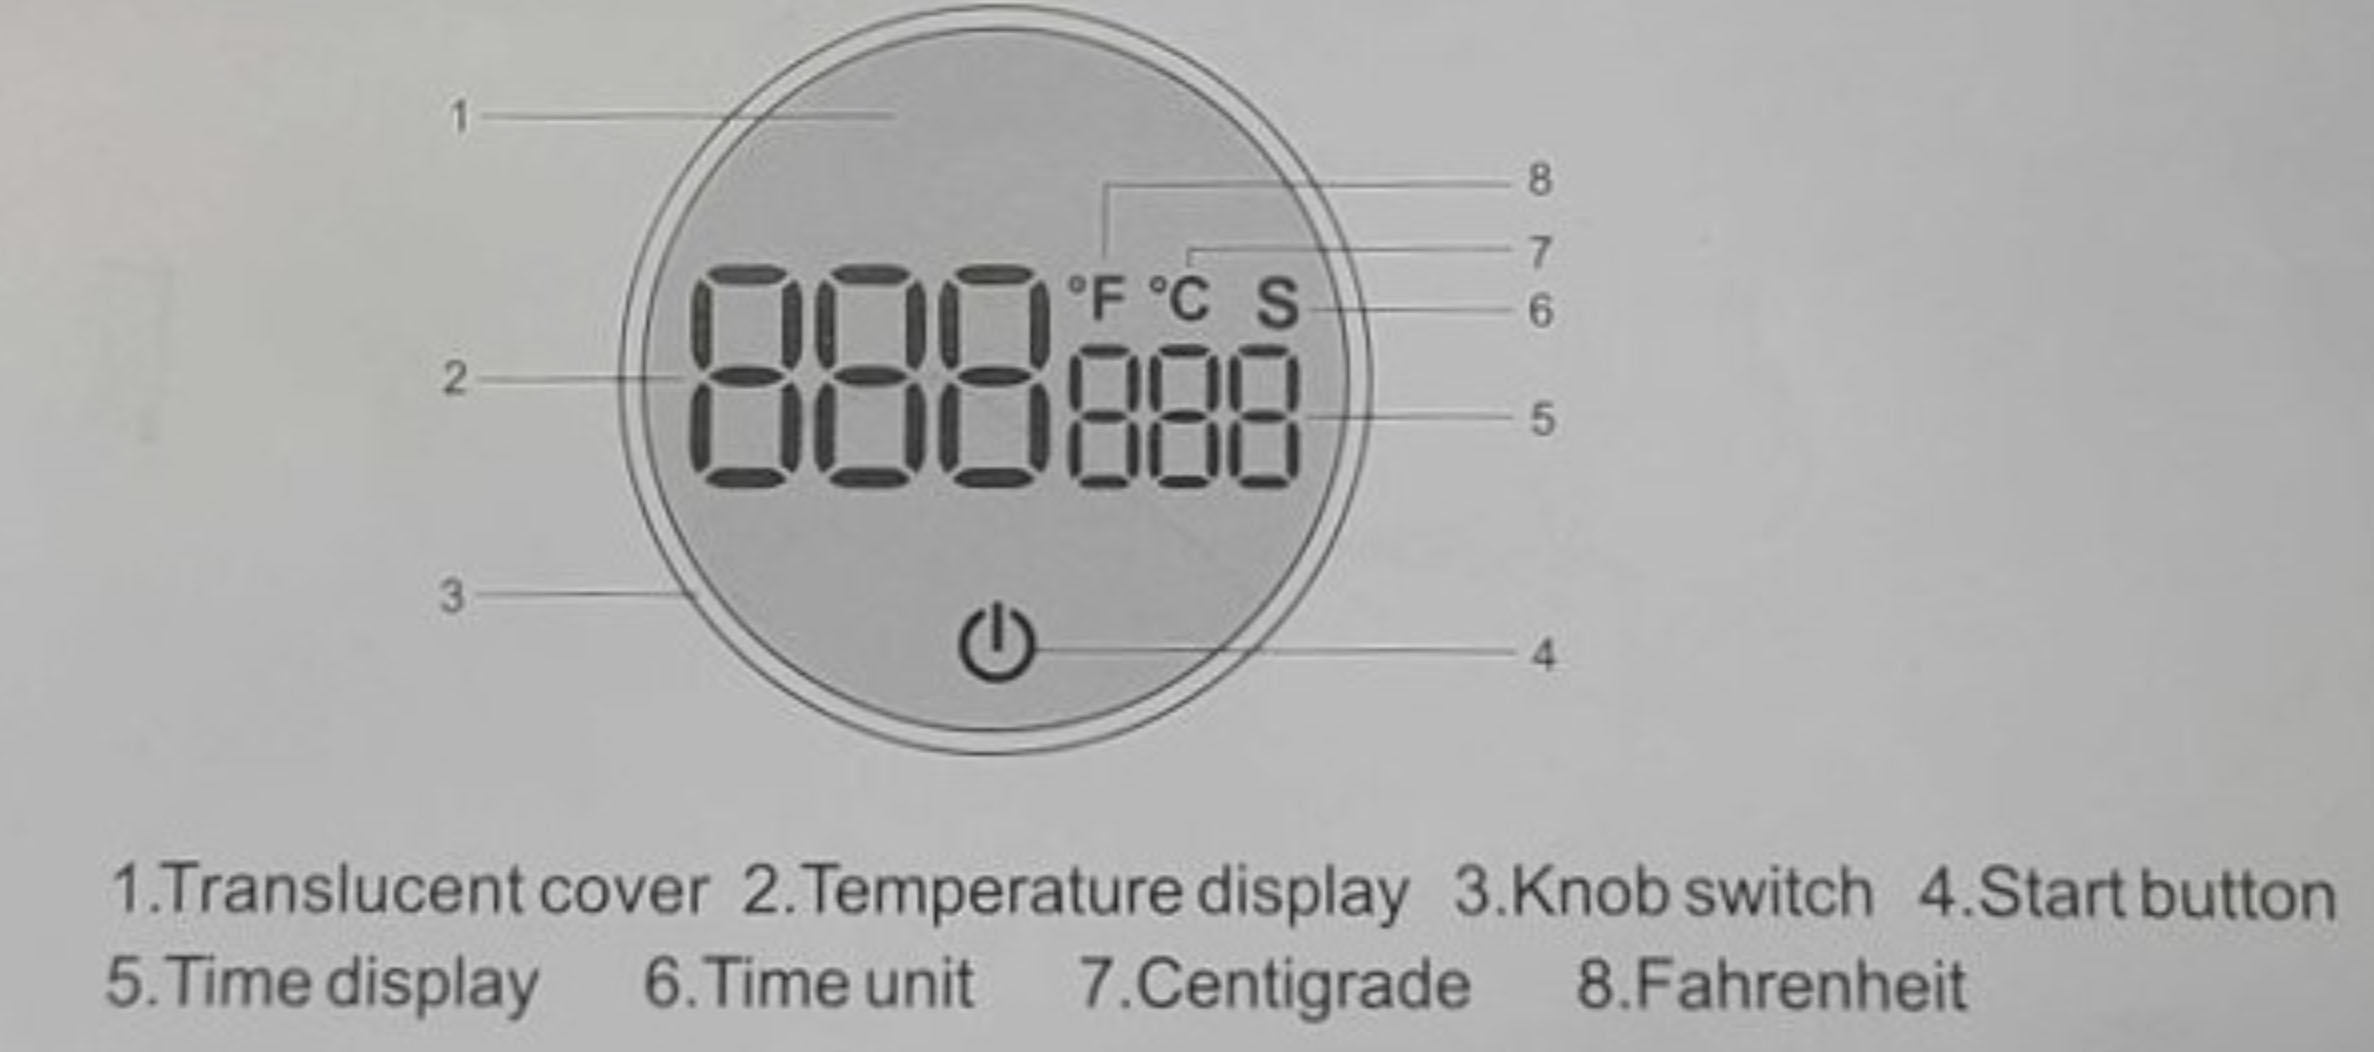
Temperature Setting:
- Turn the display half a turn to the right to enter the temperature setting mode.
- Use the switch to increase or decrease the temperature.
- Confirm the setting by turning the display back.
Time Settings
Entering Time Setting Mode:
- Turn the display half a turn to the left.
- Adjust the time using the switch.
- Confirm by turning the display back.
Getting Started
Setup:
- Connect the power cord to the power port on the machine and insert the plug into an AC socket.
Startup:
- Press the power button briefly. The machine will start heating up automatically.
Shutdown:
- Hold the power button for 3 seconds to shut down.
Auto Shutdown:
- The machine will automatically turn off if idle for more than 120 minutes.
Operation Instructions
- Preparing the Cap:
- Place the cap to be printed on the cap support
- Adjust the support to ensure the cap is precisely positioned.
- Setting Temperature and Time:
- Set the desired temperature using the temperature setting procedure outlined above.
- Set the desired time using the time setting procedure outlined above.
- Printing Process:
- Press the start button to begin printing.
- The heating plate will automatically press down onto the cap.
- After the countdown, the heating plate will lift, indicating that the printing is complete.
- Post-Printing:
- Carefully remove the cap from the support, touching in an untreated area - hand protection is suggested.
- Allow the cap to cool before handling.
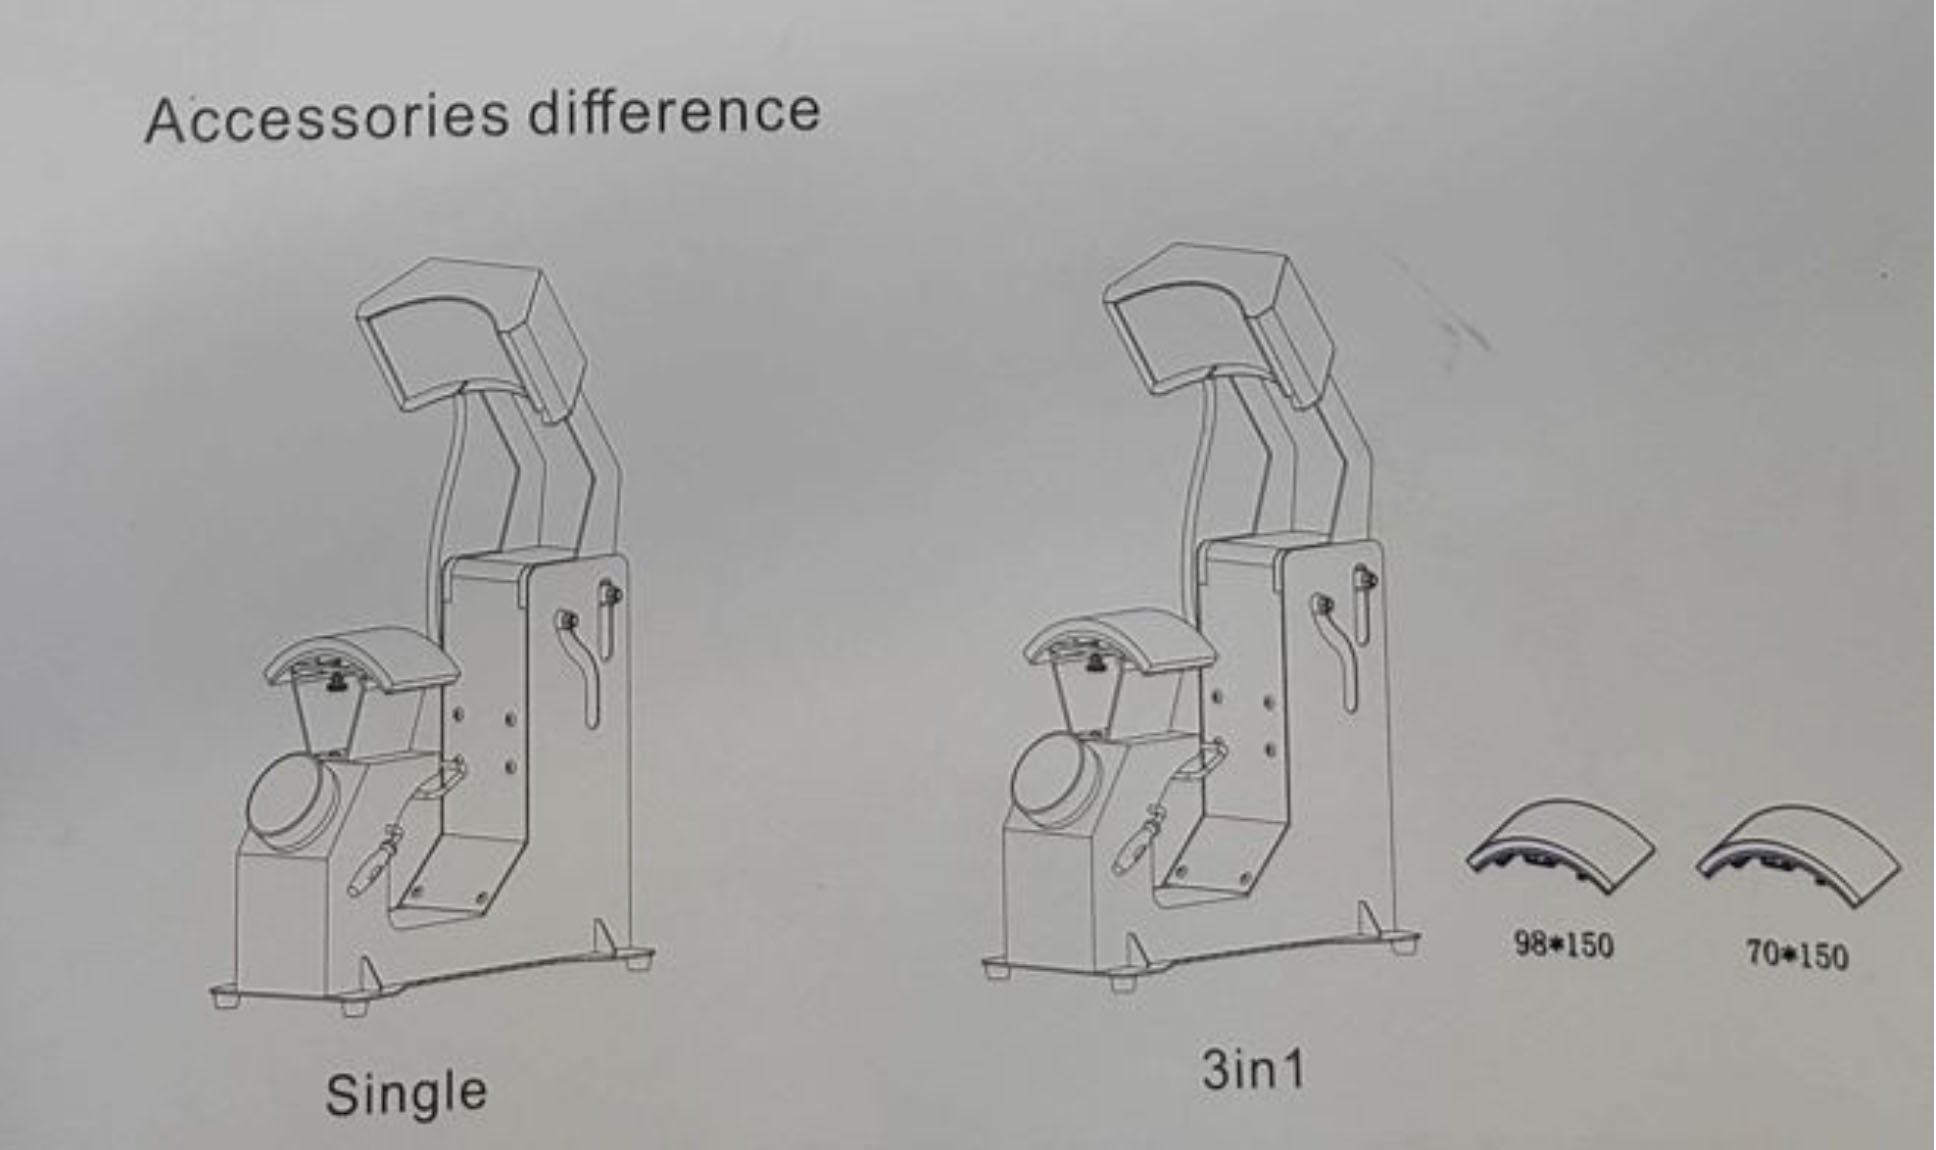
Replacement Instructions
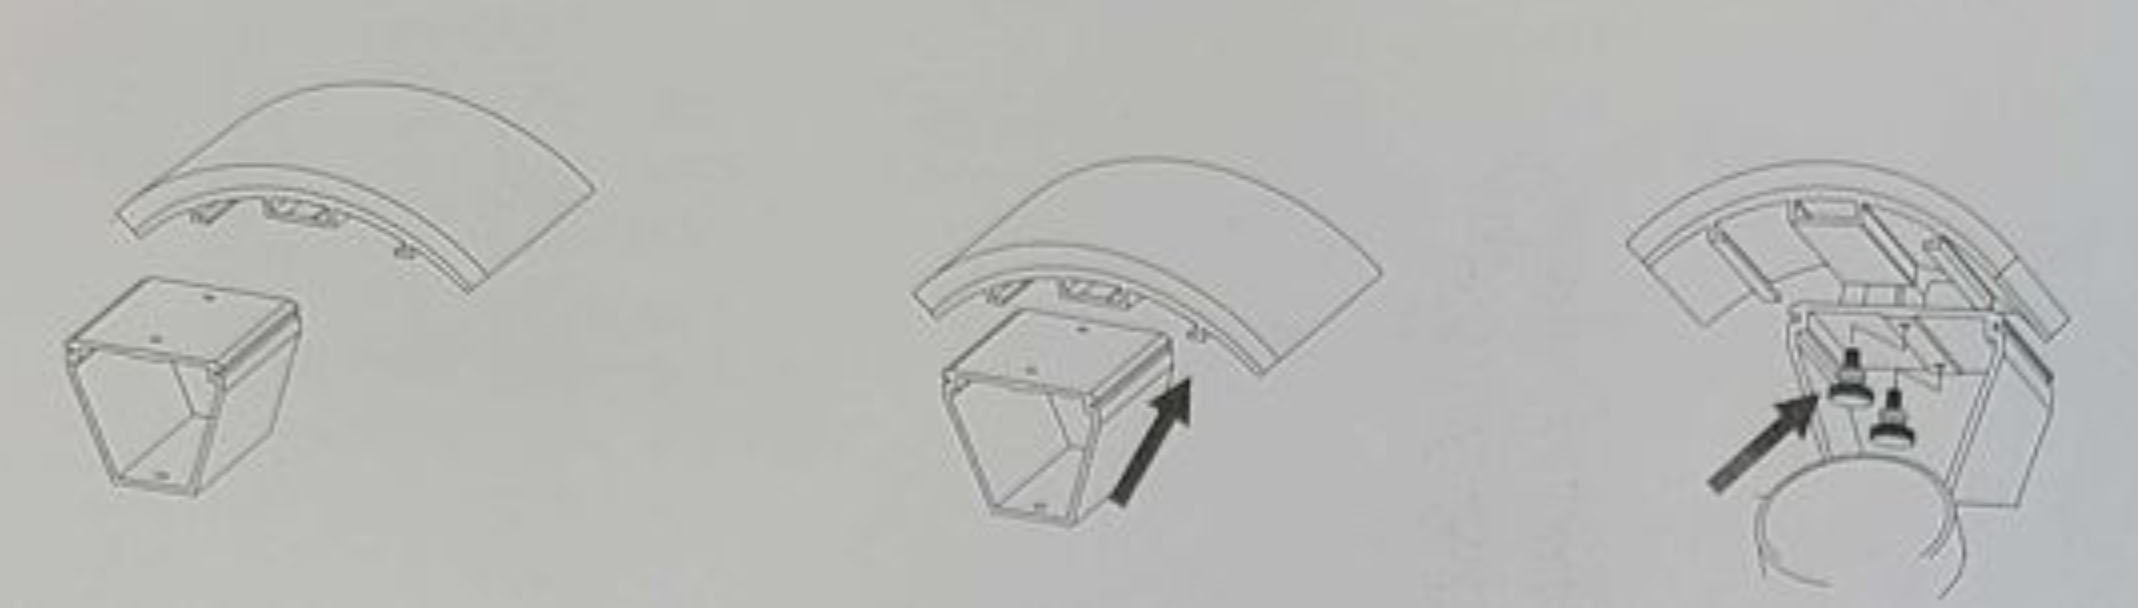
- Cap Support Replacement:
- Select the appropriate cap support.
- Insert the support into the seat slot and secure it with screws.
- Printing:
- Place the cap to be printed on the support.
- Set the desired temperature and time.
- Press the button to start the process. The machine will press and release the cap automatically.
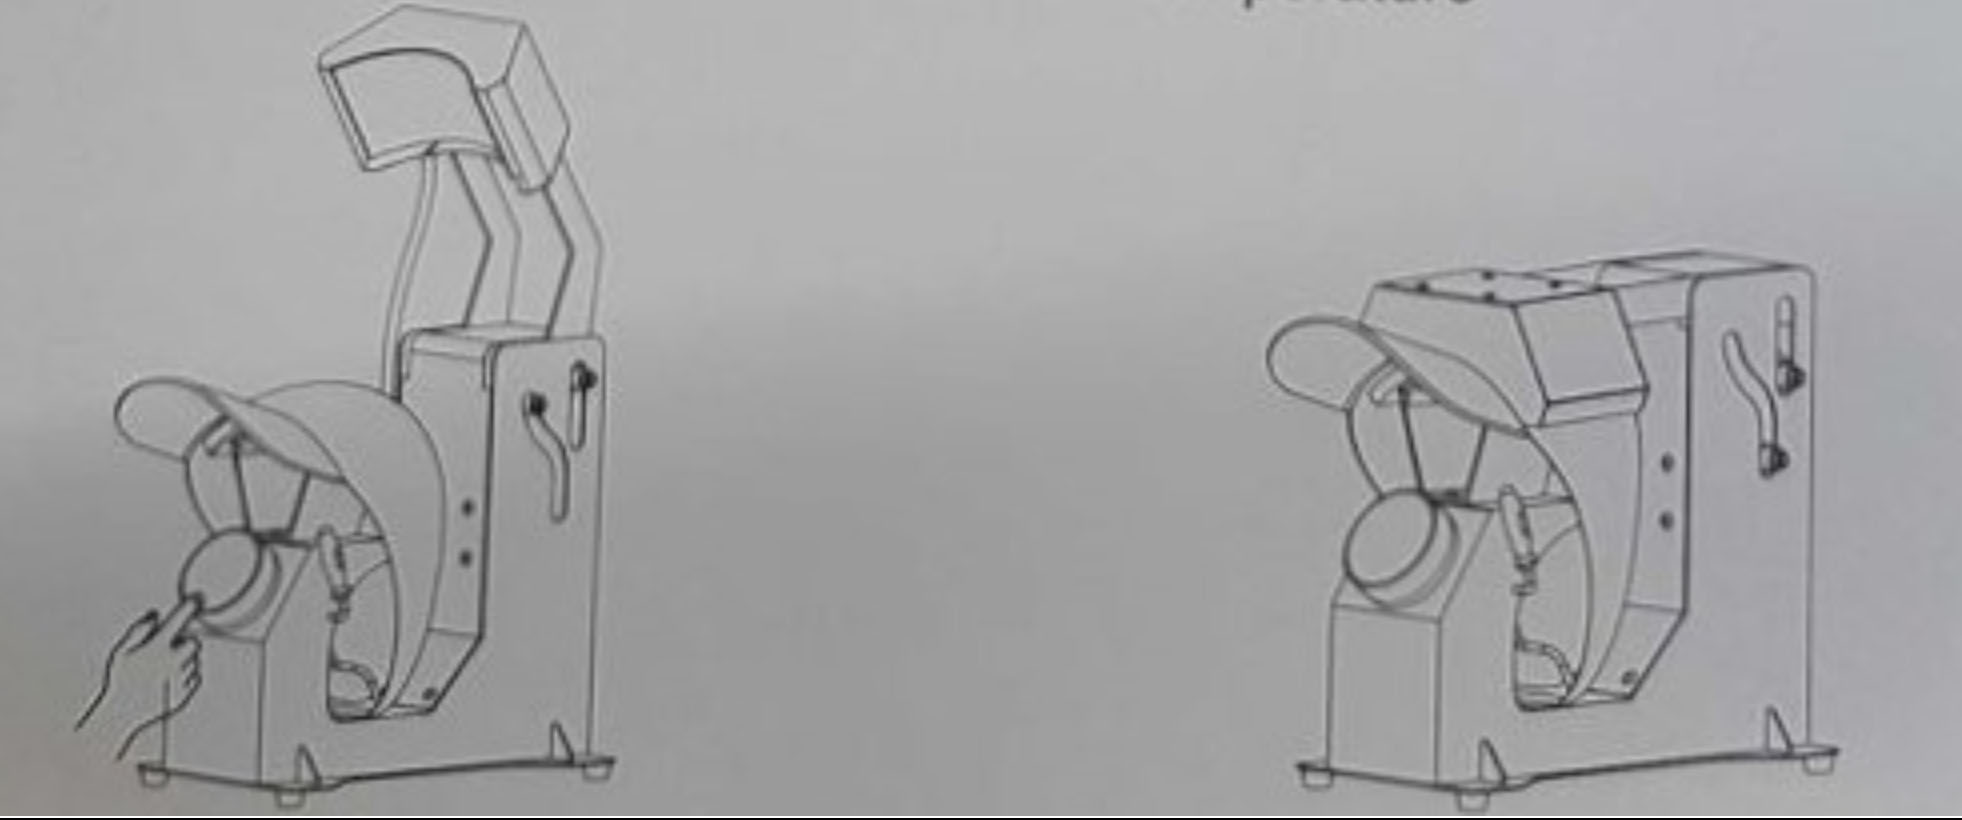
- Place the cap to be printed on the support.
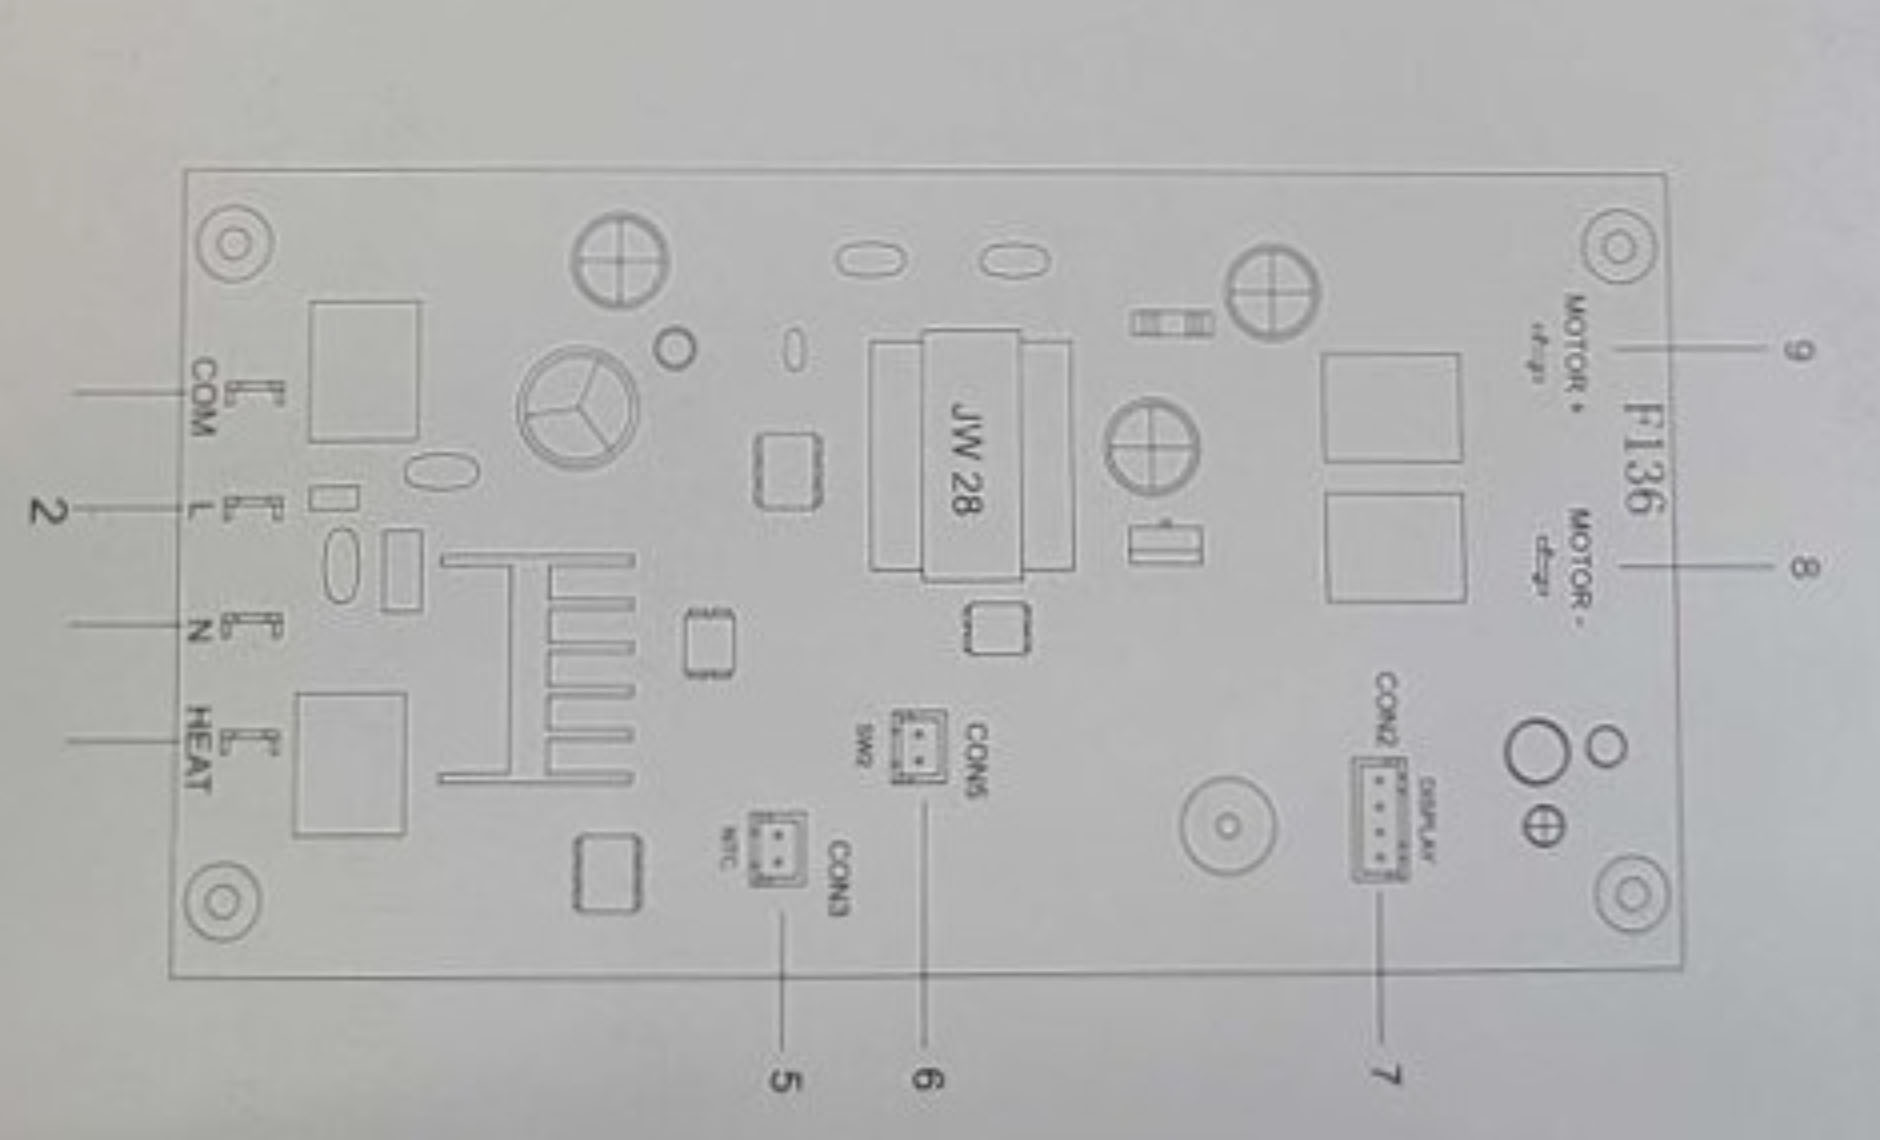
Electrical Diagram
The electrical system includes a main control circuit board, power board, NTC temperature sensor, heating coil, thermal fuse, and magnetic switch. Refer to the wiring diagram for detailed connections.

Wiring Diagram
The circuit board wiring includes:
- Output zero line
- Input zero line
- Input live line
- Output live line
- Temperature probe
- Sensor switch
- Display
- Motor
- Motor+
Troubleshooting Guide
- Machine Not Heating:
- Check the power connection and ensure the machine is plugged in.
- Ensure that the temperature setting is correct and not set to a low value.
- Machine Does Not Turn On:
- Check the power cord and outlet.
- Ensure the power button is being pressed correctly.
- Uneven Printing:
- Ensure the cap is properly aligned on the support.
- Check that the heating plate is secured and evenly pressing.
Maintenance and Cleaning
- Cleaning the Heating Plate:
- Allow the heating plate to cool.
- Use a soft cloth and mild detergent to clean the surface. Avoid abrasive materials.
- Checking the Wiring:
- Periodically check the wiring connections to ensure there are no loose or exposed wires.
- Lubricating Moving Parts:
- Use a small amount of machine oil to lubricate moving parts to prevent wear and tear.
If you have any questions or concerns, please send us an email at support@aeonlaser.us for the fastest service. If your laser is malfunctioning, please submit a support ticket.
Did you find this document helpful? Let us know what you liked or what we can improve on by sending an email to helpusgrow@aeonlaser.us.
Happy Lasering!
DISCLAIMER: AEON LASER USA AND ENGRAVING MACHINES PLUS, CORP ARE NOT RESPONSIBLE FOR ANY DAMAGES OR INJURIES THAT MAY RESULT FROM FOLLOWING THESE SUGGESTIONS. USE CAUTION AT ALL TIMES. THE MACHINES ARE INCREDIBLY HEAVY AND SHOULD BE MOVED BY PROFESSIONALS.


